
Half Moon Cookies have been delighting taste buds for generations, offering the perfect balance of soft, cake-like texture and smooth, delicious frosting. Whether you’ve had these iconic treats at your local bakery or just discovered them now, there’s no denying that a Half Moon Cookie recipe holds a special place in baked goods.
In this article, we’ll take you through everything you need to know to bake the perfect Half Moon Cookies at home. From the treat’s origins to the essential ingredients, step-by-step instructions, and tips for perfecting them, we’ve got you covered. You’ll also find creative variations to try and answer common questions about these beloved cookies. By the end, you’ll be ready to create your own batch of these irresistible sweets.
What Are Half Moon Cookies?
Introduction to Half Moon Cookies
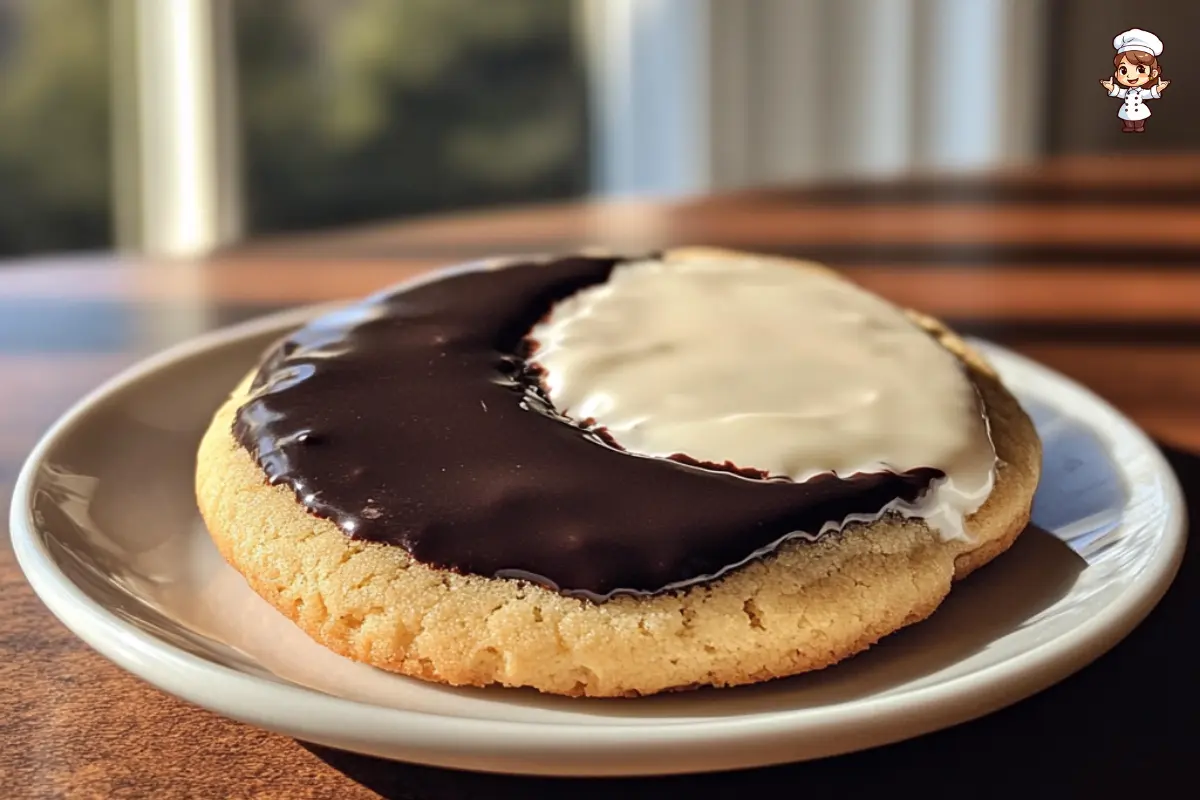
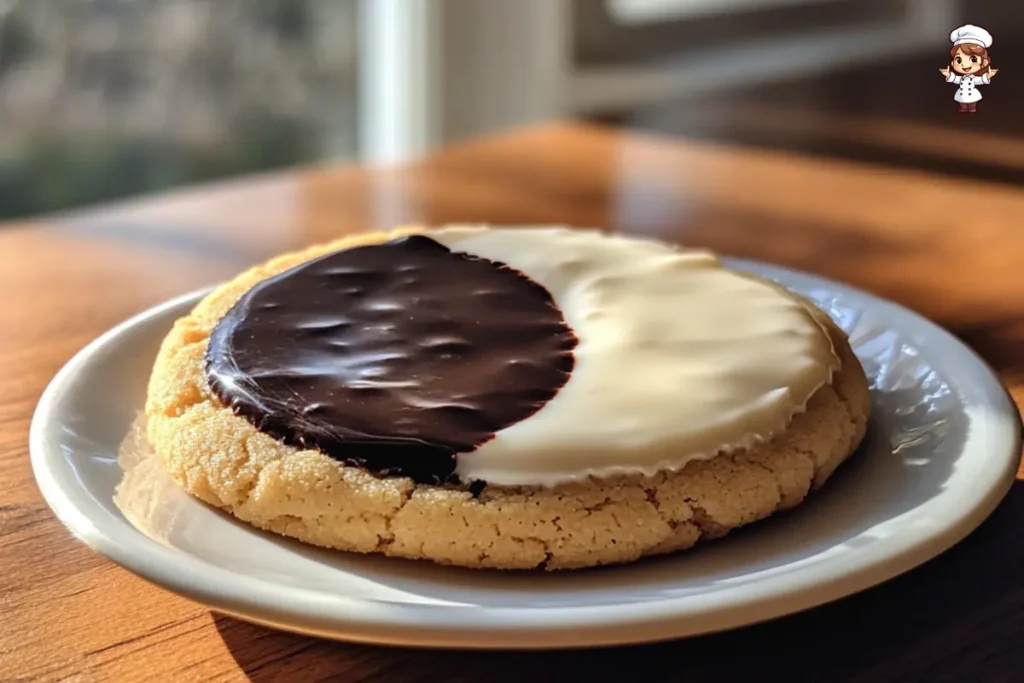
If you’ve ever wandered through a bakery in New York or enjoyed a treat at a local café, you’ve likely encountered a Half-Moon Cookie. These iconic cookies are known for their large, round shape and a fun twist of frosting, which divides them into two distinct halves—one slathered with vanilla buttercream and the other with rich chocolate fudge icing. This combination of soft cake-like dough and creamy frosting has earned them a loyal following.
Half-moon cookies are most famously associated with Upstate New York, particularly in the city of Utica, where they were first introduced. But over time, these cookies have become a beloved treat across the U.S., with numerous regional variations popping up. Despite slight variations in size, shape, and flavor, the basic structure remains the same—soft cookie dough topped with a generous serving of frosting.
Traditional vs. Modern Variations
When you hear the name Half Moon Cookie recipe, you might think of the classic black-and-white version, which features a vanilla frosting on one side and a chocolate frosting on the other. With its contrasting frostings, this traditional cookie became a staple in New York bakeries. However, bakers have experimented with different flavours over the years, giving rise to several modern takes.
For instance, some bakers now make peanut butter Half Moon Cookies, swapping the traditional frosting for a combination of creamy peanut butter and chocolate icing. Others add citrus zest to the dough, creating lemon Half Moons, while some go for a more adventurous route with spiced Half Moon Cookies. The possibilities are endless, but the essence of this treat remains the same—a delicious, cake-like cookie topped with decadent frosting.
Essential Ingredients for Half Moon Cookies

Baking Essentials: The Basic Ingredients
Before diving into the world of Half Moon Cookies, let’s take a quick look at the key ingredients that make these treats irresistible. At the heart of every Half Moon Cookies recipe is a simple yet essential list of ingredients: flour, sugar, eggs, and butter. These pantry staples form the base of the dough and give the cookies their cake-like texture.
To get the best results, use room-temperature butter. This will ensure your dough is smooth and easy to work with. Also, don’t forget the baking powder, which helps the cookies rise and become soft and fluffy. Adding a pinch of salt will help balance the sweetness and bring out the flavours.
Icing Ingredients
Now, let’s talk about the icing because it makes these cookies stand out. You’ll need two types of frosting: vanilla buttercream for one side and chocolate fudge for the other. For the vanilla frosting, powdered sugar, butter, vanilla extract, and a splash of milk are all you need. It’s the creamy, smooth consistency that makes this frosting so dreamy.
For the chocolate fudge icing, you’ll want unsweetened cocoa powder, heavy cream, and more butter. This frosting should be thick and rich, allowing you to spread it evenly across one-half of the cookie. With the right balance of these ingredients, you’ll create the perfect topping for your Half Moon Cookies recipe.
How to Make the Perfect Half-Moon Cookie Dough
Mixing the Dough
When making the dough for your Half Moon Cookies recipe, the key is to mix the right ingredients. Start by creaming the butter and sugar together in a bowl. This will help create a light, airy texture in the dough. Add the eggs, one at a time, mixing well after each addition. You’ll notice the dough becoming smoother as you go.
Next, whisk together your flour, baking powder, and salt in a separate bowl. Gradually add the dry ingredients to the wet mixture, stirring gently to combine. Be careful not to overmix; doing so can result in dense cookies instead of light, cake-like ones. Once combined, the dough should be slightly sticky but manageable.
Chilling and Resting the Dough
After mixing the dough, it’s time to let it rest. Chilling the dough is essential for two reasons. First, it makes it easier to handle and shape into uniform cookies. Second, it helps the dough retain its structure during baking, ensuring your cookies don’t spread too much.
Wrap the dough in plastic wrap and place it in the fridge for at least 30 minutes. If you’re in a hurry, you can even chill it for up to 1 hour. Once the dough is chilled, you can scoop out portions and easily shape them into round, thick cookies. Trust me, this step is crucial for getting those perfectly rounded Half Moon Cookies!
These parts lay the foundation for a perfect Half Moon Cookie recipe, guiding you through the essential ingredients and dough-making process.
Print
Half Moon Cookies Recipe: Soft, Fluffy & Irresistible!
- Total Time: 40-45 minutes
- Yield: 18-20 cookies (depending on size)
- Diet: Vegetarian
Description
Here’s a simple, delicious Half Moon Cookies Recipe for you to try out. This recipe gives you soft, cake-like cookies with a perfect balance of chocolate and vanilla glaze.
Ingredients
For the Cookies:
– 2 1/2 cups all-purpose flour
– 1 1/2 teaspoons baking powder
– 1/2 teaspoon salt
– 1/2 cup unsalted butter, softened
– 1 cup granulated sugar
– 2 large eggs
– 1 teaspoon vanilla extract
– 1/2 cup whole milk
– 1 tablespoon lemon zest (optional, for a fresh twist)
For the Frosting:
– 1/2 cup unsweetened cocoa powder (for chocolate glaze)
– 1 cup powdered sugar
– 3 tablespoons unsalted butter
– 2 tablespoons milk (adjust for consistency)
– 1/2 teaspoon vanilla extract (for vanilla glaze)
– 1 1/2 cups powdered sugar (for vanilla glaze)
– 2 tablespoons milk (for vanilla glaze)
Instructions
1. Prepare the Dough
– Preheat your oven to 350°F (175°C).
– In a medium bowl, whisk together the flour, baking powder, and salt.
– In a separate large bowl, cream the butter and sugar together until light and fluffy, about 3-4 minutes.
– Add the eggs, vanilla extract, and lemon zest (if using). Mix until well combined.
– Gradually add the dry ingredients to the wet ingredients, alternating with milk, starting and ending with the dry ingredients. Mix until just combined—do not overmix.
– Chill the dough in the refrigerator for 30 minutes to firm it up.
2. Shape the Cookies
– Roll the dough into tablespoon-sized balls and place them on a parchment-lined baking sheet. Leave about 2 inches between each cookie for spreading.
– Flatten each ball slightly with your fingers or the back of a spoon to form round discs.
– Bake for 10-12 minutes or until the edges are lightly golden but the centers are soft. Don’t overbake—remember, they will continue to cook on the sheet after removal.
– Allow the cookies to cool completely on a wire rack before frosting.
3. Make the Chocolate Frosting
– In a small saucepan, combine the unsweetened cocoa powder, powdered sugar, and butter. Add milk a little at a time, stirring constantly until the mixture is smooth and glossy.
– Once melted and smooth, remove from heat and stir in the vanilla extract.
4. Make the Vanilla Frosting
– In a separate bowl, whisk together powdered sugar, milk, and vanilla extract to create a smooth, spreadable glaze.
– Add more milk if you need a thinner consistency, or more powdered sugar for a thicker glaze.
5. Frost the Cookies
– Once the cookies have cooled, spread a generous layer of the chocolate frosting on one half of each cookie.
– On the other half, spread the vanilla glaze. You can use a small offset spatula or the back of a spoon to get a smooth, even layer of frosting on each side.
– Allow the frosting to set for about 30 minutes at room temperature, or 10-15 minutes in the fridge.
Serving and Storing:
– Serve the cookies once the frosting is set. They are perfect for a cozy coffee break or as part of a dessert platter at a party.
– Store any leftovers in an airtight container at room temperature for up to 5 days. To keep them fresher longer, you can also freeze the cookies for up to 3 months—just wrap them individually in plastic wrap and store in a freezer-safe bag.
Latest Amazon Finds


Notes
– Don’t skip the chill time! Chilling the dough helps prevent the cookies from spreading too much while baking.
– Test your frosting consistency: If it’s too runny, add a little more powdered sugar; if it’s too thick, add more milk to achieve a smooth, spreadable texture.
– Flavor variations: Feel free to try adding a dash of cinnamon or lemon zest to the dough for a unique flavor twist. You can also experiment with different frosting flavors like coffee or strawberry!
- Prep Time: 30 minutes (for chilling dough)
- Cook Time: 10-12 minutes (baking time)
- Category: Cookies
- Method: Baking
- Cuisine: American (New York-style cookies)
Nutrition
- Serving Size: 1 cookie
- Calories: 250 kcal (per cookie)
- Sugar: 20g (per cookie)
- Sodium: 60mg (per cookie)
- Fat: 12g (per cookie)
- Saturated Fat: 6g (per cookie)
- Unsaturated Fat: 4g (per cookie)
- Trans Fat: 0g (per cookie)
- Carbohydrates: 34g (per cookie)
- Fiber: 1g (per cookie)
- Protein: 2g (per cookie)
- Cholesterol: 35mg (per cookie)
Half Moon Cookies Recipe: Tips for Perfecting Your Baking
1. Mastering the Dough: Tips for a Soft and Fluffy Texture
Consistency is key when preparing the dough for Half-Moon cookies. Start by ensuring you have all the right ingredients in the correct proportions—flour, sugar, butter, and eggs. Too much flour can lead to a dry dough, while insufficient flour might make it too sticky. Consider adding a tablespoon of milk or heavy cream if you want a softer texture. This slight variation in fat content can make a significant difference in your cookies’ final texture.
Additionally, don’t overmix the dough once you’ve added the flour. Mix it until it comes together to maintain the delicate, tender crumb that defines these cookies—allowing the dough to chill in the refrigerator for 30 minutes before baking is another pro tip to enhance its flavour and make the dough easier to handle. If you’ve never tried making this dough before, you may find that resting the dough helps the flavours develop more fully.
For more insights on baking cookie dough, try to explore our recipe articles on cookie-making practices. There, we dive deeper into tips for perfecting your cookies every time!
2. Choosing the Right Frosting for a Balanced Half-Moon Cookie
Half Moon cookies are unique in that they are traditionally iced with two different frostings: a smooth, chocolate glaze on one half and a sweet, vanilla glaze on the other. Achieving the perfect frosting balance is essential for the cookie’s overall flavour profile.
For the chocolate frosting, use high-quality cocoa powder and dark chocolate to ensure a rich flavour that contrasts beautifully with the sweetness of the vanilla glaze. To avoid a thick, cloying frosting, melt the chocolate slowly over low heat and combine it with powdered sugar and a bit of butter for a smooth consistency.
On the other hand, the vanilla glaze should be smooth, glossy, and slightly sweet without overpowering the chocolate. A simple combination of powdered sugar, vanilla extract, and milk or cream will do the trick. You can adjust the consistency by adding more milk for a thinner glaze or more powdered sugar for a thicker one.
Serving and Storing Half Moon Cookies
1. How to Serve Half Moon Cookies Like a Pro
Serving Half Moon cookies is an art in itself. While these cookies are undoubtedly eye-catching, the presentation can elevate their appeal. Place the cookies on a decorative platter with a fresh mint garnish, or even drizzle a little extra chocolate sauce around the plate for a sophisticated touch.
If you want to impress your guests even further, consider serving them alongside a hot beverage such as coffee or tea. The subtle sweetness of the cookies perfectly complements the bitterness of a rich brew. You could also serve these cookies as part of a more extensive dessert spread at a special event or holiday gathering.
2. Storing Your Half Moon Cookies to Keep Them Fresh
When storing Half Moon cookies, keep them in an airtight container. This ensures the cookies remain soft and fresh for up to a week. If you plan to keep them longer, you can freeze the cookies individually by wrapping them in plastic wrap and placing them in a freezer-safe bag. This way, you’ll be able to enjoy the cookies at their freshest, even weeks later.
If you’re storing them with the frosting on, be careful not to stack the cookies on top of one another, as this can cause the frosting to smudge. Instead, store them in a single layer or place a layer of parchment paper between the cookies for extra protection.
Half Moon Cookies Recipe: Variations and Creative Twists
1. Exploring Flavor Variations for Half Moon Cookies
While the traditional Half Moon cookies are delicious on their own, experimenting with flavour variations can take your baking to the next level. You can easily tweak the dough and frosting to create a new twist on this beloved treat.
Start with the dough—why not infuse it with some citrus zest, like orange or lemon? The addition of zest brings a fresh, zesty flavour that pairs beautifully with the rich chocolate and sweet vanilla glazes. Another option is adding a pinch of cinnamon or nutmeg to the dough, giving the cookies a warm, comforting spice perfect for autumn.
You can also play with the frosting. Instead of traditional vanilla, try a strawberry glaze or a rich coffee-flavoured frosting. These flavours add a fun, unexpected twist that makes the cookies stand out. For a more decadent option, top the cookies with chopped nuts, such as toasted almonds or pecans, after frosting them.
These variations are significant for seasonal occasions or when you want to try something new. Experimenting with flavours is an excellent way to customize the classic Half Moon cookies recipe and delight your family and friends.
2. Half Moon Cookies for Special Diets: Gluten-Free, Vegan, and More
Everyone loves a good cookie, but what if you have dietary restrictions? Thankfully, there are ways to adjust the classic Half Moon cookies recipe to suit gluten-free or vegan diets, so no one has to miss out on the fun!
For gluten-free cookies, substitute the regular all-purpose flour with a high-quality gluten-free flour blend. Ensure that the other ingredients, like baking powder, are also gluten-free. To make it even better, you can add a touch of almond flour for extra tenderness.
If you’re aiming for a vegan version of Half Moon cookies, swapping out the butter and eggs for plant-based alternatives is easy. Use vegan butter or coconut oil instead of regular butter, and substitute flax eggs or chia seeds for the eggs. For the frosting, you can replace dairy milk with almond or coconut milk and ensure that the powdered sugar used is vegan-friendly (some sugars are processed with bone char).
These simple swaps allow you to enjoy the deliciousness of Half Moon cookies without compromising on taste or texture.
Half Moon Cookies Recipe: FAQs
1. Can I make Half Moon cookies ahead of time?
Yes! Half Moon cookies are a great make-ahead treat. You can prepare the dough in advance, wrap it tightly, and refrigerate it for up to 48 hours. This allows the flavours to meld together beautifully. You can freeze the dough for up to 3 months if you want to keep it on hand for a future baking session.
If you’re short on time, you can even bake the cookies beforehand, let them cool, and store them in an airtight container. Just add the frosting before serving to maintain its fresh, glossy look.
2. How do I get the frosting to set correctly?
The frosting on Half Moon cookies should set to a smooth, firm texture after about 30 minutes at room temperature. To speed up the process, pop the cookies into the fridge for about 15 minutes. Be careful not to leave them too long; the frosting can become too complicated if chilled too long. A smooth application of frosting with the right consistency will help ensure it sets evenly.
3. Why are Half Moon cookies called “Half Moon”?
The name “Half Moon” comes from the distinctive shape of the cookies. As the name suggests, each cookie is frosted with two different colors, typically a chocolate and a vanilla glaze, creating the appearance of a half moon. The cookies are traditionally round, but the unique frosting method gives them their signature look, so they are often associated with this celestial name.
Half Moon Cookies Recipe: Troubleshooting Common Issues
1. What to Do If Your Half Moon Cookies Are Too Hard
One of the most common issues people face when making Half Moon cookies is that they end up too hard instead of the soft, cake-like texture they’re meant to have. Don’t worry if this happens to you; you can fix it!
First, check your dough. Overmixing can cause cookies to become dense and tough. Instead, mix until the ingredients are just combined. Also, follow the resting step and chill your dough before baking. This helps prevent the cookies from spreading too much, keeping them thicker and fluffier.
Another tip: underbaking the cookies slightly will keep them soft. You may be tempted to bake them full-time, but pulling them out of the oven just a minute or two early can produce a smoother texture. If the cookies have cooled down too much and seem too firm, you can store them in an airtight container with a slice of bread for a day. The moisture from the bread will help soften them.
2. Fixing Runny or Thick Frosting
A smooth, glossy frosting is what makes Half Moon cookies so unique. However, frosting problems can sometimes arise, like a frosting that is too runny or thick. If your frosting is too watery, add more powdered sugar to thicken it. On the other hand, if it’s too dense and complex to spread, add a small amount of milk to loosen it up.
Another trick: ensure your frosting has had time to cool down slightly (especially the chocolate one), as overly warm frosting can spread too thin. If you’re using store-bought frosting, it’s often easier to adjust the texture by beating it with a hand mixer for a minute to get it lighter and fluffier.
Half Moon Cookies Recipe: Final Thoughts and Tips for Success
1. Mastering the Half Moon Cookie Process
Following the tips and techniques in this article, you can master the Half Moon Cookies recipe and bake like a pro. The key is to take your time, from mixing the dough to applying the frosting. Patience is essential, as the perfect Half Moon cookie requires attention to detail and a gentle touch.
Remember, practice makes perfect. Don’t be discouraged if your first batch isn’t exactly how you imagined it. With a few tweaks and some trial and error, you’ll soon be baking soft, perfectly frosted, and absolutely delicious cookies!
2. Share Your Half Moon Cookie Creations
Baking is all about fun, creativity, and sharing with loved ones. Once you’ve perfected your Half Moon cookies recipe, why not share it with friends and family? These cookies are perfect for any occasion—a casual treat with coffee or a special dessert for a holiday party.
We’d love to see your delicious creations! Feel free to share your cookie photos and any personal variations you made on social media, or leave a comment below. Your experience and feedback can help others along their cookie-baking journey.