
Craving a creamy, sweet, and delightfully easy dessert to make? A no-bake cherry cheesecake could be your new go-to recipe. This treat is perfect for anyone who loves indulgent flavors without the fuss of baking. Whether you’re whipping it up for a summer party or simply satisfying a sweet tooth, this guide has everything you need. From assembling the crust to adding the perfect cherry topping, let’s explore how to craft this delectable dessert step-by-step.
What is No-Bake Cherry Cheesecake?
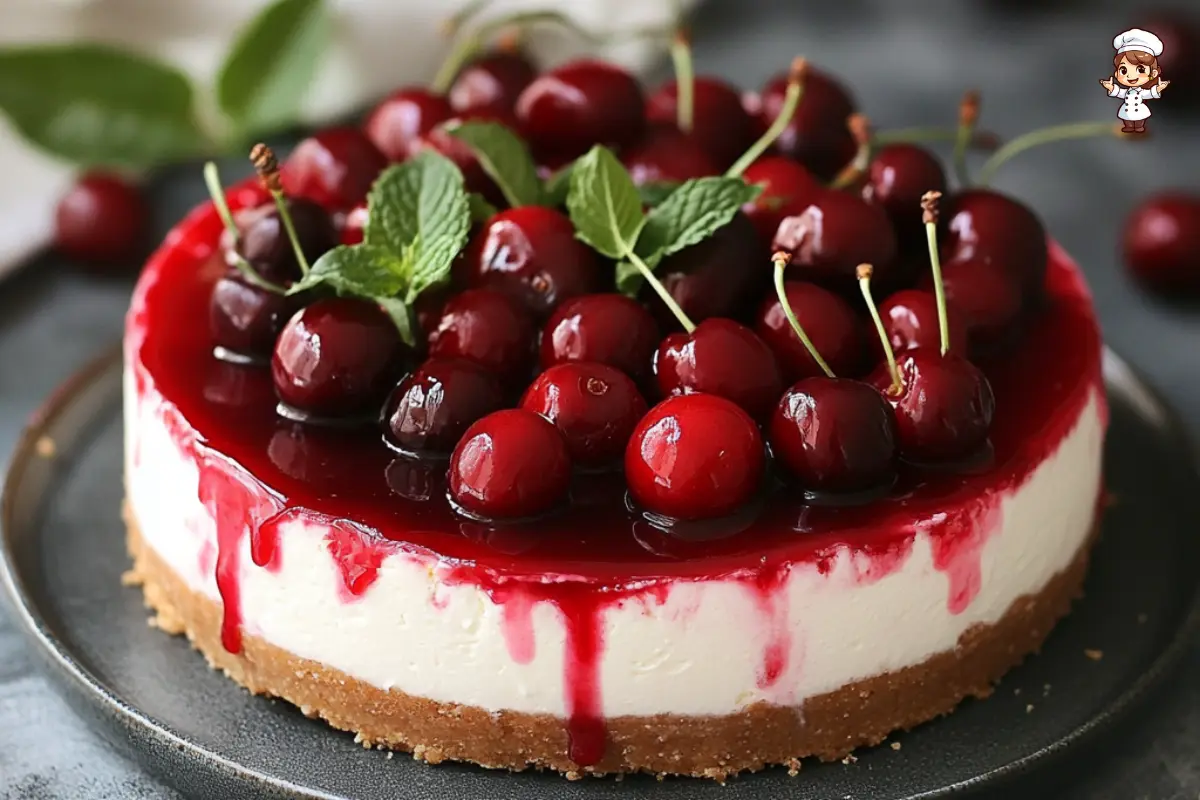
No-bake cherry cheesecake is a dessert marvel that combines a creamy cheesecake filling with a luscious cherry topping, all set on a graham cracker crust. Unlike traditional cheesecakes, this version skips the oven, making it a fantastic option for those hot days when you’d instead not heat your kitchen. It’s a sweet and tangy treat that’s as easy to make as enjoyable.
Why Choose a No-Bake Option?
Sometimes, you want to skip the hassle of baking. You may be short on time or looking for a recipe that even beginner cooks can handle. A no-bake cheesecake solves all those problems. It’s quick, requires minimal tools, and comes together with little effort. Plus, the flavor isn’t compromised one bit—it’s as indulgent and satisfying as its baked counterpart.
Quick Overview of Ingredients and Simplicity
This dessert requires only a handful of simple ingredients: graham crackers, cream cheese, sugar, heavy cream, and, of course, cherry pie filling. These pantry staples make it accessible, and you can customize the recipe to suit your tastes. The result? A dessert masterpiece that’s easy enough for weeknights but impressive enough for special occasions.
Stay tuned for Part 2, where we’ll dive into the ingredients and tools needed to create your no-bake cherry cheesecake!
Print
No-Bake Cherry Cheesecake Recipe
- Total Time: 4 hours
- Yield: 8-10 servings
Ingredients
For the Crust:
– Graham crackers: 2 cups (crushed)
– Butter: 1/2 cup (melted)
– Sugar: 2 tablespoons
For the Cheesecake Filling:
– Cream cheese: 16 oz (softened)
– Heavy cream: 1 cup (cold)
– Sugar: 1 cup (granulated)
– Vanilla extract: 1 teaspoon
For the Topping:
– Cherry pie filling: 1 can (21 oz)
Instructions
Step 1: Prepare the Graham Cracker Crust
1. Crush graham crackers into fine crumbs using a food processor or by placing them in a resealable bag and crushing with a rolling pin.
2. Mix the crumbs with melted butter and sugar until the texture resembles wet sand.
3. Press the mixture firmly into the bottom of a 9-inch pie pan or springform pan.
4. Chill the crust in the refrigerator for 20 minutes to set.
Step 2: Make the Cheesecake Filling
1. In a mixing bowl, beat the softened cream cheese until smooth and creamy using a hand mixer.
2. Add sugar and vanilla extract, and mix well.
3. In a separate chilled bowl, whip the heavy cream until soft peaks form.
4. Gently fold the whipped cream into the cream cheese mixture until fully combined, ensuring you retain the light, airy texture.
Step 3: Assemble the Cheesecake
1. Pour the cheesecake filling over the chilled crust, smoothing the top with a spatula.
2. Cover the pan with plastic wrap or aluminum foil and refrigerate for at least 3-4 hours, or overnight for best results.
Step 4: Add the Cherry Topping
1. Spread the cherry pie filling evenly over the top of the chilled cheesecake just before serving.
2. Garnish with whipped cream, fresh cherries, or chocolate shavings if desired.
Latest Amazon Finds


Notes
– Serve chilled for the best flavor and texture.
– Store leftovers in an airtight container in the refrigerator for up to 5 days.
– For longer storage, wrap the cheesecake (without the topping) tightly and freeze for up to 2 months. Thaw in the refrigerator before adding the topping and serving.
- Prep Time: 20 minutes
- Cook Time: 3-4 hours (or overnight for best results)
Keywords: cherry cheesecake recipe no bake
Ingredients and Tools You’ll Need
Main Ingredients for a Perfect No-Bake Cheesecake
To make this cherry cheesecake recipe no bake, you’ll need a few staple ingredients that pack a punch of flavor. First, grab graham crackers for the crust and melted butter and sugar to hold it together. These form the buttery base that balances the creamy filling.
Cream cheese is the star for the filling, offering that signature tangy flavor. Sweeten it with granulated sugar, then add heavy cream to create a silky texture. Vanilla extract is a must—it brings out the best in all the other ingredients. Finally, cherry pie filling crowns the dessert with a vibrant, fruity finish.
Tools for Preparation and Assembly
This recipe doesn’t demand fancy gadgets; a few tools make the job smoother. You’ll need a food processor or a rolling pin to crush the graham crackers into fine crumbs. A mixing bowl and hand mixer are essential for whipping the cream cheese and heavy cream to the right consistency.
A 9-inch pie pan works perfectly for assembly, but a springform pan can add a professional touch. A spatula will help you smooth the filling evenly, while plastic wrap or aluminum foil is handy for chilling the cheesecake without drying it out.
Substitutions and Adjustments for Special Diets
Need to make this dessert gluten-free? Swap regular graham crackers with gluten-free ones. For a lower-sugar version, opt for sugar-free pie filling and sweeteners. If dairy-free is your goal, use vegan cream cheese and whipped coconut cream. These simple tweaks let everyone enjoy this easy, no-bake dessert.
Step-by-Step Preparation Process
Preparing the Graham Cracker Crust
To start, crush your graham crackers into fine crumbs. You can use a food processor, place the crackers in a sealed bag, and crush them with a rolling pin. Combine the crumbs with melted butter and a pinch of sugar, mixing until the texture resembles wet sand. Press the mixture firmly into the base of your pie pan, ensuring an even layer. Pop the crust into the fridge to set while you prepare the filling.
Mixing the Cheesecake Filling
Here’s where the magic happens. Beat the cream cheese until it’s smooth and creamy, ensuring no lumps. Gradually add sugar and vanilla extract, blending well after each addition. Whip the heavy cream in a separate chilled bowl until soft peaks form. Fold this whipped cream gently into the cream cheese mixture, ensuring you don’t deflate the airy texture. This step creates the light, velvety filling that defines a no-bake cherry cheesecake.
Assembling and Chilling Your Cheesecake
Pour the cheesecake filling over the chilled crust, spreading it evenly with a spatula. Once smooth, cover the pan with plastic wrap or foil and let it chill in the fridge for at least three hours. This resting time allows the filling to be appropriately set, ensuring clean slices when serving.
When it’s time to serve, spread the cherry pie filling generously over the cheesecake. The bright red topping adds a burst of fruity sweetness and visual appeal, making this dessert as delicious as it is.
In Part 4, we’ll troubleshoot common challenges and share tips to perfect your cherry cheesecake recipe no bake. Stay tuned!
Common Challenges and Solutions
How to Thicken No-Bake Cheesecake Filling
Sometimes, your cheesecake filling might not set the way you want. No worries! The easiest way to fix this is to ensure you’re using cold, heavy cream and beating it until soft peaks form. Then, gently fold it into the cream cheese mixture to retain airiness.
If the filling remains runny, refrigerate the mixture for a few extra hours. Patience is key with a no-bake cherry cheesecake recipe. For urgent fixes, adding a bit of gelatin to the filling can help it firm up without altering the taste.
Fixing a Soupy Cheesecake
A soupy cheesecake is often the result of under-mixing or warm ingredients. Always start with cold heavy cream and chilled cream cheese to prevent this problem. Another tip? Don’t skip the chilling step—at least three hours, but overnight is even better!
For more tips on achieving the perfect cheesecake texture, check out this ube cheesecake recipe for inspiration.
Adjusting Sweetness and Flavor
Everyone’s palate is different. If your cheesecake tastes too tangy, you can add a touch more sugar to balance the flavors. For a unique twist, try substituting vanilla extract with almond extract or adding a splash of lemon juice to enhance the tanginess.
Storage and Preservation Tips
Storing in the Refrigerator: Do’s and Don’ts
Once your cherry cheesecake recipe no bake is ready, it’s essential to store it properly. Cover it with plastic wrap or aluminum foil to prevent it from drying out or absorbing other flavors from your fridge. It will stay fresh for up to five days when stored this way.
Freezing Instructions for Long-Term Use
Need to prepare ahead of time? No problem! This cheesecake freezes beautifully. Wrap the entire dessert (including the pan) in plastic wrap, followed by a layer of aluminum foil. Label and date it before placing it in the freezer. Thaw it in the fridge overnight before serving to retain its creamy texture.
Best Practices for Reheating or Serving After Storage
When serving your cheesecake after storage, always add the cherry topping right before serving. This prevents the topping from soaking into the filling and keeps it looking fresh. Explore our guide on canned cherry pie recipes for more dessert ideas that pair perfectly with cheesecake.
Creative Toppings and Variations
Exploring Alternatives to Cherry Pie Filling
While the classic cherry cheesecake recipe no bake is undeniably delicious, there’s room to get creative. Swap out cherry pie filling for other fruit toppings like blueberry, raspberry, or strawberry preserves. Even fresh fruit works wonders—sliced peaches or mangoes bring a refreshing twist.
Want something richer? Try a drizzle of chocolate ganache or a swirl of caramel sauce. These options pair beautifully with the tangy cream cheese filling and buttery crust, making your cheesecake stand out at any gathering.
Fresh Fruit and Nut Toppings
Fresh fruits like kiwis, blackberries, or pomegranate seeds add color and flavor. Pair them with chopped nuts, such as almonds or pecans, for a crunchy texture. This enhances the taste and elevates the cheesecake’s appearance, giving it a gourmet feel.
Making It Your Own with Unique Add-Ons
For a holiday twist, sprinkle crushed peppermint candies over the top or fold pumpkin puree into the filling for a seasonal touch. Coconut flakes, white chocolate shavings, or edible flowers can transform a simple, no-bake cheesecake into a show-stopping dessert.
FAQs About No-Bake Cherry Cheesecake
How Long Does No-Bake Cheesecake Take to Set?
Patience is crucial for this cherry cheesecake recipe no bake. Most cheesecakes take about 3-4 hours to set in the fridge. However, letting it chill overnight ensures the best texture. If you’re in a hurry, pop it in the freezer for an hour, but keep an eye on it to avoid over-firming.
Can You Use a Pre-Made Crust?
Absolutely! A pre-made graham cracker crust saves time and works just as well. It’s a lifesaver when you’re short on prep time or need to whip up a dessert quickly. Just ensure the crust is sturdy enough to hold the filling.
What Are the Best Ways to Serve No-Bake Cheesecake?
Serve your cheesecake chilled directly from the fridge for the best flavor and texture. Add the cherry topping right before serving to keep it vibrant and fresh. A dollop of whipped cream or a sprinkle of grated chocolate adds a delightful finishing touch.
For more tips and tricks, visit our recipe on healthy cheesecake options. It’s packed with ideas for making indulgent desserts a bit lighter!
Conclusion and Recipe Recap
Why This Recipe Is Perfect for Any Occasion
Whether it’s a family gathering, a holiday celebration, or simply a cozy night in, a cherry cheesecake recipe no bake is the ultimate dessert. Its rich, creamy filling paired with a tangy cherry topping is a crowd-pleaser that’s sure to impress. And the best part? You don’t need an oven to make it!
This recipe shines for its simplicity. With just a handful of ingredients and minimal tools, you can create a stunning dessert that looks as good as it tastes. Plus, it’s easily customizable, making it your own with creative toppings and flavors.
Quick Recap of the Recipe Steps
To make this delightful treat, prepare a graham cracker crust, then whip up the cream cheese filling until it’s smooth and airy. Pour the filling into the crust, chill it for a few hours, and top it with cherry pie filling before serving. It’s that simple!
So, next time you’re craving something sweet but fuss-free, try this no-bake cherry cheesecake. Your taste buds—and your guests—will thank you.
FAQ Recap and Final Tips
Frequently Asked Questions Summarized
- How long does it take to set? Give it at least 3-4 hours in the fridge or overnight for the best results.
- Can I use pre-made crusts? Definitely! They’re an excellent time-saver and work perfectly with this recipe.
- What are some alternative toppings? From fresh fruits to chocolate drizzles, there’s no limit to how creative you can get.
Final Tips for Success
To ensure your cherry cheesecake recipe no bake turns out flawlessly, remember to use cold ingredients for the filling and chill it thoroughly. Experiment with toppings like caramel, crushed nuts, or even edible flowers for added flair.
If you enjoyed this recipe, why not explore other easy dessert ideas? Our ube cheesecake recipe is another no-bake favorite you’ll love.
No matter how you customize your cheesecake, it’s bound to become a go-to recipe in your kitchen. Enjoy every creamy, fruity bite!