
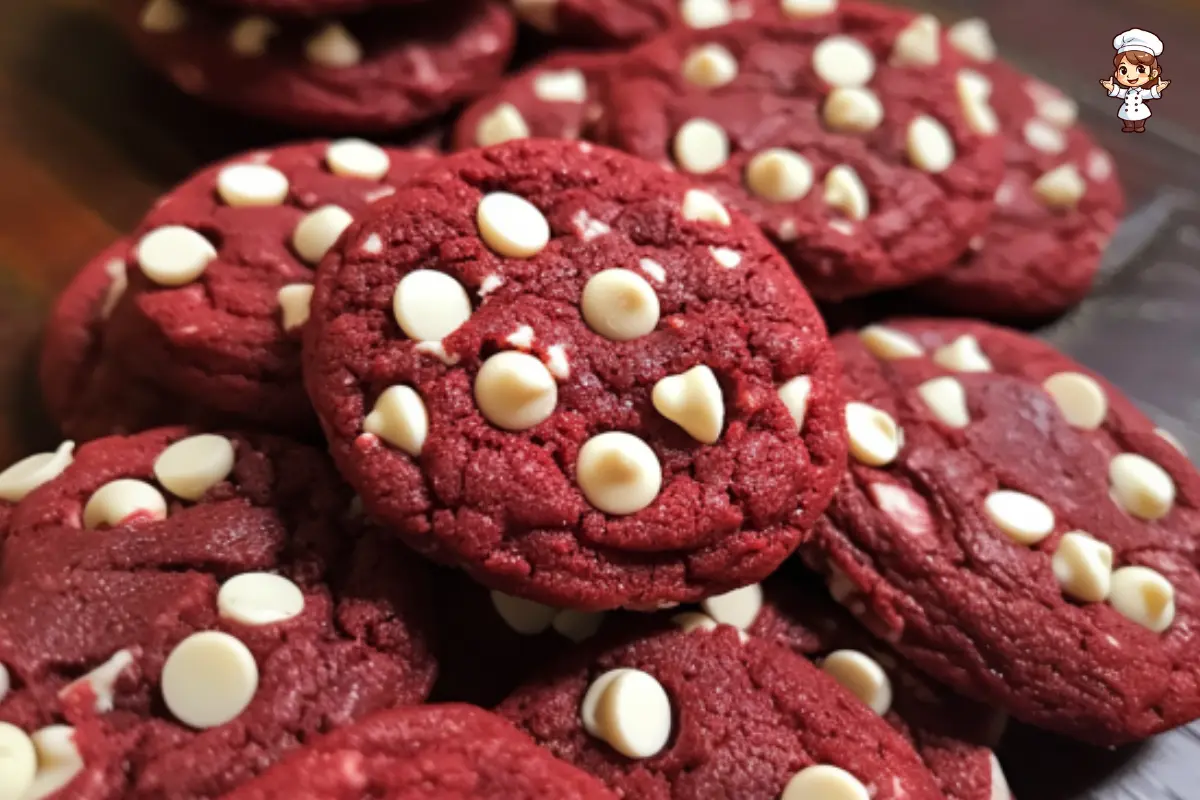
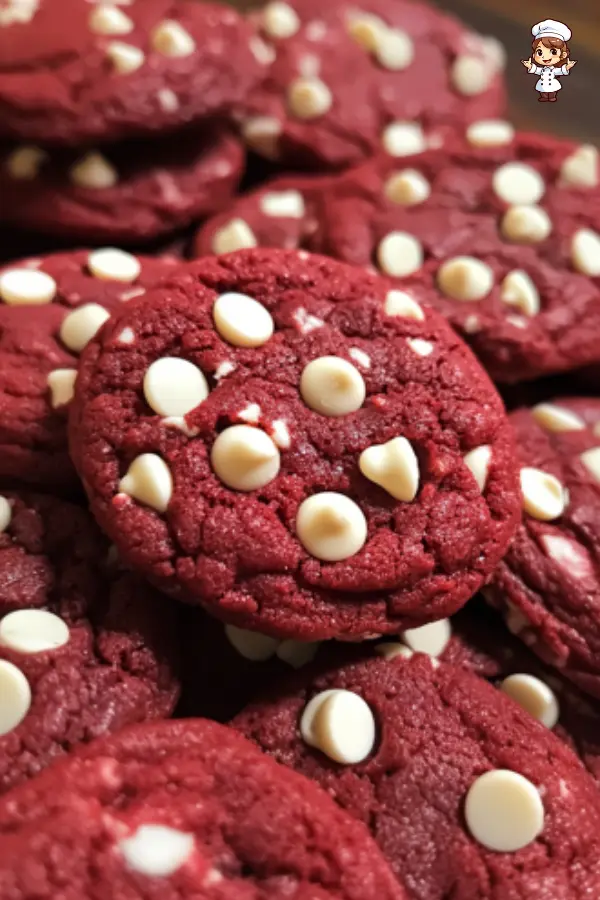
Red velvet cookies are a delightful twist on the classic red velvet cake, offering all the rich flavor and stunning color in a handheld treat. Whether baking for a special occasion or just craving a sweet snack, these cookies bring the perfect balance of tangy cream cheese, sweet white chocolate, and a vibrant red hue. In this guide, we’ll walk you through everything you need to know about making the perfect red velvet cookies, from understanding their unique ingredients to decorating them like a pro. Ready to dive in and make some delicious cookies? Let’s get started!
Key Ingredients in Red Velvet Cookies
The right ingredients are crucial for the perfect texture and flavor when making red velvet cookies. These cookies rely on a blend of simple yet impactful ingredients that give them their signature taste and vibrant red color. Let’s dive into the key ingredients that make these cookies stand out.
Essential Ingredients for Red Velvet Cookies
The unsalted butter and cream cheese form the base of the dough, providing the necessary fat to give the cookies a soft, rich texture. Cream cheese, in particular, helps these cookies maintain their signature tangy flavor while making them irresistibly chewy. Ensure the butter and cream cheese are at room temperature before mixing them—this ensures they incorporate smoothly, giving your dough the perfect consistency.
Another key ingredient is the red food coloring, which gives the cookies that stunning red hue. While many may be wary of artificial colorings, they’re crucial in achieving the classic look of red velvet cookies. The bright red color, combined with the richness of the cocoa powder and cream cheese, creates that striking visual contrast everyone loves.
White chocolate chips are an essential part of the cookie’s flavor profile. These chips add a creamy, slightly sweet flavor that balances out the tang of the cream cheese. You can always opt for darker chocolate chips if you prefer a less sweet variation, but white chocolate enhances the red velvet experience.
Substitutions and Variations
While the ingredients above are key to classic red velvet cookies, you can easily switch things up to suit your taste or dietary needs. For example, if you’re looking for a non-dairy version, substitute the butter with margarine or coconut oil and use dairy-free cream cheese. You can swap dark or milk chocolate chips for a slightly different flavor profile.
If you prefer a healthier cookie, try whole wheat flour instead of all-purpose flour. It will give the cookies a slightly nuttier flavor and add extra fiber. And if you’re trying to reduce sugar, you can substitute some or all of the granulated sugar with a healthier sweetener like Stevia or monk fruit.
How to Make Red Velvet Cookies

Making red velvet cookies is easier than you might think, and the results are always delicious. The recipe comes together quickly, and once the dough is mixed, it’s just a matter of shaping the cookies and letting them bake to perfection. Here’s how to do it step-by-step.
Step-by-Step Instructions for Baking
- Preheat the Oven and Prepare the Baking Sheets:
- Start by preheating your oven to 350°F (177°C). Line two baking sheets with parchment paper or silicone mats to ensure your cookies don’t stick.
- Make the Dough:
- In a stand mixer, combine 3/4 cup unsalted butter, 4 ounces of cream cheese, 1 cup of white sugar, and 1 cup of dark brown sugar. Mix on medium speed for about 2 minutes until the mixture is creamy and smooth. Scrape down the sides of the bowl and add 1 large egg and 1 egg yolk, mixing until fully incorporated. Then, mix 1 tablespoon of red food coloring (preferably McCormick brand) until the dough turns red.
- Add the Dry Ingredients:
- In a separate bowl, whisk together 2 3/4 cups of all-purpose flour, 1/4 cup of natural cocoa powder, 1 teaspoon of baking soda, and 1 teaspoon of kosher salt. Gradually add the dry ingredients to the wet ingredients, mixing quickly until the dough just comes together. Avoid over-mixing to keep the cookies soft and chewy.
- Incorporate the White Chocolate Chips:
- Gently fold in 2 cups of white chocolate chips into the dough. Be sure they’re evenly distributed, but avoid overworking the dough. Save about 1/2 cup of the chips for topping the cookies later.
Tips for Achieving the Perfect Red Velvet Cookie
- Chill the Dough: If you have time, chill the dough for about 30 minutes before rolling it into balls. This helps the cookies maintain their shape while baking and prevents them from spreading too much.
- Shaping the Cookies: Use a spoon or a cookie scoop to roll 1-inch dough balls. Wet your hands slightly to prevent the dough from sticking, then place the dough balls on the baking sheet, spaced about 2 inches apart.
- Bake and Top with Chips:
- Bake the cookies for 11-13 minutes or until the edges are set and the center is slightly puffed. As soon as they come out of the oven, gently press a few extra white chocolate chips into the tops of the warm cookies for a professional touch.
Decorating Red Velvet Cookies
Decorating is one of the best parts of making red velvet cookies. Not only does it add a personal touch to each cookie, but it also makes them look extra festive and delicious. You can keep it simple or go all out with intricate designs—either way, your cookies will be the star of the show!
Icing and Toppings for Red Velvet Cookies
When decorating your red velvet cookies, icing is your best friend. Cream cheese frosting is a natural choice, as it complements the tanginess of the cream cheese in the dough. You can make your own at home by mixing cream cheese, butter, powdered sugar, and vanilla extract. If you’re in a hurry, store-bought frosting works just as well! Another great option is royal icing, which hardens when it sets, giving your cookies a polished, professional look. Stacking your cookies or gifting them to friends and family is perfect.
For a bit of crunch and extra sweetness, sprinkle some colored sugar or mini chocolate chips. You can also add a festive touch with sprinkles or edible glitter to match any occasion, like red and pink sprinkles for Valentine’s Day or gold and green for Christmas.
Creative Cookie Decorating Ideas
To get more creative, you can pipe intricate designs using colored icing. For example, outline each cookie with a thin layer of white icing, then use red icing to fill the center. Or, for a fun twist, create a marble effect by swirling different icing colors together before they set. There’s no limit to what you can do, so feel free to get artistic!
Troubleshooting Common Red Velvet Cookie Issues
While making red velvet cookies is generally straightforward, it’s not uncommon to run into a few baking issues along the way. Don’t worry, though—these problems are easy to solve! Let’s review some of the most common issues and how to fix them.
Why Do Red Velvet Cookies Spread Too Much?
If your red velvet cookies are spreading more than you’d like, it’s likely because the dough is too soft. To fix this, simply chill the dough for at least 30 minutes before baking. Chilling the dough helps solidify the fats, so the cookies hold their shape better when they bake. Another reason your cookies might spread is if you’re using too much butter or not enough flour. Adjusting the ratio of these ingredients can also help keep the cookies in shape.
What to Do if Your Red Velvet Cookies Turn Out Too Dry
If your cookies are too dry, they may have been overbaked, or the dough wasn’t moist enough. To avoid this, keep a close eye on the baking time—red velvet cookies typically bake for 11-13 minutes. If your dough seems too dry, add a tablespoon of milk or an extra egg yolk to give it some extra moisture. This will keep your cookies soft and chewy, just the way they should be!
For more delicious cookie recipes, be sure to check out our article on Protein Cookie Recipe. perfect for a healthier treat!
Storing and Freezing Red Velvet Cookies
After you’ve baked your perfect red velvet cookies, you’ll want to know how to store them so they stay fresh and delicious. Luckily, these cookies keep well and are also perfect for making ahead of time. Here’s how to store and freeze them for later enjoyment.
How to Store Red Velvet Cookies
Store your red velvet cookies in an airtight container at room temperature to keep them fresh. They should stay soft and chewy for about 3-5 days. If you plan to keep them longer, you can store them in the refrigerator for up to a week. Just make sure the container is sealed tightly to prevent them from drying out. To avoid sticking, you can also layer the cookies with parchment paper if you’re stacking them in a container.
Freezing Red Velvet Cookie Dough or Baked Cookies
If you’d like to make red velvet cookies ahead of time, freezing them is a great option. For dough, scoop the dough into balls and place them on a baking sheet. Freeze the dough balls for 1-2 hours, then transfer them to a freezer or airtight container. When you’re ready to bake, simply bake the frozen dough at the usual temperature—no need to thaw!
If you have leftover baked cookies, they can also be frozen. Allow them to cool completely, then layer them in an airtight container with parchment paper between each layer. Baked cookies can be frozen for up to 3 months.
FAQs About Red Velvet Cookies
Regarding red velvet cookies, a few common questions pop up. Whether you’re a baking pro or a beginner, you might wonder about certain aspects of the recipe. Review some frequently asked questions to help you get the best results.
Can I Make Red Velvet Cookies Without Red Food Coloring?
Yes, you can! If you’re not fond of artificial food coloring or don’t have any on hand, you can still make red velvet cookies. However, the signature red color will be missing. If you still want to give the cookies a bit of color, consider using beet juice as a natural alternative. Remember that this might affect the flavor slightly, but it can be a fun and more natural option.
What Makes Red Velvet Cookies Different from Regular Cookies?
The main difference between red velvet cookies and regular cookies is the unique ingredient combination. Red velvet cookies often contain cream cheese, giving them a soft, chewy texture and tangy flavor. The addition of cocoa powder (but not as much as in chocolate cookies) gives them a mild chocolate flavor, while the red food coloring gives them that eye-catching hue. Together, these ingredients make them richer and more indulgent than standard cookies.
Can I Use a Different Type of Chocolate for Red Velvet Cookies?
While white chocolate chips are typically used in red velvet cookies to complement the tangy cream cheese flavor, you can swap them out for other types of chocolate. Dark or milk chocolate chips work just as well, but they’ll slightly alter the cookies’ overall flavor and visual appeal. Dark chocolate chips are a great choice if you’re looking for a less sweet option. However, white chocolate is the way to go for the signature red velvet look!
Print
Red Velvet Cookies
- Total Time: 27 minutes
- Yield: 24 cookies 1x
- Diet: Vegetarian
Description
These red velvet cookies offer the perfect balance of tangy cream cheese, sweet white chocolate chips, and that signature rich red color. Soft, chewy, and visually stunning, they’re perfect for any occasion, especially Valentine’s Day, Christmas, or a fun treat to share with friends and family.
Ingredients
- 3/4 cup (170g) unsalted butter, at room temperature
- 4 ounces (115g) cream cheese, at room temperature
- 1 cup (200g) white sugar
- 1 cup (220g) packed dark brown sugar
- 1 teaspoon baking soda
- 1 teaspoon kosher salt
- 2 teaspoons vanilla extract
- 1 large egg
- 1 large egg yolk
- 1 tablespoon red food coloring, preferably McCormick brand
- 2 3/4 cups (385g) all-purpose flour
- 1/4 cup (25g) natural cocoa powder (not Dutch process)
- 2 cups (340g) white chocolate baking chips, divided
Instructions
- Preheat the oven to 350°F (177°C). Line two baking sheets with parchment paper or silicone mats.
- In a stand mixer, combine 3/4 cup unsalted butter, 4 ounces cream cheese, 1 cup white sugar, and 1 cup dark brown sugar. Mix on medium speed for about 2 minutes until creamy.
- Add 1 large egg and 1 egg yolk. Mix well. Add 1 tablespoon red food coloring and mix on low speed to avoid splattering.
- In a separate bowl, whisk together 2 3/4 cups all-purpose flour, 1/4 cup cocoa powder, 1 teaspoon baking soda, and 1 teaspoon kosher salt. Gradually add the dry ingredients to the wet mixture until fully combined.
- Fold in 2 cups of white chocolate chips, reserving 1/2 cup for topping the cookies.
- Roll the dough into 1-inch balls and place them on the prepared baking sheets, spacing them 2 inches apart.
- Bake for 11-13 minutes, until the edges are set but the center is still slightly puffed. After removing from the oven, press a few white chocolate chips into the warm cookies.
- Allow the cookies to cool on the baking sheet for 5 minutes, then transfer to a wire rack to cool completely.
Latest Amazon Finds


Notes
- Chill the dough for 30 minutes if it’s too soft to handle.
- For a richer flavor, try adding dark or milk chocolate chips instead of white chocolate chips.
- Store cookies in an airtight container at room temperature for up to 5 days, or freeze for up to 3 months.
- Prep Time: 15 minutes
- Cook Time: 12 minutes
- Category: Dessert, Cookies
- Method: Baking
- Cuisine: American
Nutrition
- Serving Size: 1 cookie
- Calories: 150
- Sugar: 10g
- Sodium: 50mg
- Fat: 7g
- Saturated Fat: 4g
- Unsaturated Fat: 2g
- Trans Fat: 0g
- Carbohydrates: 18g
- Fiber: 1g
- Protein: 2g
- Cholesterol: 25mg
Keywords: Red velvet cookie recipe, soft red velvet cookies, cream cheese cookies, white chocolate red velvet cookies, easy red velvet cookies, Valentine’s Day cookies, red velvet desserts