
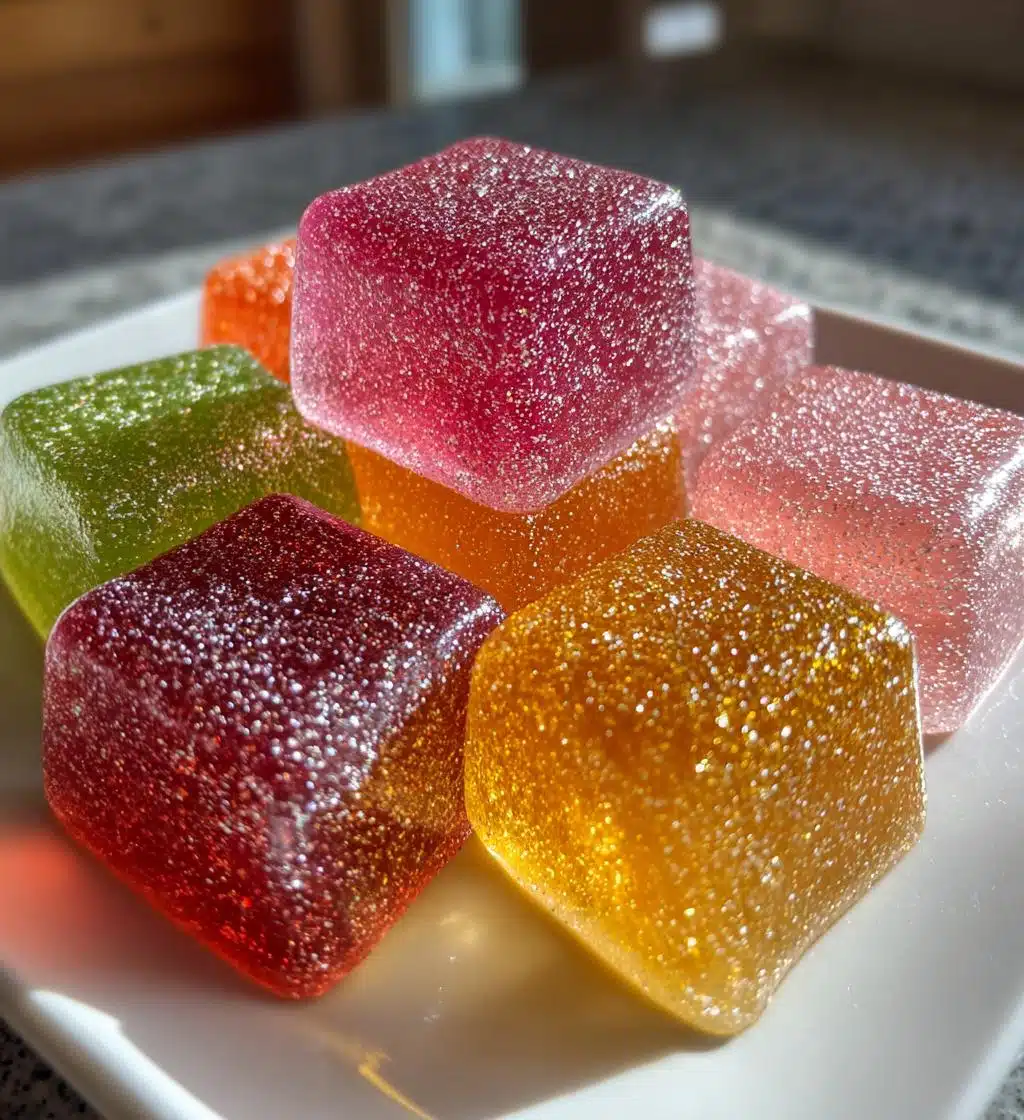
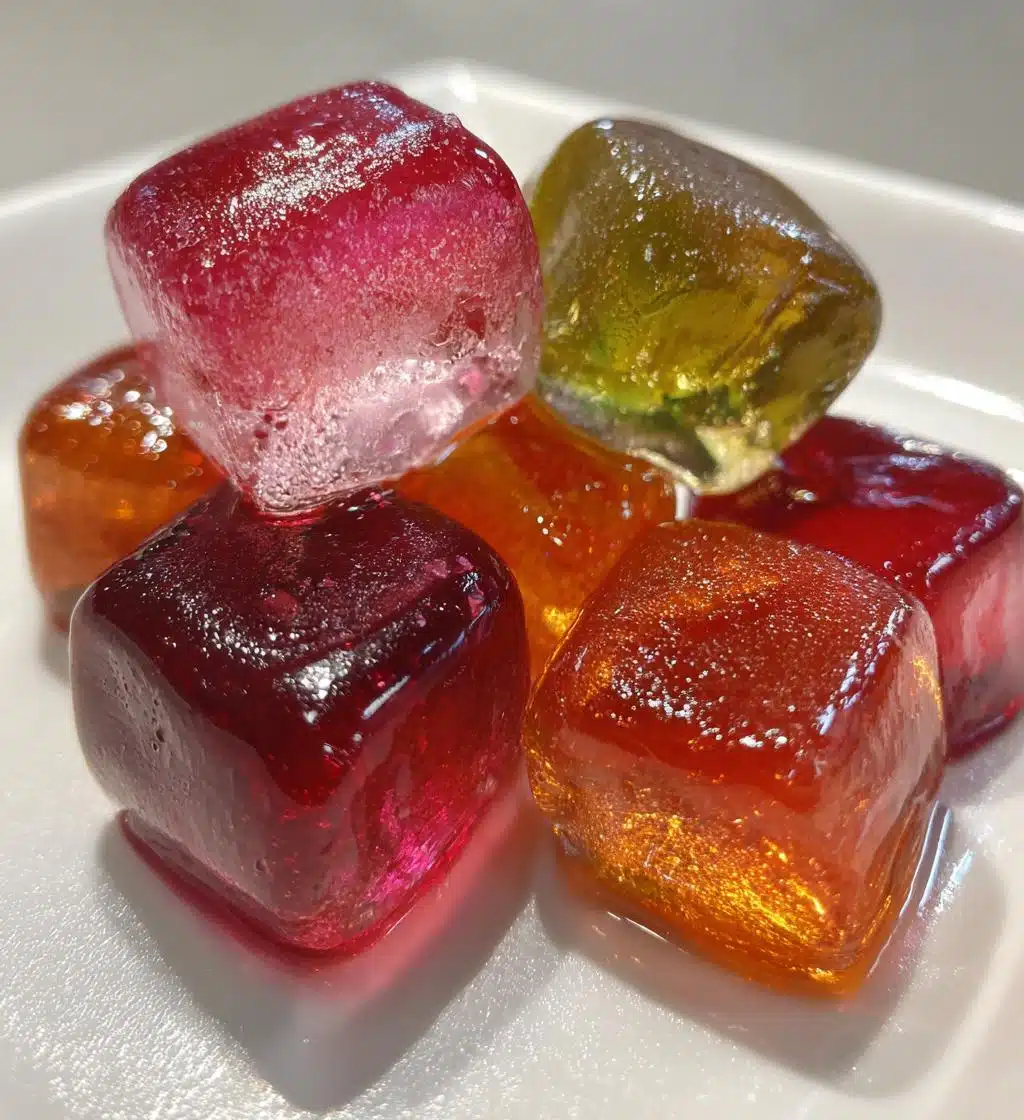
Oh my goodness, there’s just something magical about making hard candy at home! The way the sugar transforms into a glossy, vibrant treat is nothing short of enchanting. I remember the first time I tried making hard candy—it was a rainy afternoon, and I decided to dive headfirst into this sweet adventure. With just a few simple ingredients, I created colorful, flavored delights that made my kitchen smell heavenly! Trust me, this recipe is not only super easy but also allows you to customize your candy with your favorite flavors and colors. Whether you’re gearing up for a festive occasion or just want to satisfy your sweet tooth, this homemade hard candy is the perfect choice. You’ll love how you can whip up a batch in no time, and the best part? You get to share (or not!) your delicious creations with friends and family!
Ingredients List
Here’s what you need to make your very own hard candy. I promise these ingredients are super simple and easy to find!
- 2 cups granulated sugar: This is the main ingredient that will give your candy its sweetness and that delightful crunch.
- 1 cup corn syrup: This helps to keep the candy smooth and prevents it from crystallizing. Don’t skip this one!
- 1/2 cup water: Just enough to help dissolve the sugar and corn syrup before we heat it all up.
- Flavoring extract (1 teaspoon): You can choose your favorite flavor here—vanilla, peppermint, or even cherry! It’s all up to you and what you love!
- Food coloring (optional): Want to make your candy pop with color? Feel free to add a few drops of your favorite food coloring to make it as vibrant as you’d like!
How to Prepare Instructions
Making hard candy is a fun process, and I’m here to guide you through it step-by-step! Just follow these instructions, and you’ll be enjoying your homemade candy in no time. Let’s get started!
- Combine the ingredients: In a medium saucepan, mix together the 2 cups of granulated sugar, 1 cup of corn syrup, and 1/2 cup of water. Stir it gently until everything is combined. You don’t want to stir too vigorously yet!
- Heat it up: Place the saucepan over medium heat, and let the mixture cook. Stir occasionally, just until the sugar has completely dissolved. You’ll know it’s ready when you don’t see any granules left!
- Raise the temperature: Now, increase the heat to high. This is where the magic happens! Keep an eye on it as it heats up, and don’t stir anymore. You want to let it boil until it reaches 300°F, which is the hard crack stage. A candy thermometer is super helpful here!
- Remove from heat: Once it hits that magical temperature, carefully remove the saucepan from the heat. This part can be a bit tricky since the sugar is extremely hot, so be cautious!
- Add flavor and color: Quickly stir in your chosen flavoring extract and food coloring if you’re using it. The mixture might bubble up a bit, which is totally normal—just be careful!
- Pour into the pan: Pour the hot mixture into a greased pan. Make sure to do this quickly and evenly. You can use a spatula to help spread it out if needed.
- Let it cool: Allow the candy to cool completely at room temperature. This usually takes about 30 minutes to an hour. Don’t rush this part; it needs to set!
- Break into pieces: Once it’s cool and hard, you can break it into pieces. I usually just tap it with a hammer wrapped in a towel for a fun, satisfying way to break it up!
And there you have it! Your homemade hard candy is ready to be enjoyed. Just remember to be careful with the hot sugar—it can be a bit temperamental, but the results are absolutely worth it!
Why You’ll Love This Recipe
This hard candy recipe is not just about satisfying a sweet craving; it’s packed with so many wonderful benefits that you’ll find yourself making it again and again! Here are a few reasons why you’re going to adore this homemade treat:
- Quick preparation: With just 10 minutes of prep and 15 minutes of cooking, you can have delicious candy ready to enjoy in under 30 minutes!
- Customizable flavors: You can mix and match flavors to suit your taste. Whether you’re in the mood for classic peppermint or something zesty like lemon, the choice is yours!
- Perfect for gifts: Homemade candy makes a heartfelt gift. Wrap them up in a cute box or jar, and you’ll have a personal and thoughtful present for friends and family.
- Fun family activity: Making candy can be a great way to bond with kids or friends. Everyone can get involved in choosing flavors and colors!
- Store-bought quality: You can achieve that polished, store-bought look right from your kitchen! Plus, you know exactly what’s in it—no mystery ingredients here!
Seriously, once you whip up this hard candy, you’ll be hooked on the fun and creativity that comes with it. Trust me, it’s a sweet adventure you won’t want to miss!
Tips for Success
As you embark on your candy-making journey, I’ve got some pro tips to ensure your hard candy turns out perfectly every time! Trust me, these little nuggets of wisdom will make the process smoother and more enjoyable.
- Invest in a candy thermometer: This gadget is a game-changer! It helps you accurately measure the temperature, ensuring you hit that crucial 300°F mark for the hard crack stage. If you don’t have one, you can test the syrup by dropping a small amount into cold water—if it forms hard, brittle threads, you’re good to go!
- Be cautious with hot sugar: Sugar can reach incredibly high temperatures, so be super careful when handling it. Always use oven mitts or thick potholders, and keep kids and pets away from the cooking area while it’s heating up. Safety first!
- Don’t stir once it’s boiling: Once your mixture starts boiling, resist the urge to stir! This helps prevent crystallization, which can ruin the smooth texture of your candy.
- Experiment with flavors: Have fun trying different extracts! You can mix flavors for unique combinations—think vanilla with a hint of almond or even coconut! Just remember to stick to about 1 teaspoon for the best results.
- Cool it properly: Allow your candy to cool completely before breaking it into pieces. Rushing this step can lead to a sticky mess or uneven candy. Patience is key here!
- Store it right: Once your hard candy is ready, store it in an airtight container to keep it fresh and crunchy. If you live in a humid area, consider adding a piece of parchment paper between layers to prevent them from sticking together.
By keeping these tips in mind, you’ll be well on your way to creating stunning, delicious hard candy that will impress everyone! Happy candy making!
Variations
The beauty of making hard candy is that the flavor possibilities are practically endless! Once you’ve got the basic recipe down, you can let your creativity run wild. Here are some fun variations to inspire your next sweet adventure:
- Peppermint: This classic flavor is a holiday favorite! Just add 1 teaspoon of peppermint extract to your mixture right after removing it from the heat. You can also toss in some crushed peppermint candies for added texture.
- Lemon: For a refreshing citrus twist, use lemon extract instead of vanilla. A few drops of yellow food coloring will make your candy look as bright as it tastes!
- Cinnamon: Spice things up by adding 1 teaspoon of cinnamon extract. This warm flavor is perfect for fall and winter. You can even sprinkle a little cinnamon sugar on top before the candy cools for an extra touch.
- Cherry: If you’re craving something fruity, cherry extract is a delightful option! Just a teaspoon will give you that sweet, tart flavor, and a splash of red food coloring will make your candy pop.
- Green Apple: For a tart and tangy flavor, go for green apple extract. Mixing in a few drops of green food coloring will really capture that vibrant apple hue.
- Mixed Berry: Combine a few berry extracts like raspberry and blueberry for a juicy medley. Layer the colors for a beautiful striped effect—just pour one color, let it set slightly, then pour the next!
Feel free to get creative and mix flavors too! The more you experiment, the more unique and delicious combinations you’ll discover. Just remember to stick to around 1 teaspoon of extract for the best flavor payoff. Happy candy crafting!
Nutritional Information
When indulging in homemade hard candy, it’s good to know what you’re getting! Here’s a typical breakdown of the nutritional values per piece, based on standard ingredients:
- Calories: 50
- Sugar: 12g
- Carbohydrates: 13g
- Sodium: 0mg
- Fat: 0g
- Protein: 0g
- Cholesterol: 0mg
Keep in mind that these values are estimates and can vary based on the specific ingredients and flavors you choose. So, as you enjoy your sweet creations, you can have a little peace of mind knowing what’s in them! Happy candy munching!
FAQs
If you’re new to making hard candy, you might have a few questions. Don’t worry, I’ve got you covered! Here are some common queries and my answers to help ensure your candy-making adventure goes smoothly.
Why did my hard candy crystallize?
Crystallization can happen if the sugar syrup is stirred too much while it’s boiling or if it cools too quickly. To prevent this, avoid stirring once the mixture starts boiling and make sure to cool it slowly at room temperature. If you notice crystallization starting, you can try adding a bit of corn syrup or a teaspoon of vinegar to help keep it smooth next time!
How should I store my hard candy?
To keep your hard candy fresh and crunchy, store it in an airtight container. If you live in a humid area, it’s a good idea to add a piece of parchment paper between layers to prevent them from sticking together. This way, you can enjoy your sweet treats without worrying about them getting gooey!
Can I use other flavorings besides extracts?
Absolutely! While extracts are the most common, you can also use essential oils specifically labeled as food-safe. Just remember that they can be much stronger, so start with a few drops and adjust according to your taste. This opens up a whole new world of flavor possibilities for your hard candy!
How do I know when my candy is done cooking?
The key is reaching the right temperature—300°F (hard crack stage). A candy thermometer is your best friend here! If you don’t have one, you can drop a small amount of the syrup into cold water; if it forms hard, brittle threads, you’re good to go! Just keep a close watch to avoid burning!
Can I reheat the hard candy if it’s too sticky?
Yes, if your candy ends up a bit too sticky, you can gently reheat it in the microwave for a few seconds to soften it, then pour it back into a greased pan to cool again. Just be careful not to overheat it or it might burn!
I hope these answers help you feel more confident as you dive into the delightful world of homemade hard candy. Happy candy making!
Storage & Reheating Instructions
Once you’ve made your delicious hard candy, you’ll want to make sure it stays fresh and tasty for as long as possible! To do this, follow these simple storage tips:
- Store in an airtight container: After your candy has completely cooled and hardened, place it in an airtight container. This helps keep moisture out and maintains that satisfying crunch you love.
- Layer with parchment paper: If you have several layers of hard candy, consider placing a piece of parchment paper between each layer. This prevents them from sticking together and keeps them looking beautiful!
- Avoid humidity: Hard candy doesn’t like humidity at all! Try to store it in a cool, dry place away from any heat sources. If you live in a humid area, you might even want to store it in the fridge, but be sure to let it come back to room temperature before enjoying to avoid any stickiness.
If you find that your candy has gotten a little too sticky over time, don’t worry! You can gently reheat it to bring it back to life:
- Microwave method: Place the sticky candy in a microwave-safe bowl and heat it in short bursts of about 5-10 seconds. Keep an eye on it to avoid burning! Once it’s softened, you can pour it back into a greased pan to cool again.
- Stovetop method: Alternatively, you can reheat it in a saucepan over low heat, stirring gently until it softens. Just be careful not to let it get too hot!
With these storage and reheating tips, you’ll be able to enjoy your homemade hard candy at its best for days to come. Happy snacking!
Print
Hard Candy: 7 Comforting Recipes for Sweet Nostalgia
- Total Time: 25 minutes
- Yield: Approximately 20 pieces 1x
- Diet: Vegetarian
Description
A simple recipe for making hard candy at home.
Ingredients
- 2 cups granulated sugar
- 1 cup corn syrup
- 1/2 cup water
- Flavoring extract (1 teaspoon)
- Food coloring (optional)
Instructions
- Combine sugar, corn syrup, and water in a saucepan.
- Cook over medium heat until sugar dissolves.
- Increase heat and cook until mixture reaches 300°F (hard crack stage).
- Remove from heat and add flavoring and coloring.
- Pour into a greased pan and let it cool.
- Once cool, break into pieces.
Notes
- Be careful with hot sugar.
- Store in an airtight container.
- You can experiment with different flavors.
- Prep Time: 10 minutes
- Cook Time: 15 minutes
- Category: Candy
- Method: Stovetop
- Cuisine: American
Nutrition
- Serving Size: 1 piece
- Calories: 50
- Sugar: 12g
- Sodium: 0mg
- Fat: 0g
- Saturated Fat: 0g
- Unsaturated Fat: 0g
- Trans Fat: 0g
- Carbohydrates: 13g
- Fiber: 0g
- Protein: 0g
- Cholesterol: 0mg
Keywords: hard candy, homemade candy, candy recipe