
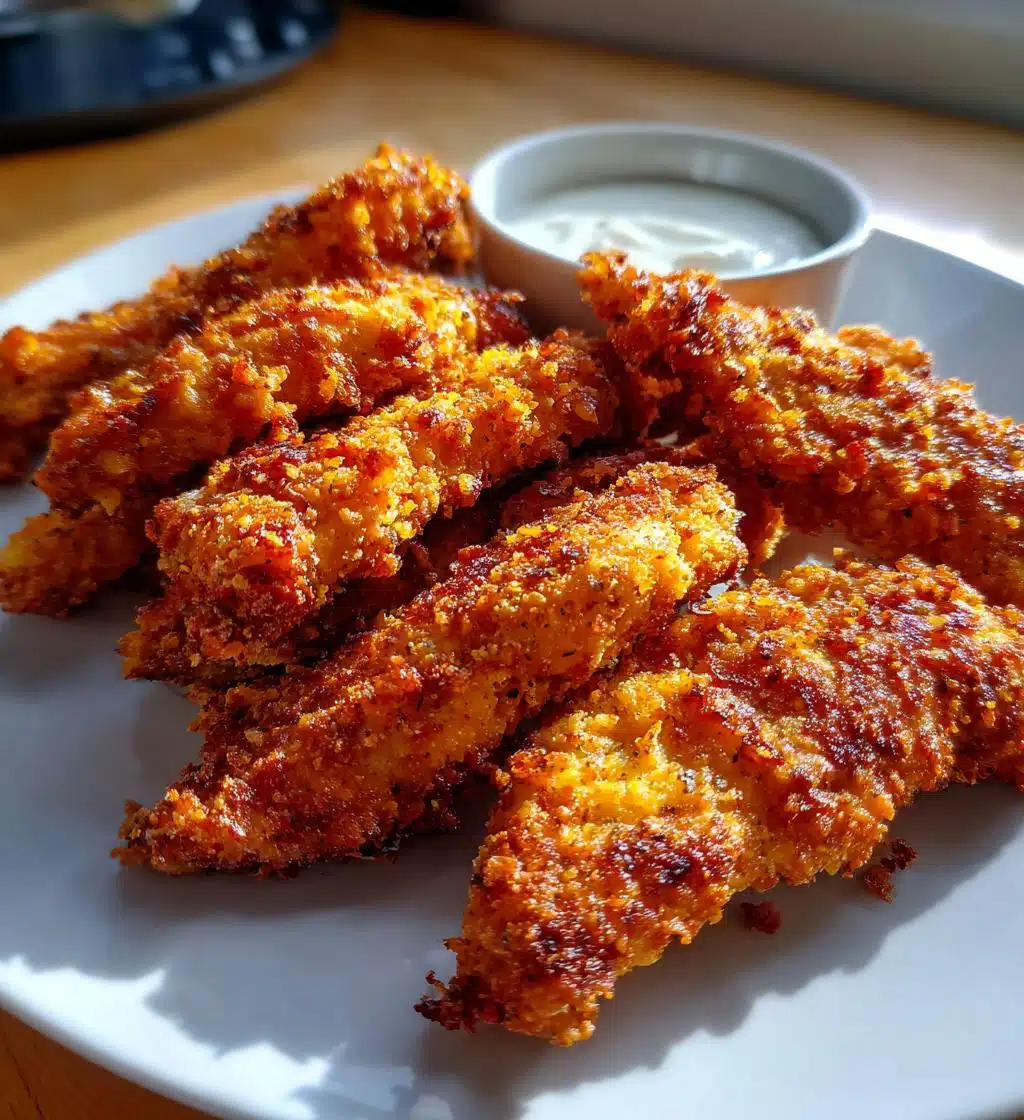
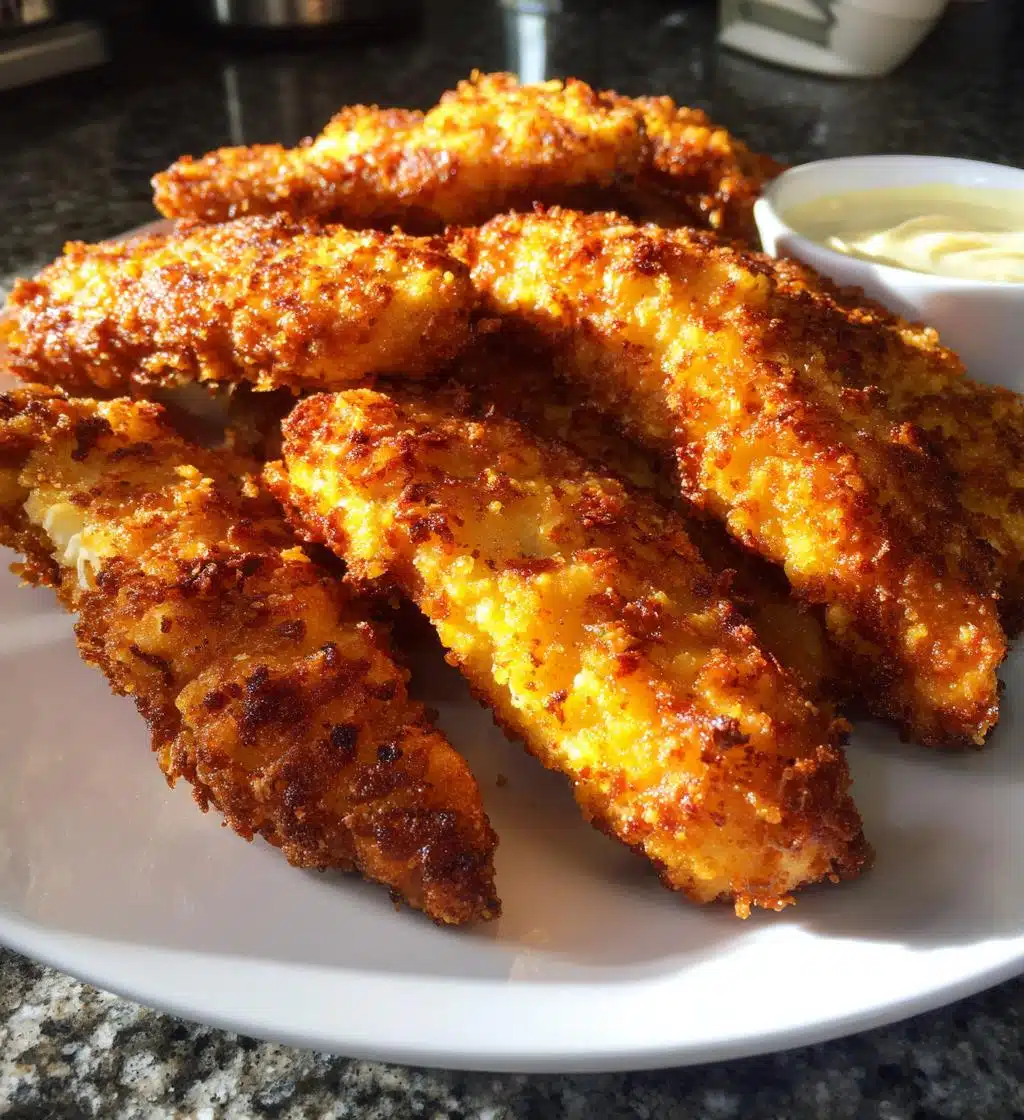
Oh my goodness, let me tell you about my absolute favorite buttermilk chicken tenders recipe! Seriously, these tenders are the epitome of crispy and tender perfection. The buttermilk marinade works its magic, making the chicken so juicy that every bite is a little piece of heaven. Whether it’s a cozy family dinner or a lively gathering with friends, these tenders steal the show every time! Trust me, when you serve these, you can expect happy faces and empty plates. So, let’s dive into this easy recipe that’s bound to become a staple in your home, too!
Ingredients List
- 1 lb chicken tenders: Fresh or frozen; if frozen, thaw them completely before marinating.
- 1 cup buttermilk: This is the key to tenderness! If you don’t have buttermilk, you can make a quick substitute by adding a tablespoon of vinegar or lemon juice to regular milk and letting it sit for 5 minutes.
- 1 cup all-purpose flour: This is what gives the tenders that lovely crispy coating.
- 1 tsp garlic powder: For that savory kick. Feel free to adjust based on your love for garlic!
- 1 tsp onion powder: Adds a depth of flavor that makes these tenders irresistible.
- 1 tsp paprika: This not only gives a nice color but also a subtle smokiness. You can use smoked paprika if you want a bolder flavor.
- 1 tsp salt: Essential for enhancing all the flavors.
- 1/2 tsp black pepper: A touch of spice to round out the seasoning.
- Oil for frying: Use a neutral oil with a high smoke point, like vegetable or canola oil, to achieve that perfect crispy texture.
How to Prepare the Buttermilk Chicken Tenders Recipe
Marinating the Chicken
First things first, you’ll want to marinate the chicken tenders in that glorious buttermilk! Just pop the tenders into a bowl or a resealable bag, pour in the buttermilk, and make sure they’re all coated. This step is super important because the buttermilk not only adds flavor but also helps tenderize the chicken, making it juicy and delicious. I usually let them soak for at least 2 hours, but if you can manage to let them sit overnight, you’ll be in for an even tastier treat!
Preparing the Coating
While the chicken is soaking up all that goodness, let’s get the coating ready! In a large bowl, mix together the flour, garlic powder, onion powder, paprika, salt, and black pepper. Stir it all up until it’s well combined—this is where the flavor magic happens! I love to make sure every grain of flour is seasoned, so don’t be shy about mixing. Now, set this bowl aside; we’ll use it in just a bit!
Frying the Chicken Tenders
Now for the fun part—frying! Heat a generous amount of oil in a frying pan over medium heat. You want it hot but not smoking—around 350°F (175°C) is perfect. Once the oil is ready, take each marinated chicken tender and dip it into your seasoned flour mixture, making sure to coat it well. Shake off any excess flour and gently place the tenders in the hot oil. Fry them for about 5-7 minutes on each side, or until they’re golden brown and cooked through. Oh, that sizzle is music to my ears!
Draining and Serving
Once they’re perfectly golden, carefully remove the tenders from the oil and let them drain on a plate lined with paper towels. This will help soak up any extra grease, keeping your tenders crispy! Serve them hot right away, and don’t forget to pair them with your favorite dipping sauce. Trust me, you’re going to want to dive into these right away—they’re too good to resist!
Tips for Success
If you want to ensure your buttermilk chicken tenders turn out perfectly every time, I’ve got some tried-and-true tips just for you! First, don’t skimp on the marinating time. The longer you let the chicken sit in that buttermilk, the more flavorful and tender it will be—aim for at least 2 hours, but overnight is even better!
Next up, seasoning is key! Feel free to adjust the spices in the coating to suit your taste. If you love a bit of heat, add some cayenne pepper to the flour mixture. For a more herbaceous flavor, try adding dried herbs like thyme or oregano. Just remember, taste your coating mix before you start frying to make sure it’s just right!
When it comes to frying, maintaining the right oil temperature is crucial. If your oil is too hot, your chicken will burn on the outside and stay raw inside. If it’s too cool, you’ll end up with soggy tenders. Use a meat thermometer to check that your oil is around 350°F (175°C) before adding the chicken. This way, you’ll achieve that gorgeous golden brown finish without any guesswork!
Lastly, once your tenders are out of the oil, let them drain on paper towels to keep them crispy. It’s tempting to dig in right away, but giving them a moment to rest will enhance their crunch. And trust me, you’ll want to savor every crispy, tender bite!
Nutritional Information
When it comes to enjoying my buttermilk chicken tenders, it’s always nice to know what you’re indulging in! Here are the estimated nutritional values for a typical serving size (which is about 1/4 of the recipe):
- Calories: 350
- Fat: 18g
- Saturated Fat: 3g
- Unsaturated Fat: 15g
- Trans Fat: 0g
- Cholesterol: 75mg
- Sodium: 600mg
- Carbohydrates: 25g
- Fiber: 1g
- Sugar: 1g
- Protein: 25g
These values are estimates based on the ingredients I use, so keep in mind that actual numbers may vary slightly depending on specific brands or cooking methods. But one thing’s for sure: you’re in for a deliciously satisfying treat that’s full of flavor and protein!
FAQ Section
Got questions about my buttermilk chicken tenders recipe? No worries, I’ve got you covered! Here are some common queries that pop up, along with my favorite tips and tricks.
Can I use chicken breasts instead of tenders?
Absolutely! You can cut boneless, skinless chicken breasts into strips to make your own tenders. Just keep in mind that cooking times might vary slightly, so be sure to check for doneness.
How long can I store leftovers?
If you have any leftovers (which is rare in my house!), you can store them in an airtight container in the fridge for up to 3 days. Just be sure to reheat them in the oven or air fryer to help regain that crispiness!
Can I freeze the chicken tenders?
Yes, you can freeze them! Just make sure they’re completely cooled, then place them in a freezer-friendly bag or container. They should last for about 2 months. To reheat, you can bake them straight from the freezer—just add a few extra minutes to the cooking time.
What dipping sauces go well with these chicken tenders?
The options are endless! My favorites include honey mustard, ranch dressing, or a spicy sriracha mayo. You could even whip up a tangy barbecue sauce for an extra kick. Go wild with your favorites!
Can I make these chicken tenders in the oven instead of frying?
Yes, you can! While they won’t be quite as crispy, you can bake them on a lined baking sheet at 400°F (200°C) for about 20-25 minutes, flipping halfway through. Just be sure to lightly spray them with oil to help with browning!
What if I don’t have buttermilk?
No problem! You can easily make a buttermilk substitute by mixing a tablespoon of vinegar or lemon juice with a cup of regular milk. Let it sit for about 5 minutes, and voila! You have a perfect buttermilk replacement.
Why You’ll Love This Recipe
- Quick and easy to prepare—perfect for busy weeknights!
- Crispy on the outside, tender and juicy on the inside.
- Buttermilk marinade adds incredible flavor and moisture.
- Great for family dinners or casual gatherings with friends.
- Customizable seasoning options to suit your taste.
- Pairs beautifully with a variety of dipping sauces.
- Leftovers (if there are any!) can be easily stored and reheated.
- A fun recipe to make together with kids or guests!
- Gluten-free option available with simple ingredient swaps.
- Always a crowd-pleaser—everyone loves homemade chicken tenders!
Storage & Reheating Instructions
Storing your leftover buttermilk chicken tenders is easy-peasy! Just make sure they’ve cooled down completely before you tuck them away. Place them in an airtight container and pop them in the fridge, where they’ll stay fresh for up to 3 days. If you have a lot of leftovers, you can also freeze them! Just wrap each tender individually in plastic wrap or place them in a freezer-friendly bag. They’ll be good for about 2 months.
Now, when it comes to reheating, you want to keep that crispy texture intact! For the best results, I recommend using an oven or an air fryer. Preheat your oven to 400°F (200°C) and arrange the tenders on a baking sheet. Bake for about 10-15 minutes, flipping them halfway through, until they’re heated through and crispy again. If you’re using an air fryer, set it to 375°F (190°C) for about 8-10 minutes, checking to make sure they’re warmed up and crunchy.
Microwaving is an option too, but it tends to make the coating a bit soggy. If you do use the microwave, place a paper towel under the tenders and use short intervals to heat them up. Just remember, the oven or air fryer is your best bet for keeping that delicious crunch! Enjoy every last bite, because these tenders are just too good to waste!
Print
Buttermilk Chicken Tenders Recipe: 5 Secrets to Perfection
- Total Time: 2 hours 30 minutes
- Yield: 4 servings 1x
- Diet: Gluten Free
Description
Crispy and tender buttermilk chicken tenders.
Ingredients
- 1 lb chicken tenders
- 1 cup buttermilk
- 1 cup all-purpose flour
- 1 tsp garlic powder
- 1 tsp onion powder
- 1 tsp paprika
- 1 tsp salt
- 1/2 tsp black pepper
- Oil for frying
Instructions
- Marinate chicken in buttermilk for at least 2 hours.
- Mix flour, garlic powder, onion powder, paprika, salt, and pepper in a bowl.
- Heat oil in a frying pan over medium heat.
- Dip marinated chicken in flour mixture, coating well.
- Fry chicken tenders until golden brown, about 5-7 minutes per side.
- Drain on paper towels and serve hot.
Notes
- Adjust seasoning to taste.
- Use a meat thermometer to ensure chicken is cooked through.
- Serve with your favorite dipping sauce.
- Prep Time: 15 minutes
- Cook Time: 15 minutes
- Category: Main Dish
- Method: Frying
- Cuisine: American
Nutrition
- Serving Size: 1 serving
- Calories: 350
- Sugar: 1g
- Sodium: 600mg
- Fat: 18g
- Saturated Fat: 3g
- Unsaturated Fat: 15g
- Trans Fat: 0g
- Carbohydrates: 25g
- Fiber: 1g
- Protein: 25g
- Cholesterol: 75mg
Keywords: buttermilk chicken tenders recipe