
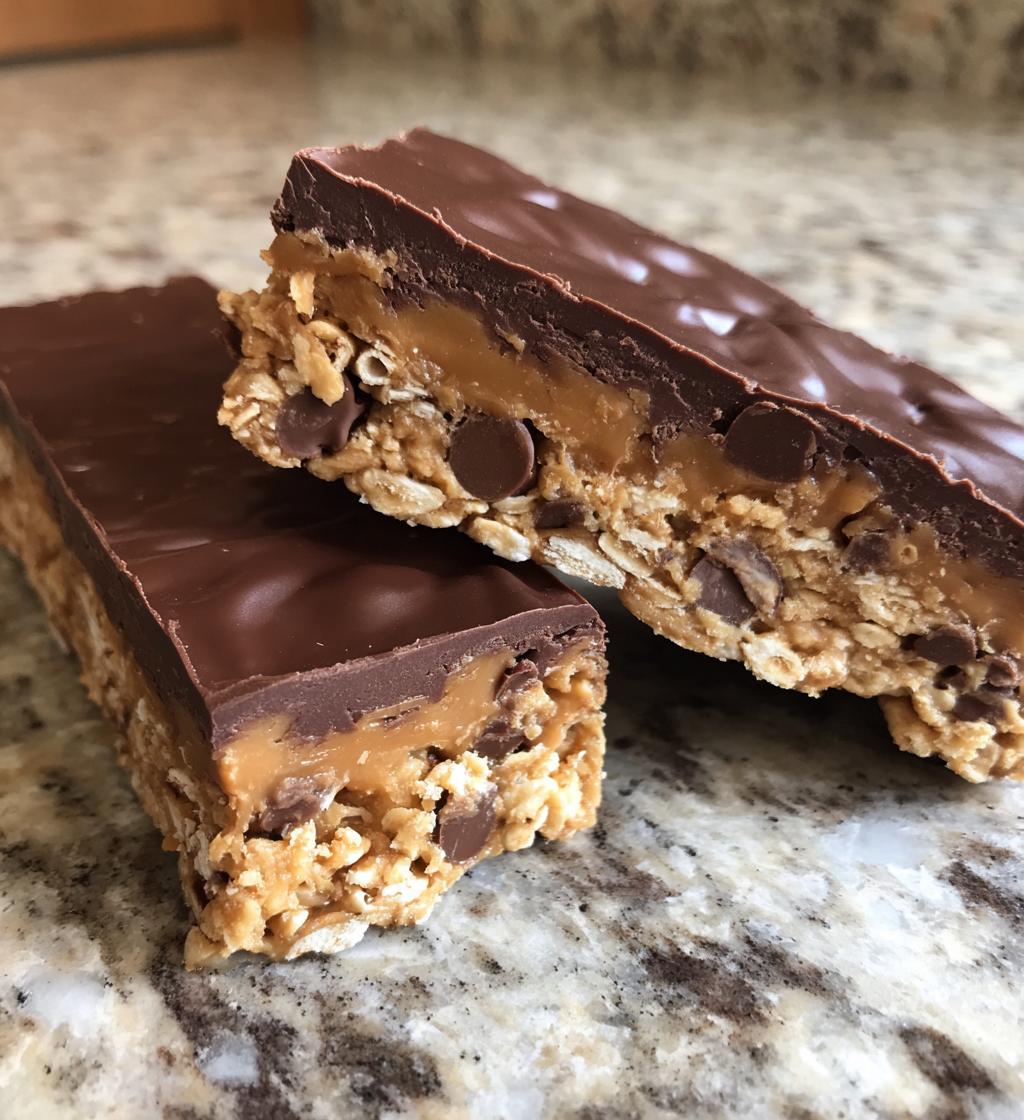
There’s something so delightful about quick snacks, isn’t there? I mean, who doesn’t love a treat that’s ready to go in no time? That’s where my no bake chocolate oat bars come in! They’re a total lifesaver when you need something sweet but don’t want to spend hours in the kitchen. Just a handful of simple ingredients, and you’ve got yourself a delicious, chewy bar that’s perfect for after-school snacks or a midday pick-me-up. I remember making these with my mom as a kid—what a joy it was to mix everything together and sneak some chocolate chips when no one was looking! Trust me, you’re going to want to whip these up and enjoy the nostalgia just like I do!

Ingredients
- 2 cups rolled oats – These are the base of our bars, giving them that hearty texture. Make sure to use rolled oats for the best chew!
- 1 cup creamy peanut butter – This adds richness and binds everything together. I love using the natural kind for a delicious flavor.
- 1/2 cup honey – This sweetener not only provides sweetness but also helps to hold the bars together. You can substitute with maple syrup if you prefer!
- 1/2 cup semi-sweet chocolate chips – The best part! These add the perfect touch of chocolatey goodness. Feel free to use dark chocolate chips for a richer taste.
How to Prepare No Bake Chocolate Oat Bars
Making these no bake chocolate oat bars is super simple, and I can’t wait to share the steps with you! Just follow along, and you’ll have a delicious treat ready to go in no time.
Step 1: Mix Base Ingredients
First things first—grab a large mixing bowl and combine the rolled oats, creamy peanut butter, and honey. I like to use a sturdy spatula or a wooden spoon to really get in there! Mix until everything is thoroughly combined, and you don’t see any dry oats. This part is key because it ensures your bars hold together nicely and have that perfect chewy texture. Don’t be shy; really get those ingredients to know each other!
Step 2: Add Chocolate Chips
Now, it’s time to add the chocolate chips! Gently fold them into the oat mixture, making sure they’re evenly distributed. You want every bite to have that sweet chocolate goodness, so take a moment here to avoid clumping. I always find myself sneaking a few chips at this stage—can you blame me?
Step 3: Press into Dish
Next, line a baking dish with parchment paper (this makes for easy removal later). Transfer your mixture into the dish and press it down firmly with your hands or a spatula. It’s important to make it even so that when you cut the bars, they’re all the same size! You want them to look as good as they taste, right? Don’t rush this step; a good press will help keep them together.
Step 4: Refrigerate
Once you’ve got everything pressed down, pop the dish into the fridge for at least 2 hours. This is crucial because it helps the bars set and firm up nicely. Trust me, waiting is the hardest part, but it’s so worth it!
Step 5: Cut and Serve
After the chilling time is up, take the dish out of the fridge and lift the bars out using the parchment paper. Place them on a cutting board and slice them into your desired bar size. I like to cut mine into 12 bars, but you can make them bigger or smaller depending on your cravings! Store any leftovers in an airtight container in the refrigerator, and they’ll stay fresh for about a week. Enjoy your delicious, chewy bars any time you need a quick snack!
Why You’ll Love This Recipe
- Quick and easy to make—perfect for busy days!
- No baking required, so there’s less mess to clean up.
- Nutritious—packed with oats and peanut butter for sustained energy.
- Customizable—add your favorite nuts, dried fruits, or even a sprinkle of sea salt on top!
- Kid-friendly and great for after-school snacks or lunchboxes.
- Deliciously satisfying with that perfect balance of chewy and chocolatey.
- Store them in the fridge for a quick grab-and-go treat whenever you need a sweet fix.
Tips for Success
Making the perfect no bake chocolate oat bars is all about a few little tricks that can elevate your bars to the next level. Trust me, these will make all the difference!
- Quality Ingredients: Use high-quality peanut butter for the best flavor. I love natural peanut butter that’s just ground peanuts and salt—no added sugars or oils. It makes a world of difference!
- Mixing Consistency: When you’re mixing the oats, peanut butter, and honey, make sure everything is well combined. You want a sticky, cohesive mixture that holds together well. If it feels too dry, a touch more honey will help!
- Pressing Technique: Don’t skip the pressing! Use a flat-bottomed spatula or even your hands to really compact the mixture into the dish. A firm press ensures your bars won’t crumble apart when you cut them.
- Chilling Time: I know it’s hard to wait, but resist the urge to cut them too early! The longer they chill, the firmer they’ll get. If you can, let them sit for 3 hours for that perfect texture.
- Customization: Feel free to get creative! You can mix in nuts, seeds, or even swap out the chocolate chips for dried fruit. Just remember to keep the ratios similar to maintain that chewy texture.
- Serving Suggestions: For an extra treat, drizzle some melted chocolate on top before chilling. It adds a beautiful finish and makes them even more decadent!
With these tips in your back pocket, you’ll be well on your way to crafting the most delicious no bake chocolate oat bars ever! Enjoy the process and have fun with it!
Nutritional Information
Here’s a quick look at the estimated nutritional values for each bar, which is based on the ingredients I typically use. Keep in mind that these values can vary slightly depending on the specific brands and types of ingredients you choose. But this should give you a good idea of what you’re munching on!
- Serving Size: 1 bar
- Calories: 150
- Fat: 7g
- Saturated Fat: 1g
- Unsaturated Fat: 6g
- Trans Fat: 0g
- Cholesterol: 0mg
- Sodium: 50mg
- Carbohydrates: 20g
- Fiber: 3g
- Sugar: 8g
- Protein: 4g
These no bake chocolate oat bars are not only delicious but also provide a nice balance of nutrients to keep you energized throughout the day. Enjoy knowing you’re treating yourself to something that’s both tasty and wholesome!
FAQ Section
Can I use different nut butters?
Absolutely! Almond butter, cashew butter, or even sunflower seed butter work great. Just keep in mind that each nut butter has its own flavor, so choose one you love!
How long do these bars last?
These no bake chocolate oat bars will keep in the refrigerator for about a week if stored in an airtight container. I find they taste best within the first few days, but they still hold up nicely!
Can I add other ingredients?
Of course! You can mix in nuts, seeds, dried fruit, or even a sprinkle of cinnamon for extra flavor. Just be mindful of the overall ratios so the texture stays perfect!
Can I make these bars vegan?
Yes! Simply substitute the honey with maple syrup or agave nectar, and you’ll have delicious vegan bars!
What’s the best way to cut these bars?
Using a sharp knife helps! I like to let them sit at room temperature for a few minutes before cutting to make it easier. Just be gentle to avoid crumbling!
Can I freeze these bars?
Yes, you can! Wrap them individually in plastic wrap or place them in an airtight container and freeze for up to 2 months. Thaw in the fridge before enjoying.
Storage & Reheating Instructions
Storing your no bake chocolate oat bars properly is key to keeping them fresh and delicious! Once you’ve cut them into bars, place them in an airtight container. I usually layer parchment paper between the bars to prevent them from sticking together—this way, you can grab one without any hassle!
Keep the container in the refrigerator, and they’ll stay good for about a week. If you want to enjoy them later, you can also freeze them! Just wrap each bar tightly in plastic wrap or place them in a freezer-safe container. They’ll last for up to 2 months in the freezer. When you’re ready to enjoy one, simply thaw it overnight in the fridge. No need to reheat—these bars are perfect served cold or at room temperature!
So, whether you’re grabbing one on the go or enjoying it as a sweet treat at home, you’ll always have a tasty snack ready and waiting for you!
Print
No Bake Chocolate Oat Bars: 7 Irresistible Reasons to Indulge
- Total Time: 2 hours 10 minutes
- Yield: 12 bars 1x
- Diet: Vegetarian
Description
Easy no bake chocolate oat bars for a quick treat.
Ingredients
- 2 cups rolled oats
- 1 cup peanut butter
- 1/2 cup honey
- 1/2 cup chocolate chips
Instructions
- In a bowl, mix oats, peanut butter, and honey until combined.
- Add chocolate chips and stir until evenly distributed.
- Press the mixture into a lined baking dish.
- Refrigerate for at least 2 hours.
- Cut into bars and serve.
Notes
- Store bars in the refrigerator.
- Customize with nuts or dried fruit if desired.
- Prep Time: 10 minutes
- Cook Time: 0 minutes
- Category: Snack
- Method: No Bake
- Cuisine: American
Nutrition
- Serving Size: 1 bar
- Calories: 150
- Sugar: 8g
- Sodium: 50mg
- Fat: 7g
- Saturated Fat: 1g
- Unsaturated Fat: 6g
- Trans Fat: 0g
- Carbohydrates: 20g
- Fiber: 3g
- Protein: 4g
- Cholesterol: 0mg
Keywords: no bake chocolate oat bars