
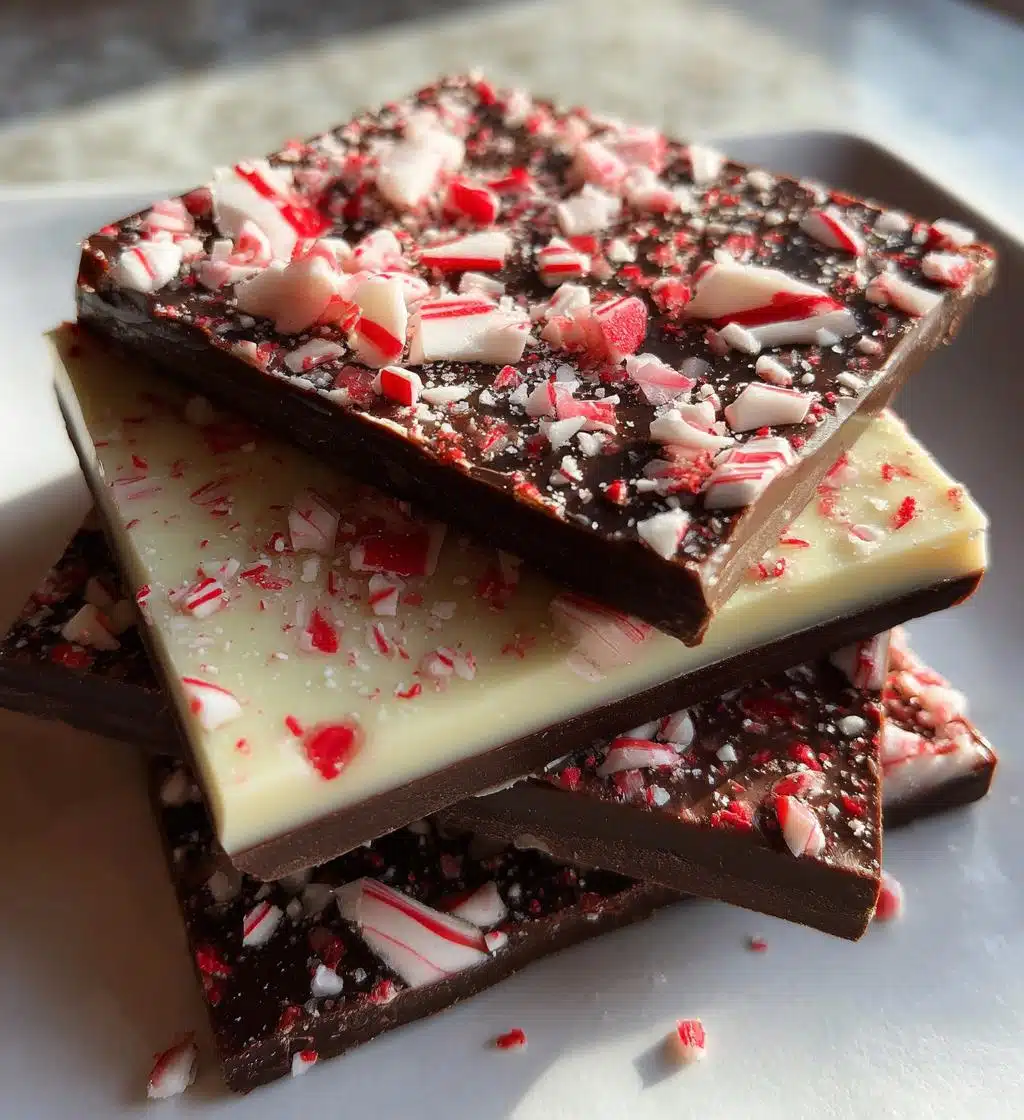
Oh, the joy of making peppermint treats during the holidays! There’s something so magical about the sweet and minty aroma wafting through the kitchen as you whip up delicious goodies. My absolute favorite has to be Peppermint Chocolate Bark for Christmas. It’s a festive favorite in my family, and every year, we gather around the kitchen to create this delightful treat together. I love how easy it is to make and how gorgeous it looks with its swirls of dark and white chocolate, topped with bright red crushed candy canes. It’s a tradition that sparks laughter and joy, as we inevitably end up with chocolate-covered fingers and giggles. Trust me, this bark not only tastes amazing but also brings the spirit of the season into your home!
Ingredients for Peppermint Chocolate Bark for Christmas
Gathering your ingredients is the first step to creating this festive delight! Here’s what you’ll need:
- 12 ounces of dark chocolate, chopped into smaller pieces for easier melting
- 12 ounces of white chocolate, also chopped
- 1 teaspoon of peppermint extract for that refreshing minty flavor
- 1 cup of crushed candy canes, which add a delightful crunch and festive flair
Make sure to use high-quality chocolate for the best taste! I always go for a dark chocolate that’s at least 60% cocoa for that rich, indulgent flavor. And don’t worry if you end up with some extra crushed candy canes; they can be used to top off other holiday treats or even sprinkled into hot cocoa. Yum!
How to Prepare Peppermint Chocolate Bark for Christmas
Now that you’ve gathered all your ingredients, let’s dive into the fun part—making this delightful peppermint chocolate bark! Follow these simple steps, and you’ll have a festive treat ready to impress your family and friends.
Step 1: Prepare the Baking Sheet
First things first, line a baking sheet with parchment paper. This is super important because it keeps your chocolate from sticking and makes cleanup a breeze. Just make sure you smooth out any wrinkles in the paper so that your chocolate sets evenly. Trust me, you’ll thank yourself later!
Step 2: Melt Dark Chocolate
Next up, it’s time to melt your dark chocolate. Place the chopped chocolate into a microwave-safe bowl and heat it in the microwave in 30-second intervals. Stir after each interval until the chocolate is completely melted and smooth. This should take about 1 to 2 minutes, but keep an eye on it! You don’t want to overheat it, or it’ll seize up on you, which would be such a bummer!
Step 3: Spread Dark Chocolate
Once your dark chocolate is beautifully melted, pour it onto the prepared baking sheet. Using a spatula, spread it out evenly to create a nice layer that’s about ¼ inch thick. Don’t worry about it being perfect; the more rustic, the better! Just make sure to get those edges covered too.
Step 4: Chill Dark Chocolate
Now it’s time to chill! Place the baking sheet in the fridge for about 30 minutes, or until the dark chocolate is set and firm to the touch. This is the perfect time to clean up your workspace or sip on some hot cocoa, right?
Step 5: Melt White Chocolate
While the dark chocolate is chilling, let’s get that white chocolate ready! Just like before, place the chopped white chocolate into another microwave-safe bowl and melt it using the same 30-second intervals, stirring in between. Once it’s smooth, stir in the peppermint extract for that wonderful holiday flavor—this is where the magic happens!
Step 6: Spread White Chocolate
Now, carefully pour and spread the melted white chocolate over the set dark chocolate layer. Use your spatula to gently spread it out, making sure to cover the dark chocolate completely. The contrast of the white on dark is just stunning!
Step 7: Add Candy Canes
Before the white chocolate sets, sprinkle the crushed candy canes all over the top. This is where you can go a little wild! I love to add a generous amount for that perfect crunch and festive flair. Plus, that pop of red and white is just too pretty to resist!
Step 8: Chill Again
Time for another chill session! Pop the baking sheet back into the fridge for about 1 hour, or until the chocolate is completely set. The anticipation is real, but it’ll be worth the wait!
Step 9: Break and Serve
Once the chocolate is fully set, remove it from the fridge and let it sit at room temperature for a few minutes. Then, break it into pieces—don’t worry about making them uniform; the rustic look adds to the charm! Serve them up on a festive platter, and watch everyone light up when they take a bite of this delicious bark!
Why You’ll Love This Recipe
Oh my goodness, where do I even start? One of the best things about Peppermint Chocolate Bark for Christmas is just how quick and easy it is to whip up! Seriously, this no-bake treat comes together in no time, making it perfect for those busy holiday moments when you want to impress without spending hours in the kitchen.
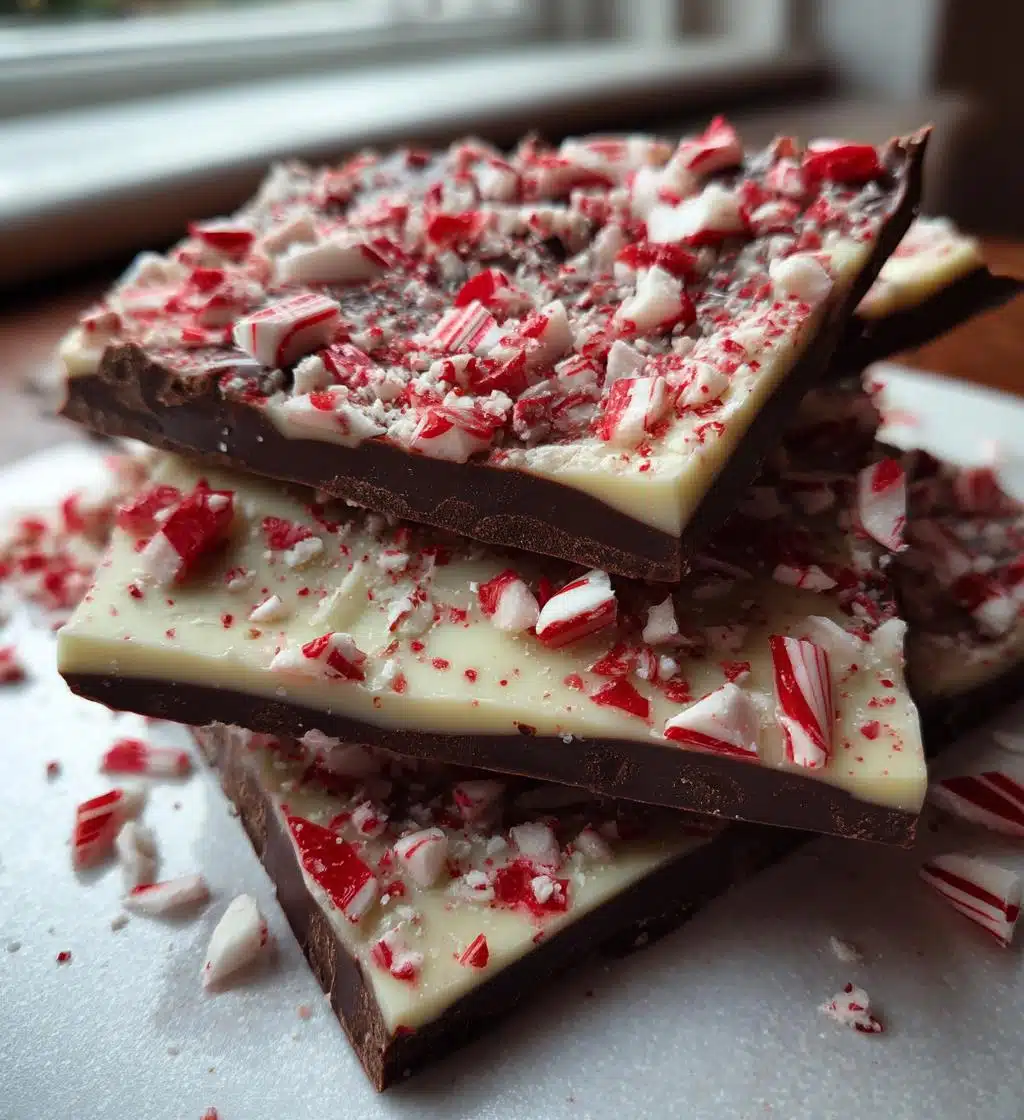
And let’s talk about the appearance! The stunning contrast of dark and white chocolate, topped with vibrant red crushed candy canes, makes for a festive centerpiece that’s sure to wow your guests. It looks like you put in a ton of effort when, in reality, it’s so simple. You’ll feel like a holiday rockstar!
But the best part? The flavor! The rich, creamy chocolate paired with that refreshing peppermint kick is absolutely heavenly. It’s like a sweet hug for your taste buds! Trust me, every bite will transport you to a winter wonderland, and it’s a treat that’s loved by kids and adults alike. You’ll find yourself making this year after year, and I can almost guarantee it will become a cherished holiday tradition in your home!
Tips for Success
Let’s make sure your Peppermint Chocolate Bark for Christmas turns out perfectly every time! Here are my top tips for success that will have you feeling like a pro in the kitchen.
- Quality Chocolate Matters: Use good quality chocolate for the best flavor. I always opt for chocolate that contains at least 60% cocoa for the dark chocolate. It makes all the difference in taste!
- Melting Chocolate: When melting chocolate, you can use either the microwave or a double boiler. If you prefer the microwave, remember to melt it in short bursts of 30 seconds, stirring in between to ensure it doesn’t burn. If you’re using a double boiler, keep the water simmering gently, and stir the chocolate until it’s smooth.
- Adjusting Mint Flavor: The mint flavor is so key to this recipe! If you love a strong peppermint kick, feel free to add a little extra peppermint extract. Just be cautious not to overdo it—start with a little and taste as you go!
- Crushed Candy Canes: For the best crunch, crush your candy canes just before using them. I find it easier to put them in a resealable bag and give them a good whack with a rolling pin. This way, you can control the size of the pieces, and it adds a fun element to the process!
- Even Spreading: When spreading the melted chocolate, use an offset spatula or the back of a spoon for a smooth finish. Don’t rush this step; take your time to make sure it’s even for that beautiful presentation.
- Storage Tip: Always store your bark in an airtight container to keep it fresh. It can last up to two weeks—but I doubt it will stick around that long!
With these tips in your back pocket, you’ll be ready to create the most delicious peppermint chocolate bark that will wow your family and friends this holiday season! Enjoy the process and happy baking!
Storage & Reheating Instructions
Now that you’ve made this delightful Peppermint Chocolate Bark for Christmas, let’s talk about how to store those yummy leftovers! First off, make sure to let the bark cool completely at room temperature before you store it. Once it’s set and cool, place the pieces in an airtight container. This is super important because it keeps the bark fresh and prevents any pesky moisture from ruining that perfect crunch!
You can store the container at room temperature for up to two weeks, but I have a feeling it won’t last that long in your house! If you want to keep it longer, you can pop it in the fridge, where it will stay fresh for a few extra days. Just make sure to let it come to room temperature before serving, so it’s nice and melt-in-your-mouth delicious!
As for reheating? You actually don’t need to! The beauty of this bark is that it’s best enjoyed straight from the container. So no need to fuss with ovens or microwaves—just grab a piece and indulge in that sweet, pepperminty goodness!
Nutritional Information
So, you might be curious about what’s packed into each delightful piece of Peppermint Chocolate Bark for Christmas! Here’s an estimated breakdown of the nutritional values per piece:
- Calories: 150
- Sugar: 14g
- Fat: 9g
- Saturated Fat: 5g
- Unsaturated Fat: 3g
- Trans Fat: 0g
- Carbohydrates: 17g
- Fiber: 1g
- Protein: 2g
- Cholesterol: 5mg
- Sodium: 20mg
Keep in mind that these values are just estimates, as they can vary based on the specific ingredients you use. But hey, a little indulgence during the holidays is totally worth it, right? Enjoy every delicious bite of this festive treat without any guilt!
FAQ about Peppermint Chocolate Bark for Christmas
Can I use different types of chocolate?
Absolutely! While I love the combination of dark and white chocolate, you can switch it up and use milk chocolate instead of dark chocolate if you prefer something sweeter. Just keep in mind that the flavor will be a bit different, but still delicious!
How do I crush the candy canes?
Great question! The easiest way is to place the candy canes in a resealable plastic bag and give them a good whack with a rolling pin or a heavy pan. This way, you can control the size of the pieces. Just be careful not to create a fine powder—aim for a mix of small chunks and bits for that perfect crunch!
Can I make this bark ahead of time?
Yes! Peppermint Chocolate Bark for Christmas is perfect for making ahead of time. You can whip it up a few days in advance, store it in an airtight container, and it will stay fresh for up to two weeks. Just make sure to keep it in a cool, dry place to maintain that delightful crunch!
What can I do with leftover peppermint extract?
Oh, there are so many fun uses for leftover peppermint extract! You can add it to your hot chocolate, holiday cookies, or even homemade whipped cream for a festive twist. It’s a versatile ingredient that can spice up many of your holiday treats!
Why did my bark not set properly?
If your bark didn’t set, it could be due to a few reasons. Make sure you melted the chocolate properly—overheating can cause it to lose its ability to harden. Also, be sure to chill it long enough; if it’s still warm when you try to break it, it might be too soft. Patience is key, my friend!
Peppermint Chocolate Bark for Christmas: 9 Steps to Joy
- Total Time: 1 hour 25 minutes
- Yield: 24 pieces 1x
- Diet: Vegetarian
Description
Delicious peppermint chocolate bark perfect for Christmas.
Ingredients
- 12 ounces dark chocolate
- 12 ounces white chocolate
- 1 teaspoon peppermint extract
- 1 cup crushed candy canes
Instructions
- Line a baking sheet with parchment paper.
- Melt dark chocolate in a microwave-safe bowl.
- Spread the melted dark chocolate onto the prepared baking sheet.
- Chill until set, about 30 minutes.
- Melt white chocolate and stir in peppermint extract.
- Spread the melted white chocolate over the dark chocolate layer.
- Sprinkle crushed candy canes over the top.
- Chill until completely set, about 1 hour.
- Break into pieces and serve.
Notes
- Store in an airtight container.
- Can use milk chocolate instead of dark chocolate.
- Adjust mint flavor to taste.
- Prep Time: 20 minutes
- Cook Time: 5 minutes
- Category: Dessert
- Method: No-Bake
- Cuisine: American
Nutrition
- Serving Size: 1 piece
- Calories: 150
- Sugar: 14g
- Sodium: 20mg
- Fat: 9g
- Saturated Fat: 5g
- Unsaturated Fat: 3g
- Trans Fat: 0g
- Carbohydrates: 17g
- Fiber: 1g
- Protein: 2g
- Cholesterol: 5mg
Keywords: Peppermint Chocolate Bark for Christmas