

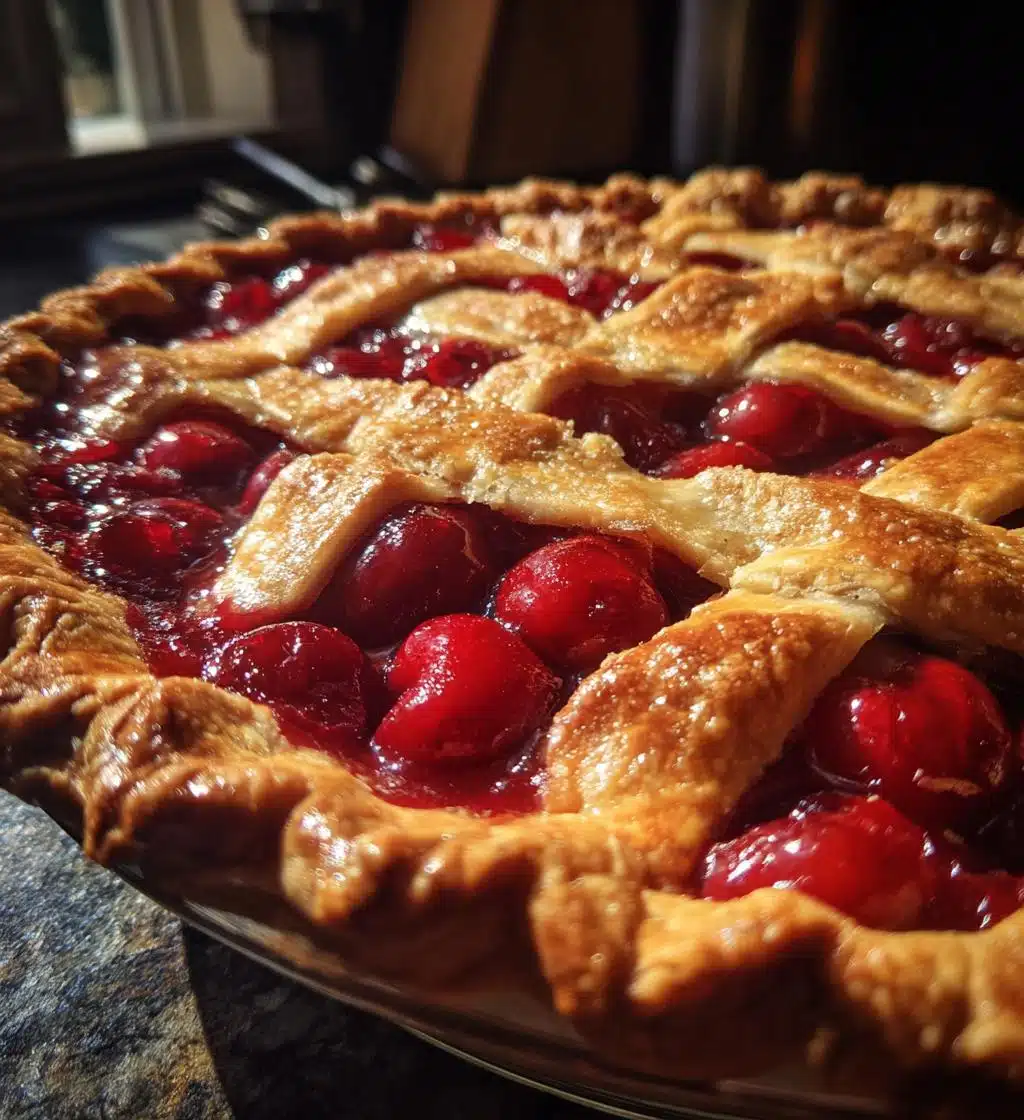
There’s something magical about Christmas Cherry Pie that just lights up the holiday season! The vibrant red cherries nestled in a flaky crust always remind me of cozy evenings spent with family, gathering around the table, with laughter and stories filling the air. I remember the first time I made this pie; I was just a kid, and my grandma let me help with the filling. The smell of those bubbling cherries on the stove was absolutely irresistible! Trust me, this festive cherry pie is the perfect centerpiece for your Christmas celebrations, bringing joy and sweet memories to every bite!
Ingredients for Christmas Cherry Pie
- 2 cups pitted fresh or frozen cherries
- 1 cup granulated sugar
- 1/4 cup cornstarch
- 1 tablespoon lemon juice
- 1 teaspoon vanilla extract
- 1/4 teaspoon almond extract
- 1 tablespoon butter, cut into small pieces
- 1 package pie crusts (contains 2 crusts)
When you’re gathering these ingredients, make sure the cherries are nice and ripe if you’re using fresh ones. And if you’re going the frozen route, just let them thaw a bit first. The combination of flavors here is what makes this Christmas Cherry Pie so delightful, so don’t skip on the vanilla and almond extracts—they add a lovely depth! Happy baking!
How to Prepare Christmas Cherry Pie
Preheat the Oven
First things first, let’s preheat that oven to 425°F (220°C). This step is super important because a hot oven helps the crust to bake perfectly golden and flaky. It also gets your kitchen smelling amazing right from the start! So, while you’re prepping your ingredients, just let that oven do its thing and get nice and toasty.
Prepare the Cherry Filling
Now, let’s dive into the cherry filling! In a medium saucepan, toss together your beautiful pitted cherries, granulated sugar, cornstarch, lemon juice, vanilla extract, and almond extract. Turn the heat to medium and keep stirring until the mixture starts to bubble and thicken up—this usually takes about 5-7 minutes. You’ll want to keep a close eye on it, as it can go from thickening to bubbling over in a flash! Once it’s bubbling and looks glossy, remove it from the heat and let it cool a bit. The aroma will be heavenly, so enjoy it!
Assemble the Pie
Alright, it’s time to assemble our masterpiece! Grab your first pie crust and gently lay it in your pie pan. Make sure it fits snugly! Now, pour in that glorious cherry filling, making sure to spread it out evenly. Don’t skimp on those cherries—load it up! Then, sprinkle those little butter pieces on top of the filling; this will add an extra richness to your pie. Next, take the second pie crust and carefully place it over the filling. Pinch the edges to seal them up tight, and don’t be afraid to get a little creative with your crimping—this is your pie after all! Finally, grab a sharp knife and cut a few slits in the top crust to let the steam escape while it bakes.
Bake the Pie
Now, let’s get that pie in the oven! Bake it for about 30-35 minutes, or until the crust is beautifully golden brown and you can see the cherry filling bubbling through those slits. Keep an eye on it towards the end—every oven is a little different, and you want to avoid any burnt edges. Once it’s out, let it cool for a few minutes before serving. Your Christmas Cherry Pie is almost ready to be the star of your holiday feast!
Tips for Success
Making a scrumptious Christmas Cherry Pie is all about those little details! Here are my top tips to ensure your pie turns out perfectly every time:
- Use Quality Cherries: Whether you choose fresh or frozen, make sure your cherries are ripe and sweet! If you’re using frozen cherries, let them thaw and drain any excess juice to prevent a soggy crust.
- Don’t Skip the Cornstarch: This ingredient is crucial for thickening the filling. It helps bind the juices from the cherries, giving you that luscious filling without a watery mess.
- Watch the Baking Time: Keep an eye on your pie as it bakes! Ovens can vary, so start checking around the 30-minute mark. You want a golden-brown crust and bubbling filling.
- Let It Cool: After baking, allow your pie to cool for about 10-15 minutes before slicing. This resting time helps the filling set up a bit more, making for cleaner slices!
- Experiment with Spices: For a little twist, try adding a pinch of cinnamon or nutmeg to the cherry filling. It adds a warm, festive flavor that pairs beautifully with the cherries.
- Keep It Simple: If you’re new to making pies, don’t stress about making your crust look perfect. A rustic look adds charm and character to your pie!
Follow these tips, and you’ll be well on your way to baking the most delightful Christmas Cherry Pie that everyone will rave about. Happy baking, my friend!
Variations on Christmas Cherry Pie
Now, let’s talk about some fun and creative ways to jazz up your Christmas Cherry Pie! While the classic version is absolutely delicious, experimenting with different flavors and ingredients can make your pie even more special. Here are some ideas to get your culinary creativity flowing:
- Spiced Cherry Delight: Add a pinch of cinnamon or nutmeg to the cherry filling for a warm, cozy flavor that screams holiday spirit. You can even toss in a bit of allspice for an extra layer of spice!
- Berry Medley: Mix in some blueberries or raspberries with the cherries for a delightful berry blend. The combination of flavors will add a beautiful burst of color and taste to your pie.
- Almond Joy: If you love the flavor of almonds, try adding some chopped almonds to the filling or even drizzle a bit of almond extract over the top crust before baking. It adds a lovely nuttiness!
- Chocolate Cherry: For the chocolate lovers out there, sprinkle some mini chocolate chips into the cherry filling. The rich chocolate pairs beautifully with the tart cherries for a decadent twist.
- Maple Glaze: Instead of sugar, use pure maple syrup in the filling for a unique sweetener that lends a lovely depth of flavor. Just reduce the sugar a bit to balance it out!
- Different Crusts: Switch things up by using a graham cracker crust or a crumbly oat crust instead of the traditional pie crust. It adds a delightful crunch and a new texture to your pie!
Feel free to mix and match these variations to create a Christmas Cherry Pie that’s uniquely yours. After all, the best part of baking is making it your own! Enjoy the process and let your taste buds lead the way!
Storage & Reheating Instructions
Once you’ve enjoyed your delicious Christmas Cherry Pie, you might find yourself with some leftovers—if you’re lucky! To keep your pie tasting fresh, store it in the refrigerator. Just cover it loosely with plastic wrap or foil to prevent it from drying out. It should stay good for about 3-4 days, but trust me, it’s best enjoyed within the first couple of days!
When you’re ready to enjoy a slice (or two!), you can serve it cold straight from the fridge, but if you want to warm it up a bit, here’s how to do it without sacrificing that lovely flaky crust:
- Oven Method: Preheat your oven to 350°F (175°C). Place the pie on a baking sheet and cover it loosely with aluminum foil to keep the crust from getting too brown. Heat for about 15-20 minutes, or until warmed through. The foil will help keep it nice and moist!
- Microwave Method: If you’re in a hurry, you can pop a slice in the microwave for about 30 seconds to 1 minute. Be cautious, as microwaving can make the crust a bit chewy rather than crispy, but it’s a quick fix when you’re craving that sweet cherry goodness!
Whichever method you choose, don’t forget to add a dollop of whipped cream or a scoop of vanilla ice cream on top for that extra special touch. Enjoy every bite of your festive creation, even days after the holiday celebration!
Nutritional Information
Now, let’s talk numbers! Here’s the estimated nutritional data for one slice of this delightful Christmas Cherry Pie:
- Calories: 250
- Sugar: 20g
- Fat: 8g
- Protein: 2g
- Carbohydrates: 40g
Keep in mind that these values are estimates, and they can vary based on the specific ingredients you use. But hey, that’s part of the fun of baking at home! Enjoy your slice of holiday cheer, and remember, it’s all about balance and savoring those sweet moments with loved ones during this festive season!
Why You’ll Love This Recipe
This Christmas Cherry Pie is not just a dessert; it’s an experience that brings warmth and joy to your holiday celebrations! Here’s why you’ll absolutely adore making and sharing this pie:
- Festive Appeal: The vibrant red cherries and flaky crust scream holiday cheer, making it a perfect centerpiece for your Christmas table!
- Easy to Prepare: With just a few simple ingredients and straightforward steps, even novice bakers can whip this pie up with confidence.
- Delicious Flavor: The sweet, tart cherry filling paired with hints of vanilla and almond creates a flavor explosion that’s oh-so-satisfying!
- Versatile Treat: Serve it warm, at room temperature, or with a scoop of ice cream—there’s no wrong way to enjoy it!
- Great for Sharing: This pie yields 8 generous slices, making it perfect for family gatherings or holiday parties.
- Customizable: Feel free to experiment with spices or mix in other fruits for a unique twist—every batch can be a little different!
Trust me, once you take that first bite, you’ll understand why this Christmas Cherry Pie has a special place in my heart and in the hearts of everyone who gets to enjoy it!
FAQ Section
Got questions about making this fabulous Christmas Cherry Pie? Don’t worry, I’ve got you covered! Here are some common inquiries and my best answers to help you bake the perfect pie:
Can I use frozen cherries instead of fresh?
Absolutely! Frozen cherries work wonderfully in this recipe. Just make sure to let them thaw and drain any excess liquid before using them in the filling. It’ll still taste just as delicious and save you some prep time!
What can I substitute for cornstarch?
If you don’t have cornstarch on hand, you can use all-purpose flour as a thickener. Just use about twice the amount—so, 1/2 cup of flour instead of 1/4 cup of cornstarch. The filling might be a tad thicker, but it will still hold together beautifully!
How do I prevent a soggy crust?
Great question! To help keep your crust from getting soggy, make sure to cook the cherry filling until it’s thick and bubbly before pouring it into the crust. Also, you can brush the bottom crust with a bit of melted butter before adding the filling. This adds a barrier and keeps the crust nice and flaky!
Can I make this pie ahead of time?
You sure can! You can prepare the pie in advance, just don’t bake it until you’re ready to serve. Cover it tightly with plastic wrap and store it in the fridge for up to a day. When you’re ready, pop it in the oven and bake it to perfection!
What’s the best way to serve Christmas Cherry Pie?
Oh, there are so many delightful ways! You can serve it warm with a scoop of vanilla ice cream or a dollop of whipped cream for that extra indulgence. If you prefer it cold, it’s still delicious straight from the fridge. Either way, it’s sure to be a hit!
Can I use a different type of fruit?
Definitely! While cherries are the star of this recipe, feel free to get creative. You can try using blueberries, raspberries, or even a mix of different fruits. Just keep in mind that the sweetness and tartness may vary, so adjust the sugar accordingly!
How can I store leftovers?
To keep your pie fresh, simply cover it loosely with plastic wrap or foil and store it in the refrigerator. It should last for about 3-4 days. If you somehow have any left after that, I doubt it will last long enough to worry about!
I hope these FAQs help you on your baking journey! Remember, every pie is a little adventure in the kitchen, so don’t be afraid to experiment and have fun with it. Happy baking!
Print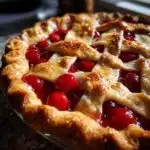
Christmas Cherry Pie: 7 Irresistible Reasons to Bake
- Total Time: 50 minutes
- Yield: 8 servings 1x
- Diet: Vegetarian
Description
A festive cherry pie perfect for Christmas celebrations.
Ingredients
- 2 cups fresh or frozen cherries
- 1 cup granulated sugar
- 1/4 cup cornstarch
- 1 tablespoon lemon juice
- 1 teaspoon vanilla extract
- 1/4 teaspoon almond extract
- 1 tablespoon butter
- 1 package pie crusts (2 crusts)
Instructions
- Preheat the oven to 425°F (220°C).
- In a saucepan, combine cherries, sugar, cornstarch, lemon juice, vanilla, and almond extract.
- Cook over medium heat until the mixture bubbles and thickens.
- Remove from heat and let it cool.
- Place one pie crust in a pie pan and fill it with the cherry mixture.
- Add small pieces of butter on top of the filling.
- Cover with the second pie crust and seal the edges.
- Cut slits in the top crust for steam to escape.
- Bake for 30-35 minutes until the crust is golden brown.
Notes
- Serve warm or at room temperature.
- Add whipped cream for extra flavor.
- Store leftovers in the refrigerator.
- Prep Time: 15 minutes
- Cook Time: 35 minutes
- Category: Dessert
- Method: Baking
- Cuisine: American
Nutrition
- Serving Size: 1 slice
- Calories: 250
- Sugar: 20g
- Sodium: 150mg
- Fat: 8g
- Saturated Fat: 3g
- Unsaturated Fat: 5g
- Trans Fat: 0g
- Carbohydrates: 40g
- Fiber: 2g
- Protein: 2g
- Cholesterol: 10mg
Keywords: Christmas Cherry Pie, dessert, holiday pie