
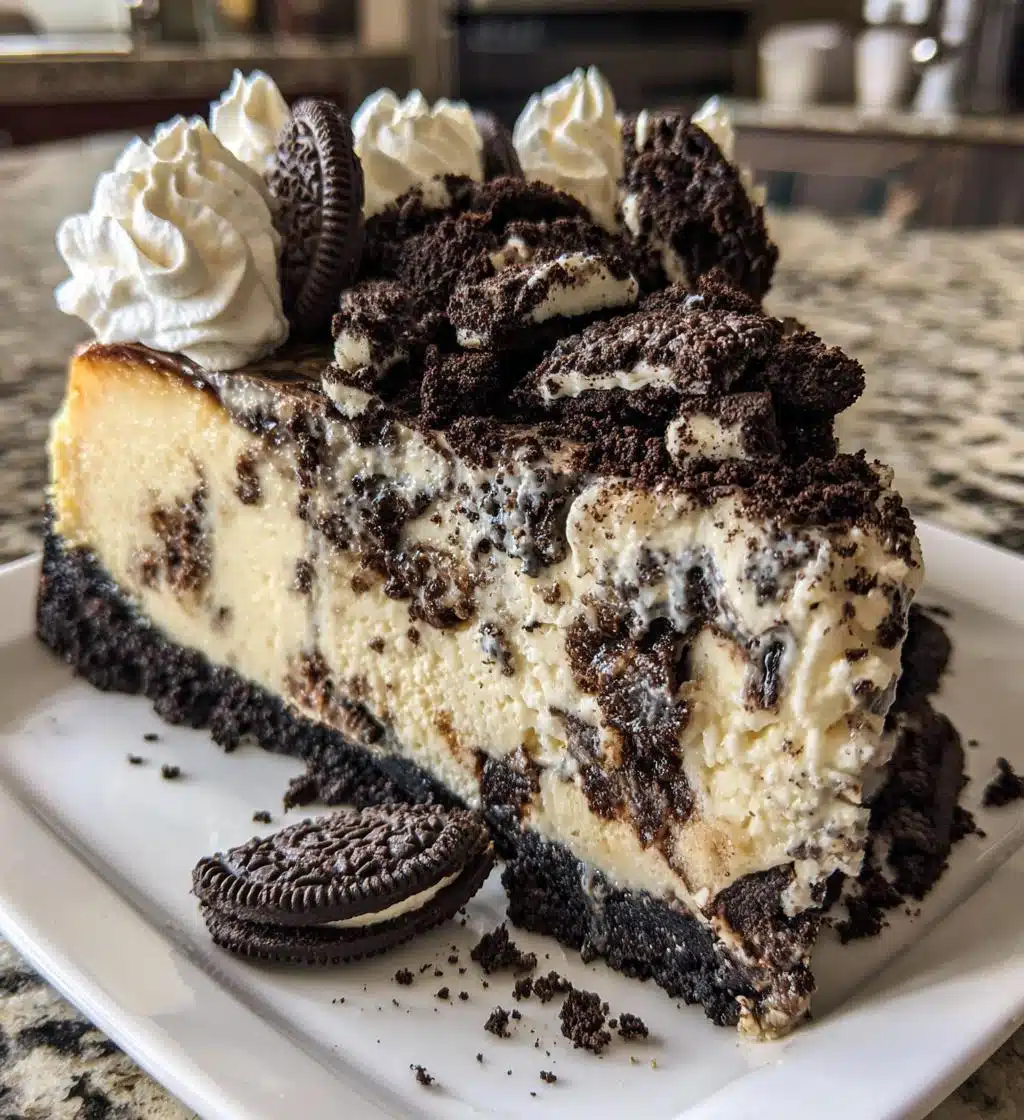
Oh my goodness, let me tell you about this Oreo cheesecake! It’s seriously one of my all-time favorite desserts. I remember the first time I made it—it was for a family gathering, and I was a little nervous. But as soon as I took that first bite, I knew I had hit the jackpot! The richness of the cream cheese combined with those delightful chunks of Oreo cookies just makes my taste buds dance with joy. And the crust? Don’t even get me started! It’s the perfect blend of crunch and creaminess. Every time I whip up this cheesecake, it brings smiles and happy memories. Trust me, whether it’s a birthday, a holiday, or just a cozy night in, this Oreo cheesecake is always the star of the show!
Ingredients List
Gather these simple ingredients to create your delicious Oreo cheesecake. I’ve made sure to specify how to prepare them for the best results.
- 24 Oreo cookies, crushed (this will be for the crust and the filling)
- 1/4 cup unsalted butter, melted (this helps bind the crust together)
- 2 cups cream cheese, softened (make sure it’s at room temperature for a smooth mix)
- 1 cup granulated sugar (this sweetens the cheesecake beautifully)
- 1 teaspoon vanilla extract (for that lovely hint of flavor)
- 3 large eggs (bring them to room temperature for easier mixing)
- 1 cup sour cream (adds creaminess and tang)
- 1 cup whipped cream (this lightens the filling and makes it extra fluffy)
- Additional Oreo cookies for topping (because you can never have too many Oreos!)
How to Prepare Oreo Cheesecake
Preheat the Oven
First things first, you’ll want to preheat your oven to 325°F (163°C). Preheating is super important because it helps ensure that your cheesecake bakes evenly. If you skip this step, the texture can end up all wonky, and we definitely don’t want that! So, while you’re gathering your ingredients, go ahead and get that oven warming up.
Make the Crust
Now, let’s talk about the crust! In a mixing bowl, combine those crushed Oreo cookies with the melted butter. You want the mixture to be well combined and look a bit like wet sand—this helps it hold together beautifully. Once it’s mixed, press it firmly into the bottom of your springform pan. Make sure it’s an even layer; this crust is going to be the perfect crunchy base for our rich filling. It should feel solid and sturdy when you’re done!
Prepare the Filling
Alright, time for the star of the show: the filling! In a large bowl, beat your softened cream cheese until it’s super smooth—this is key for a creamy cheesecake. Then, add in the granulated sugar and vanilla extract, mixing until everything is combined. Next, add the eggs one at a time, making sure to mix well after each addition. This helps create a silky batter! Now, gently fold in the sour cream and whipped cream until just combined. This will make your filling light and fluffy—yum!
Combine with Oreos
Now that your filling is looking fabulous, it’s time to add those crushed Oreos. Gently stir them into the mixture, ensuring they’re evenly distributed without over-mixing. You want those delicious cookie chunks throughout the filling for that classic Oreo flavor in every bite!
Bake the Cheesecake
Pour that luscious batter over your prepared crust, smoothing the top with a spatula. Pop it in the oven and bake for 55-60 minutes. You’ll know it’s done when the edges are set, but the center still has a slight jiggle. Don’t worry, it will firm up as it cools!
Cooling and Refrigeration
Once baked, let your cheesecake cool in the pan for about an hour. Then, transfer it to the refrigerator for at least 4 hours—trust me, this chilling time is essential! It allows the flavors to meld and the texture to become perfectly creamy. Plus, the longer you wait, the more delicious it gets! So, practice a little patience, and it’ll be so worth it when you finally dig in!
Tips for Success
Now, before you dive into making your Oreo cheesecake, let me share some of my favorite tips to ensure it turns out absolutely perfect every time!
- Room Temperature Ingredients: Make sure all your ingredients, especially the cream cheese and eggs, are at room temperature. This helps everything blend together smoothly and avoids any lumps in your cheesecake.
- Don’t Overmix: When you’re combining your ingredients, especially after adding the eggs, mix just until combined. Overmixing can introduce too much air, which might lead to cracks in your cheesecake as it cools.
- Cool Gradually: After baking, let your cheesecake cool in the pan before refrigerating. This gradual cooling helps prevent cracks and keeps the texture silky.
- Garnishing: For a beautiful finish, top your cheesecake with a generous dollop of whipped cream and sprinkle some crushed Oreos on top. It not only looks fabulous but adds that extra crunch and flavor!
- Chill Before Serving: I know it’s tempting to dig in right away, but giving your cheesecake at least 4 hours (or even overnight!) to chill really enhances the flavors and sets the texture perfectly.
- Experiment with Toppings: Feel free to get creative! You can add chocolate syrup, a drizzle of caramel, or even a scoop of vanilla ice cream on the side for a truly indulgent dessert.
With these tips, you’re well on your way to creating a show-stopping Oreo cheesecake that will leave everyone asking for seconds! Enjoy the process, and happy baking!
Why You’ll Love This Recipe
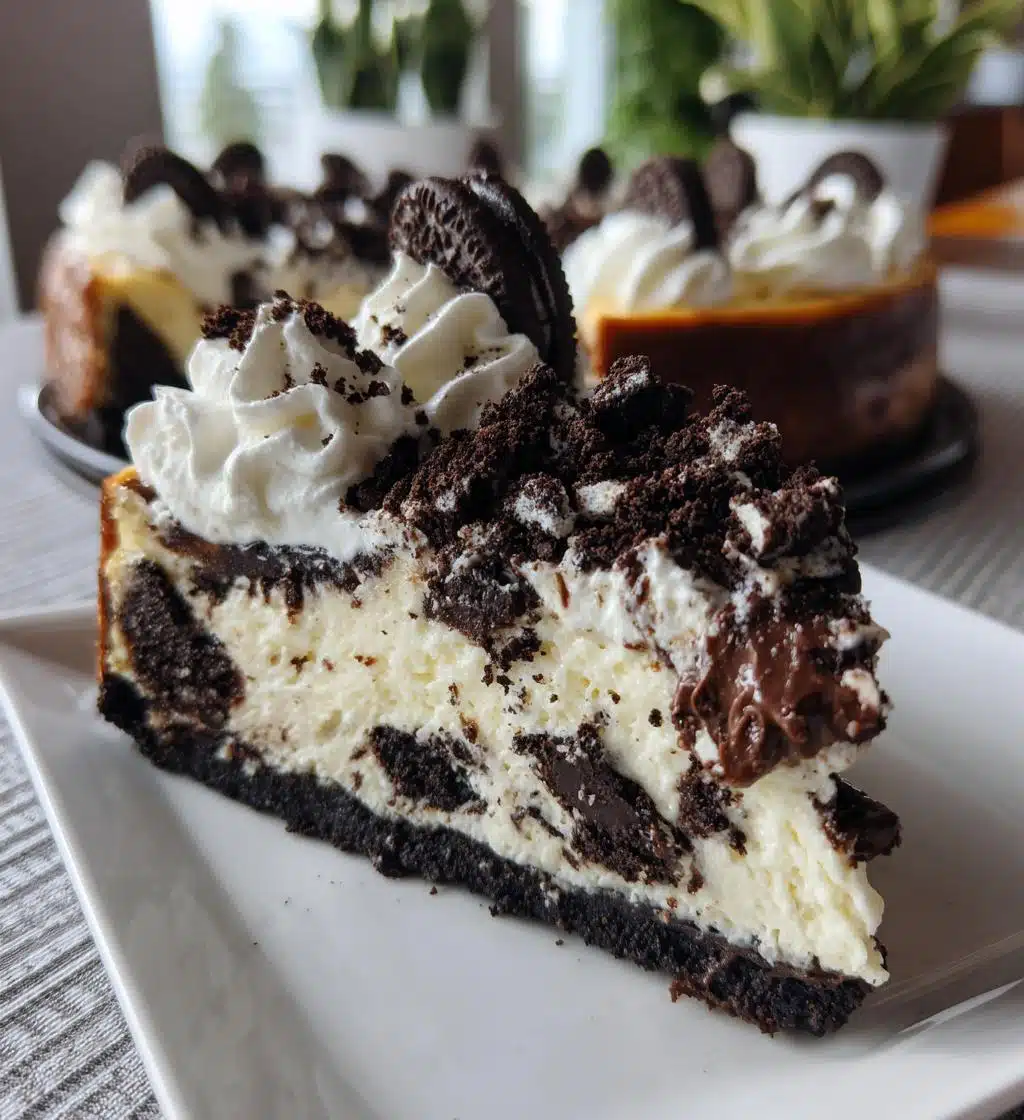
- Rich and Creamy Flavor: This Oreo cheesecake is a decadent treat that perfectly balances the creaminess of the filling with the delightful crunch of Oreo cookies.
- Easy to Prepare: With straightforward steps and simple ingredients, this recipe is perfect for both beginners and seasoned bakers alike.
- Crowd-Pleasing Dessert: Whether it’s a birthday party or a cozy family dinner, this cheesecake is always a hit—everyone loves it!
- Make-Ahead Option: It’s a fantastic dessert to prepare in advance, giving you more time to enjoy your event without the stress of last-minute baking.
- Versatile Toppings: You can dress it up with whipped cream, chocolate sauce, or extra Oreo crumbles for an eye-catching presentation.
- Perfect for Any Occasion: This Oreo cheesecake shines at holidays, celebrations, or just as a sweet indulgence on a regular day.
- Rich Texture with a Crunch: The combination of creamy filling and crunchy crust creates a delightful contrast that’s simply irresistible!
Nutritional Information
As with any recipe, the nutritional values can vary based on the specific ingredients and brands you choose, so keep that in mind! Here’s an estimated breakdown for one slice of this scrumptious Oreo cheesecake:
- Calories: 400
- Fat: 25g
- Saturated Fat: 15g
- Unsaturated Fat: 5g
- Trans Fat: 0g
- Cholesterol: 80mg
- Sodium: 250mg
- Carbohydrates: 35g
- Fiber: 1g
- Sugar: 30g
- Protein: 6g
These values are a great starting point, but remember to adjust based on your specific ingredients! Enjoy your deliciously rich Oreo cheesecake guilt-free!
FAQ Section
Can I use low-fat cream cheese?
Yes, you can! Just keep in mind that while it will still taste delicious, the texture might be a bit different—less creamy and rich than with full-fat cream cheese.
What if I don’t have a springform pan?
No worries! You can use a regular cake pan, but make sure to line the bottom with parchment paper for easy removal. Just be gentle when taking it out!
How do I store leftovers?
Simply cover the cheesecake with plastic wrap or transfer slices to an airtight container. It’ll stay fresh in the refrigerator for about 5 days. Trust me, it won’t last long, but it’s nice to have a slice waiting for you!
Can I freeze this cheesecake?
Absolutely! Just make sure it’s properly wrapped in plastic wrap and then foil before freezing. It can last up to 2 months! When you’re ready to enjoy it, let it thaw in the fridge overnight.
What other cookies can I use?
If you want to switch things up, feel free to try other sandwich cookies! Chocolate chip cookies, peanut butter cookies, or even mint Oreos can add a fun twist to your cheesecake.
Can I add toppings before baking?
While you can sprinkle some crushed Oreos on top before baking, I recommend saving the whipped cream and extra toppings until after it cools. This keeps everything looking fresh and delicious!
What should I do if my cheesecake cracks?
Cracks can happen, but don’t fret! If it does crack, you can always cover it with whipped cream or chocolate ganache for a fabulous fix. And remember, cooling it slowly helps prevent cracks!
Can I make this cheesecake gluten-free?
You sure can! Just use gluten-free Oreo cookies for the crust and filling. It’ll still be just as tasty!
Storage & Reheating Instructions
Storing leftovers of your Oreo cheesecake is super simple! Just make sure to cover it well. If you’ve got a whole cheesecake, wrap it tightly in plastic wrap or aluminum foil to keep it fresh. You can also transfer slices to an airtight container, which works beautifully too. This way, you can enjoy your delicious cheesecake for up to 5 days in the refrigerator!
If you want to keep it for a longer time, you can absolutely freeze it! Just make sure it’s well-wrapped in plastic wrap and then in aluminum foil to prevent freezer burn. It can last in the freezer for up to 2 months. When you’re ready to indulge again, just move it to the fridge to thaw overnight. No need to reheat; serve it chilled and enjoy that rich, creamy goodness!
Trust me, having a slice of Oreo cheesecake waiting for you in the fridge is like a little slice of heaven on busy days! Enjoy every bite!
For more delicious cheesecake recipes, check out this cheesecake page!
For tips on baking, visit our blog!
And if you’re interested in the history of cheesecake, you can read more here.
Print
Oreo cheesecake: 7 Reasons You’ll Crave This Decadence
- Total Time: 4 hours 80 minutes
- Yield: 12 servings 1x
- Diet: Vegetarian
Description
This Oreo cheesecake is rich and creamy, with a delicious cookie crust and chunks of Oreo cookies throughout.
Ingredients
- 24 Oreo cookies, crushed
- 1/4 cup unsalted butter, melted
- 2 cups cream cheese, softened
- 1 cup granulated sugar
- 1 teaspoon vanilla extract
- 3 large eggs
- 1 cup sour cream
- 1 cup whipped cream
- Additional Oreo cookies for topping
Instructions
- Preheat your oven to 325°F (163°C).
- Mix crushed Oreo cookies with melted butter.
- Press the mixture into the bottom of a springform pan.
- In a bowl, beat cream cheese until smooth.
- Add sugar and vanilla, mixing until combined.
- Add eggs one at a time, mixing well after each addition.
- Fold in sour cream and whipped cream.
- Add crushed Oreos to the mixture, stirring gently.
- Pour the batter over the crust in the pan.
- Bake for 55-60 minutes or until set.
- Let it cool and refrigerate for at least 4 hours before serving.
Notes
- Use room temperature ingredients for a smooth batter.
- Top with additional whipped cream and Oreo cookies for garnish.
- Store leftovers in the refrigerator.
- Prep Time: 20 minutes
- Cook Time: 60 minutes
- Category: Dessert
- Method: Baking
- Cuisine: American
Nutrition
- Serving Size: 1 slice
- Calories: 400
- Sugar: 30g
- Sodium: 250mg
- Fat: 25g
- Saturated Fat: 15g
- Unsaturated Fat: 5g
- Trans Fat: 0g
- Carbohydrates: 35g
- Fiber: 1g
- Protein: 6g
- Cholesterol: 80mg
Keywords: oreo cheesecake, dessert, cheesecake recipe