
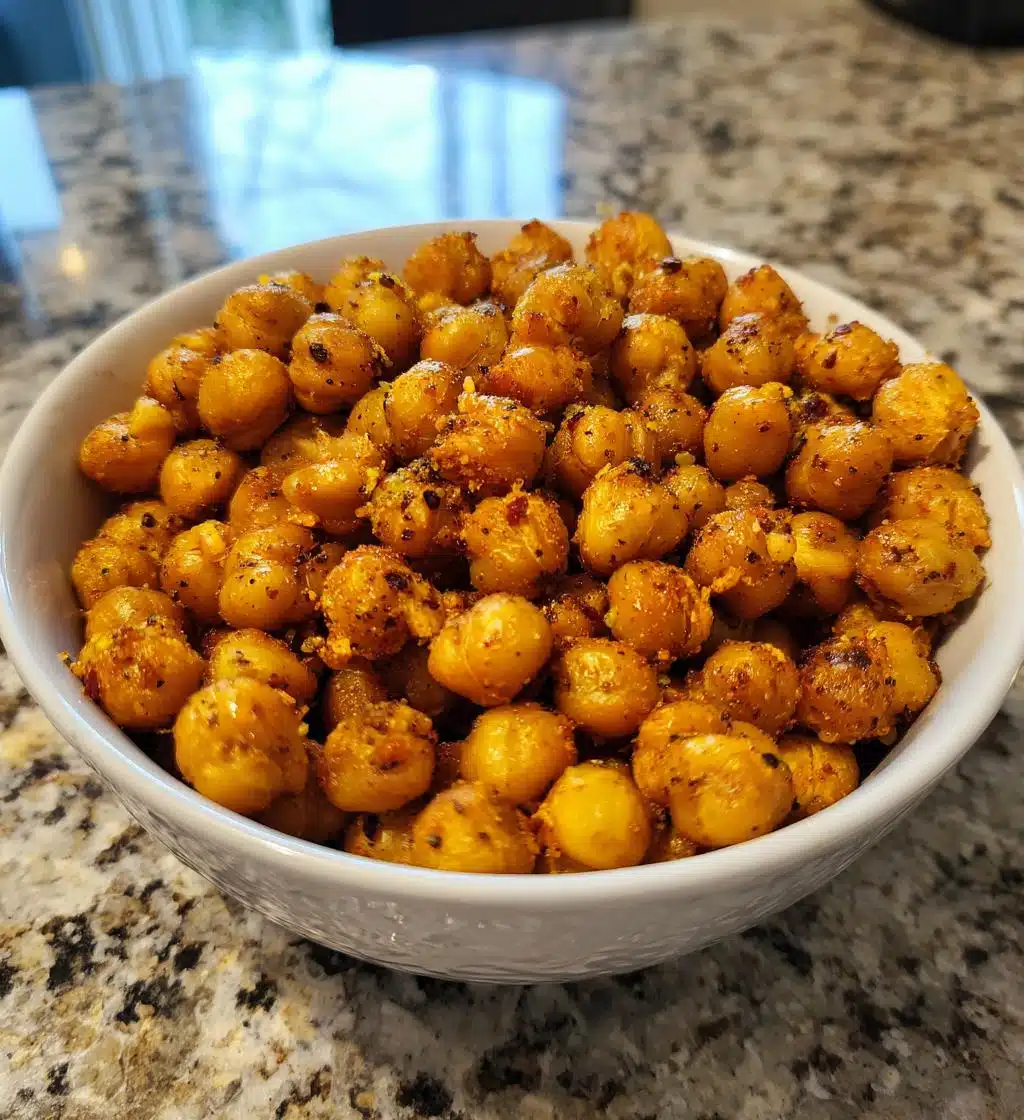
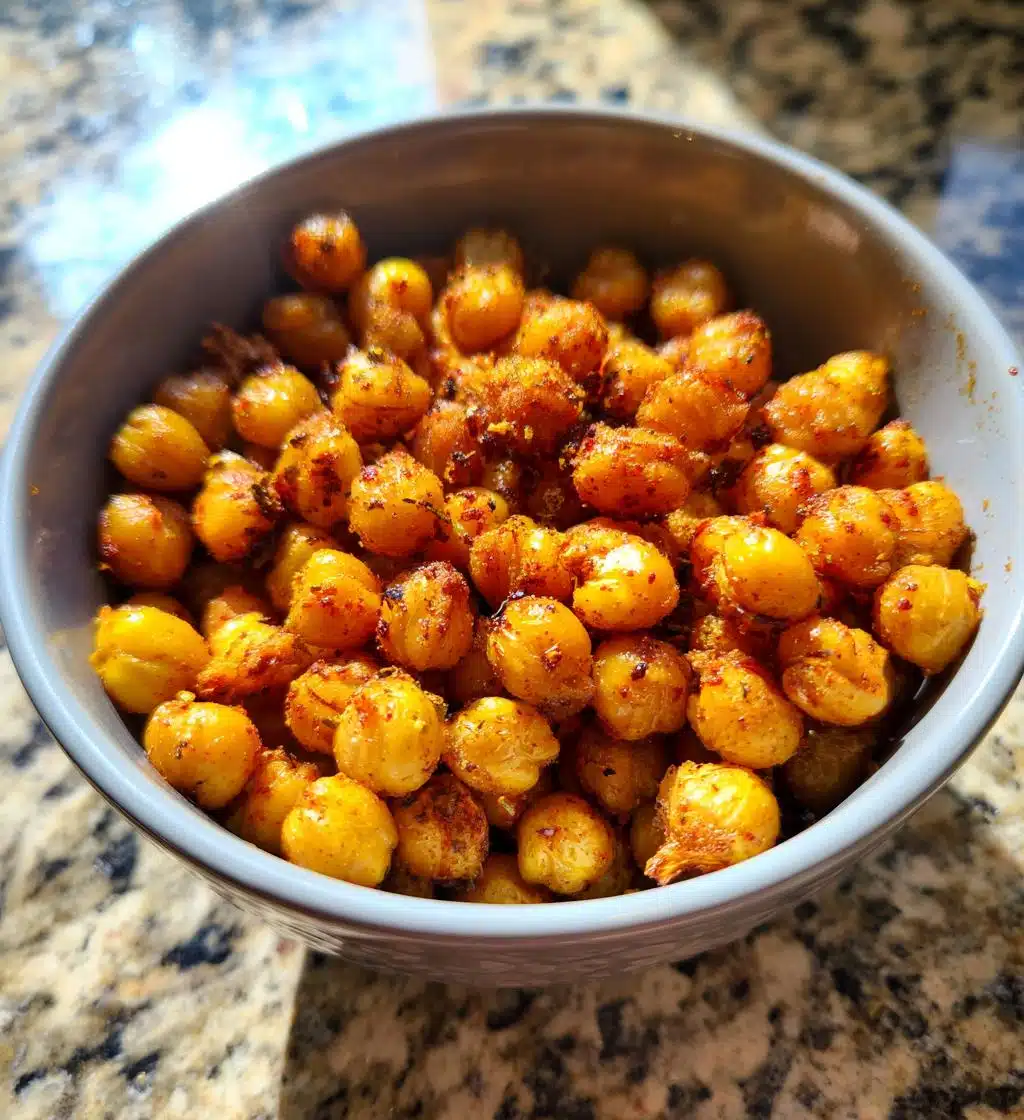
If you’re looking for a snack that’s not only delicious but also healthy, let me introduce you to my crispy air fryer chickpeas! Seriously, these little gems are so versatile—they can be a crunchy snack on their own or a fabulous topping for salads and grain bowls. I love how they’re packed with protein and fiber, making them a great choice for those midday munchies or as a crunchy addition to your meals. Plus, the air fryer gives them that perfect crunch without needing a ton of oil. Trust me, once you try these, you’ll find yourself making them all the time. They’re just that good! So, let’s dive into how to whip up a batch of these irresistible little bites!
Ingredients List
- 1 can of chickpeas, drained and rinsed (about 15 ounces)
- 1 tablespoon of olive oil
- 1 teaspoon of garlic powder
- 1 teaspoon of paprika
- Salt to taste
How to Prepare Air Fryer Chickpeas
Getting those chickpeas crispy and delicious is super simple! Follow these steps, and you’ll be amazed at how easy it is to make a healthy snack that packs a punch. Ready? Let’s get cooking!
Step-by-Step Instructions
- Preheat the air fryer: Start by preheating your air fryer to 400°F (200°C). This ensures that your chickpeas will crisp up nicely from the get-go.
- Dry those chickpeas: Grab a can of chickpeas, drain and rinse them under cold water. Now, here’s the key—pat them dry with a paper towel. This step is crucial because any moisture left will make it harder for them to get that lovely crunch!
- Season them up: In a mixing bowl, toss the dried chickpeas with 1 tablespoon of olive oil, 1 teaspoon of garlic powder, 1 teaspoon of paprika, and a sprinkle of salt. Get in there with your hands and mix it up until all the chickpeas are coated evenly. Yum!
- Air fry: Place the seasoned chickpeas in the air fryer basket in a single layer. This is super important—if they’re overcrowded, they won’t crisp up as well. Cook them for 15-20 minutes, shaking the basket halfway through to ensure even cooking.
- Cool and enjoy: Once they’re golden brown and crispy, remove them from the air fryer and let them cool for a few minutes. They’ll be hot, so be careful! Now you’re ready to snack or sprinkle them on your favorite salad.
And there you have it—crunchy air fryer chickpeas that are perfect as a snack or a salad topper! Enjoy every crispy bite!
Why You’ll Love This Recipe
- Healthy Snacking: These air fryer chickpeas are low in calories but high in protein and fiber, making them a guilt-free munchie that keeps you satisfied.
- Crispy Perfection: The air fryer gives them an incredible crunch without the need for deep frying, so you can enjoy that satisfying texture without the extra fat.
- Quick and Easy: With just a few simple steps and minimal prep time, you can whip these up in about 30 minutes. Perfect for when you need a snack in a hurry!
- Versatile Flavor: You can easily customize the spices to suit your mood—add some cayenne for heat, or throw in some Italian herbs for a Mediterranean twist!
- Great for Meal Prep: These chickpeas store well, making them an easy addition to your weekly meal prep. Just pop them in a container, and you’ve got a healthy snack ready to go!
- Kid-Friendly: Kids love the crunch and flavor! They make a fun and nutritious alternative to chips for lunchboxes or after-school snacks.
Tips for Success
To make sure your air fryer chickpeas turn out perfectly every time, I’ve got some tried-and-true tips just for you! These little nuggets of wisdom will help you achieve that ideal crunch and flavor.
- Don’t skip drying: Seriously, drying the chickpeas is crucial. If you skip this step, they’ll end up more chewy than crispy. So, give them a good pat down with a paper towel!
- Experiment with spices: Feel free to get creative! Besides garlic powder and paprika, try adding cumin for a warm, earthy flavor or nutritional yeast for a cheesy twist. The sky’s the limit!
- Adjust cooking time: Every air fryer is a bit different, so watch your chickpeas as they cook. If you like them extra crunchy, don’t hesitate to let them go a few minutes longer, just keep an eye on them so they don’t burn!
- Shake it up: Make sure to shake the basket halfway through cooking. This helps the chickpeas cook evenly and get that nice, crispy exterior all around.
- Try different oils: While olive oil is my go-to, you can experiment with avocado oil or even coconut oil for a different flavor profile. Just be mindful of the smoke point!
- Store smart: If you have leftovers (which is rare, trust me!), keep them in an airtight container but know they may lose some crunch. You can pop them back in the air fryer for a minute or two to revive that crispy goodness!
With these tips in your back pocket, you’ll be a chickpea pro in no time. Enjoy your crunchy creations!
Variations on Air Fryer Chickpeas
One of the best things about air fryer chickpeas is how customizable they are! You can switch up the flavors to match your mood or what you have in your pantry. Here are some delicious variations that I absolutely love:
- Spicy Sriracha: For a kick of heat, toss the chickpeas in a little Sriracha sauce before air frying. Just remember, a little goes a long way—start with a teaspoon and adjust to your taste!
- Herb & Lemon: Mix in a teaspoon of dried oregano, thyme, or rosemary along with some lemon zest for a bright, fresh flavor. It’s like a Mediterranean vacation in every bite!
- Sweet Cinnamon: If you’re in the mood for something sweet, sprinkle some cinnamon and a touch of sugar on your chickpeas. They’ll caramelize beautifully and make for a delightful snack.
- BBQ Bliss: Use your favorite barbecue seasoning or sauce to give the chickpeas a smoky flavor. This is perfect for those summer vibes, even when it’s not grilling season!
- Cheesy Nutritional Yeast: For a cheesy flavor without the dairy, sprinkle some nutritional yeast over the chickpeas before frying. It adds a savory umami taste that’s simply irresistible.
- Asian-Inspired: Toss in some five-spice powder and a splash of soy sauce for an Asian flair. You can even add a sprinkle of sesame seeds after they’re done cooking for extra crunch!
Don’t be afraid to mix and match these ideas or create your own combo! The possibilities are endless, and that’s what makes these air fryer chickpeas so fun and exciting to make. Enjoy experimenting!
Storage & Reheating Instructions
So, you’ve made a batch of those delicious air fryer chickpeas, and now you’re wondering how to keep them fresh? No worries! Storing them right is key to maintaining that fabulous crunch.
First things first, let them cool completely—this is super important to prevent condensation in the container. Once cooled, transfer your chickpeas to an airtight container. They’ll stay fresh for about 3-4 days, but trust me, they’re best enjoyed right after cooking!
If you find yourself with leftovers (which is a rare occurrence, but hey, it happens!), and you want to reheat them, just pop them back in the air fryer for a few minutes at 400°F (200°C). This will help restore their crunchiness. Just keep an eye on them so they don’t overcook. You can also use an oven to reheat them, but the air fryer really does the best job of reviving that crispy texture!
And there you have it—simple storage and reheating tips to keep your air fryer chickpeas as tasty as the day you made them. Enjoy snacking!
Nutritional Information Disclaimer
Just a quick note about the nutritional information I’ve shared! Keep in mind that the exact nutrition can vary based on the specific ingredients and brands you use. Whether it’s the type of olive oil or the brand of chickpeas, those little differences can impact the total calories, fat, and other nutritional values. So, while I strive to give you an accurate estimate, it’s always a good idea to calculate based on what you’re using in your kitchen. Happy cooking!
FAQ Section
Can I use dried chickpeas instead of canned?
Absolutely! Just keep in mind that you’ll need to soak and cook them first. Dried chickpeas require a bit more prep, but they’ll still turn out fantastic when you air fry them!
How do I know when the chickpeas are done?
You’ll know they’re ready when they’re golden brown and crispy. Just give the basket a shake halfway through cooking to check for even crispiness. If they don’t have that satisfying crunch yet, feel free to let them cook a bit longer!
Can I make these chickpeas spicy?
Yes! If you love a little heat, add some cayenne pepper or your favorite hot sauce to the mix before air frying. Just start with a small amount, taste, and adjust as needed. It’s all about that perfect balance!
What if my chickpeas are too chewy?
If your chickpeas don’t turn out as crispy as you’d like, it may be because they weren’t dried enough before seasoning. Make sure to pat them really dry before tossing them in oil and spices. Also, increasing the cooking time slightly can help achieve that crunch!
Can I use other types of beans?
Sure! While chickpeas are my favorite for this recipe, you can experiment with other beans like black beans or kidney beans. Just remember that they might have different cooking times, so keep an eye on them!
Are air fryer chickpeas gluten-free?
Yes! Chickpeas are naturally gluten-free, making this snack perfect for anyone avoiding gluten. Just be sure to check that any spices or seasoning blends you use are also gluten-free!
How do I keep my chickpeas crunchy after cooking?
To keep them crispy, store your chickpeas in an airtight container once they’ve cooled completely. If they start to lose their crunch, just pop them back in the air fryer for a couple of minutes to revive that texture!
Can I make these chickpeas ahead of time?
You can definitely make them ahead! Just be aware that they’re best enjoyed fresh. If you’re meal prepping, consider making a batch and storing them for a few days to enjoy throughout the week!

Air Fryer Chickpeas: 5 Steps to Crispy Perfection
- Total Time: 30 minutes
- Yield: 2 servings 1x
- Diet: Vegan
Description
Crispy air fryer chickpeas make a healthy snack or topping for salads.
Ingredients
- 1 can chickpeas, drained and rinsed
- 1 tablespoon olive oil
- 1 teaspoon garlic powder
- 1 teaspoon paprika
- Salt to taste
Instructions
- Preheat the air fryer to 400°F (200°C).
- Pat the chickpeas dry with a paper towel.
- In a bowl, mix chickpeas, olive oil, garlic powder, paprika, and salt.
- Place chickpeas in the air fryer basket in a single layer.
- Cook for 15-20 minutes, shaking the basket halfway through.
- Once crispy, remove and let cool before serving.
Notes
- Store leftovers in an airtight container.
- Adjust spices to your preference.
- For extra crunch, cook a little longer.
- Prep Time: 10 minutes
- Cook Time: 20 minutes
- Category: Snack
- Method: Air Frying
- Cuisine: Mediterranean
Nutrition
- Serving Size: 1 serving
- Calories: 150
- Sugar: 1g
- Sodium: 200mg
- Fat: 6g
- Saturated Fat: 1g
- Unsaturated Fat: 5g
- Trans Fat: 0g
- Carbohydrates: 20g
- Fiber: 6g
- Protein: 7g
- Cholesterol: 0mg
Keywords: air fryer chickpeas, healthy snack, crispy chickpeas