
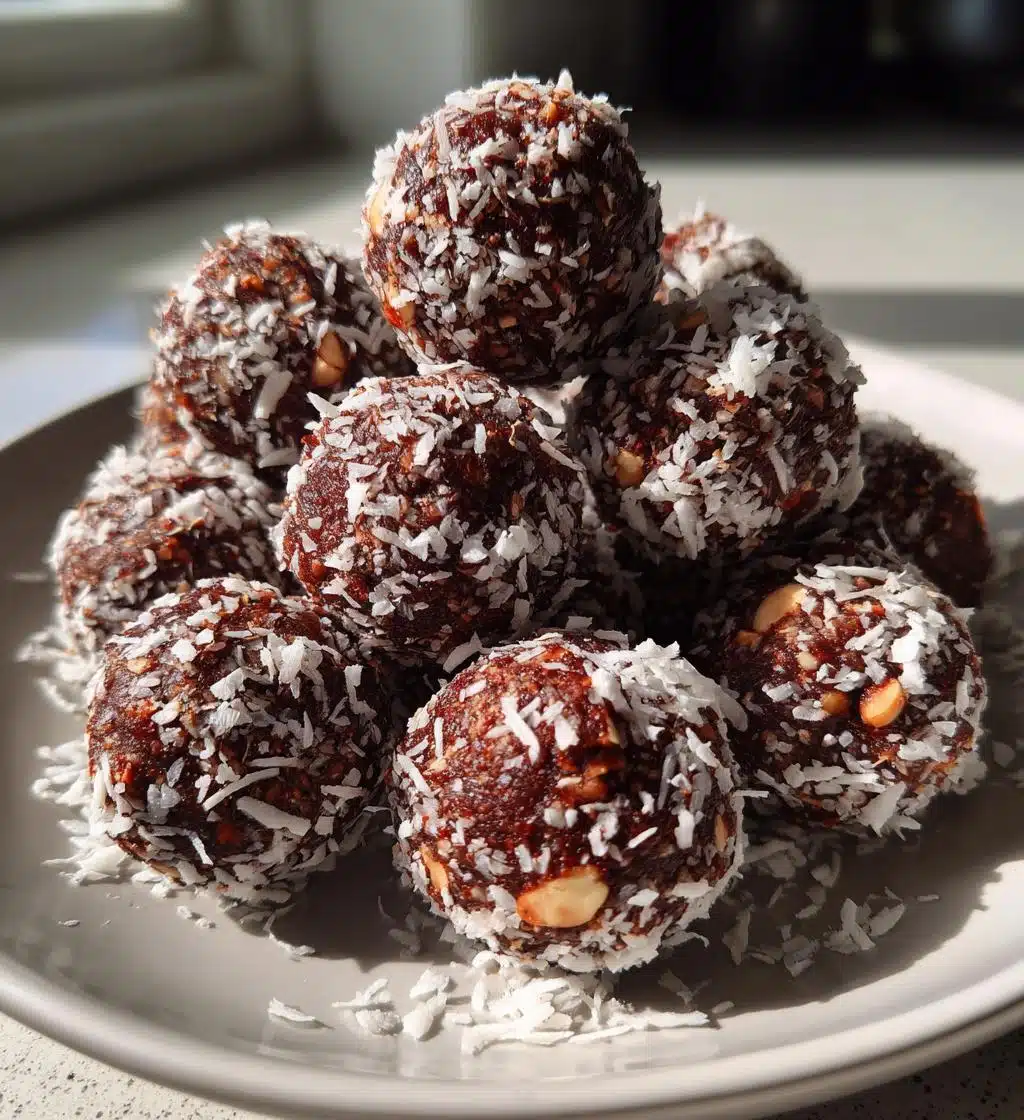
Oh my goodness, let me tell you about these bliss balls! They’re like little bites of heaven, and the best part? They’re vegan and gluten-free, which means everyone can enjoy them without worry. I whip these up whenever I need a quick snack or a sweet treat that doesn’t feel like a guilty pleasure. Seriously, they’re so simple to make that I often prepare a double batch just to have some on hand for those late-night cravings or when friends drop by unexpectedly.
All you need is a food processor and just a handful of wholesome ingredients—no baking required! I love how these bliss balls are packed with natural sweetness from dates and a rich chocolatey flavor from cocoa powder. Plus, they’re loaded with healthy fats from nuts and coconut oil, making them a perfect energy boost. It’s like snagging a little piece of joy with every bite!
Trust me, once you try making these, you’ll find yourself reaching for them instead of store-bought snacks. They’re not just quick and easy; they’re also a delightful way to sneak in some nutrition while satisfying your sweet tooth. So, let’s dive into how to make these delicious little gems!
Ingredients List
Gathering the right ingredients is half the fun! Here’s everything you’ll need to whip up these delightful bliss balls:
- 1 cup pitted dates (make sure they’re nice and soft for easy blending)
- 1 cup almond flour (this gives our bliss balls a lovely nutty flavor)
- 1/2 cup unsweetened cocoa powder (for that rich, chocolatey goodness)
- 1/4 cup maple syrup (a touch of natural sweetness to balance everything out)
- 1/4 cup coconut oil, melted (this adds creaminess and helps bind the mixture)
- 1/2 cup shredded coconut (for that chewy texture and a hint of tropical flair)
- 1/2 cup chopped nuts (I love using walnuts or almonds, but any nuts you like will work!)
These ingredients come together beautifully, creating a mixture that’s not only tasty but also nourishing. Trust me, you’ll want to have these on hand all the time!
How to Prepare Bliss Balls Recipe Vegan Gluten Free
Now that you’ve got your ingredients all set, let’s jump into the fun part—making these bliss balls! It’s super straightforward, and I promise you’ll be snacking on these little delights in no time. Just follow these simple steps, and you’ll be on your way to blissful snacking!
Step-by-Step Instructions
- First, grab your food processor and toss in those pitted dates. Blend them until they’re smooth and sticky—this is the base of our bliss balls, and it adds that wonderful natural sweetness!
- Next, add the almond flour, unsweetened cocoa powder, maple syrup, and melted coconut oil into the processor. Blend everything together until it’s well combined. You want a nice, cohesive mixture that holds together when you press it.
- Now, it’s time to stir in the shredded coconut and chopped nuts. You can either pulse a couple of times just to mix them in or do it by hand if you want to keep some texture. I love the crunch that the nuts add!
- Once everything is well mixed, it’s time to form the bliss balls. Grab a small amount of the mixture and roll it between your palms to create little bite-sized balls. I usually aim for about 1 inch in diameter, but feel free to make them as big or small as you like!
- Finally, place your bliss balls on a baking sheet lined with parchment paper. Pop them into the refrigerator for at least 30 minutes. This step helps them firm up, making them easier to handle and even more delicious!
And there you have it! These bliss balls are ready to be enjoyed after a little chill time. I often find myself sneaking one or two before they even make it to the fridge—oops! But trust me, they’re worth the wait. Let’s get rolling!
Nutritional Information
Let’s talk about the nutritional goodness packed into these bliss balls! Each little ball is not just a tasty treat but also a healthy snack option. Here’s a breakdown of the estimated nutritional data per bliss ball:
- Calories: 100
- Fat: 5g
- Saturated Fat: 3g
- Unsaturated Fat: 2g
- Trans Fat: 0g
- Carbohydrates: 12g
- Sugar: 8g
- Fiber: 2g
- Protein: 2g
- Sodium: 1mg
- Cholesterol: 0mg
These values are estimates, but they give you a good idea of how wholesome these bliss balls really are. They’re rich in healthy fats, natural sugars, and fiber, making them a perfect guilt-free snack to keep you energized throughout the day. Enjoy every bite knowing you’re treating yourself right!
Why You’ll Love This Recipe
- Quick and easy to make—perfect for busy days when you need a snack in a hurry!
- Nutritious and wholesome, packed with natural ingredients that nourish your body.
- Deliciously sweet with no added sugars, thanks to the dates and maple syrup.
- Vegan and gluten-free, so everyone can enjoy them without any dietary worries.
- Customizable—feel free to mix in your favorite nuts or add a sprinkle of cinnamon for a twist!
- No baking required—just blend, roll, and chill for a delightful treat!
- Perfect for meal prep—make a batch and have them ready for snacking all week long.
- Great source of energy, making them ideal for a pre-workout boost or a midday pick-me-up.
Honestly, these bliss balls really check all the boxes for a scrumptious snack. You’ll find yourself making them time and again, just like I do, because they’re that good! Trust me, once you taste them, you’ll be hooked!
Tips for Success
To make sure your bliss balls turn out absolutely perfect every time, I’ve got a few handy tips for you! These little nuggets of joy are pretty forgiving, but these tricks will take them to the next level:
- Adjust the Sweetness: Depending on your taste and the sweetness of your dates, you might want to tweak the amount of maple syrup you use. If you prefer a sweeter treat, feel free to add a little more syrup, but remember, the dates already bring a lot of natural sweetness to the party!
- Texture Matters: If you like a bit of crunch in your bliss balls, don’t skip the chopped nuts! They add a delightful texture that complements the creaminess from the coconut oil. You can experiment with different nuts or even seeds to find your perfect combo.
- Roll in Coconut: For an extra layer of flavor and a beautiful finish, roll your bliss balls in some shredded coconut after you form them. Not only does it make them look super cute, but it also adds a lovely chewy texture that you’ll adore!
- Chill Time: Don’t rush the chilling step! Letting your bliss balls firm up in the fridge for at least 30 minutes really helps them hold their shape and enhances the flavors. I know it’s tempting to dig in right away, but trust me, they’re worth the wait!
- Batch Making: These bliss balls are perfect for meal prep! Make a big batch and store them in an airtight container in the fridge. They’ll stay fresh for about a week, so you’ll always have a healthy snack ready to go.
- Get Creative: Feel free to mix in your favorite ingredients! Think about adding a scoop of nut butter for extra richness, or some spices like cinnamon or vanilla for a flavor twist. The possibilities are endless!
With these tips in your back pocket, you’ll be a bliss ball-making pro in no time. Enjoy the process, and don’t forget to have fun while you’re at it! Happy snacking!
Variations
One of the best things about these bliss balls is how versatile they are! You can easily switch things up to keep your taste buds excited. Here are some of my favorite variations that you can try out:
- Nutty Delight: Change up the nuts! Instead of walnuts or almonds, try using pecans, hazelnuts, or cashews. Each nut brings its own unique flavor and texture, making every batch a little different!
- Seeds Galore: For an extra boost of nutrition, toss in some chia seeds, flaxseeds, or pumpkin seeds. They add a delightful crunch and pack a punch of omega-3 fatty acids!
- Fruity Fusion: Mix in some dried fruit like cranberries, raisins, or apricots for a chewy twist. Just chop them up a bit so they blend nicely into the mixture.
- Spiced Up: Add a pinch of cinnamon, nutmeg, or even a dash of ginger for a warm, cozy flavor. It’s like a little hug in every bite!
- Chocolate Lovers: For an extra chocolatey treat, fold in some chocolate chips or vegan chocolate chunks. Who could resist a bliss ball that’s even more chocolaty?
- Peanut Butter Bliss: Swirl in a tablespoon or two of natural peanut butter or almond butter into the mixture for a creamy, nutty flavor explosion. This will also make them even more satisfying!
- Coconut Craze: If you love coconut, try adding coconut extract for an intense coconut flavor, or even mix in some cocoa nibs for a chocolatey crunch.
With these fun variations, you can create a new bliss ball experience every time you make them! Get creative, have fun, and don’t be afraid to experiment with different flavors and ingredients. The joy of cooking is all about making it your own!
Storage & Reheating Instructions
Once you’ve made these delicious bliss balls, you’ll want to keep them fresh and ready for snacking! The good news is, they store incredibly well. Here’s how to do it:
- Airtight Container: Place your bliss balls in an airtight container. This is key to keeping them fresh and preventing them from drying out or absorbing any unwanted odors from the fridge.
- Refrigeration: Store them in the refrigerator, where they’ll stay good for about a week. They’re perfect for grabbing when you need a quick energy boost or a sweet treat!
- Freezing: If you want to keep them longer, you can freeze bliss balls! Just make sure to separate them with parchment paper to prevent sticking, then pop them in a freezer-safe bag or container. They’ll stay fresh for up to two months!
- Thawing: When you’re ready to enjoy your frozen bliss balls, simply take them out and let them thaw in the fridge for a few hours or overnight. No need to heat them up—enjoy them chilled for the best texture!
- Serving Suggestions: These bliss balls are fantastic on their own, but you can also pair them with a cup of tea or coffee for a delightful snack break. They’re also great for on-the-go munching—just toss a few in your bag for a healthy treat whenever you need it!
By following these storage tips, you’ll ensure that your bliss balls remain fresh and irresistible, ready to satisfy your cravings anytime. Happy snacking!
FAQ Section
I totally get it—when trying out a new recipe, you might have a few questions swirling around in your mind. So, let’s tackle some of the most common ones about these bliss balls!
Can I substitute the dates?
Yes, you can! If you don’t have dates on hand, you can use medjool dates or even dried figs. Just make sure they’re soft enough to blend smoothly. If you’re looking for a lower-sugar option, you might try using mashed bananas, but keep in mind that they’ll change the flavor and texture a bit.
What can I use instead of almond flour?
No worries! You can swap almond flour for other nut flours like hazelnut or cashew flour. If you need a nut-free option, use sunflower seed flour or even oats processed into a fine powder. Just keep an eye on the consistency when you mix!
How long do these bliss balls last?
In the fridge, they’ll stay fresh for about a week. If you freeze them, they can last up to two months—just make sure to store them in an airtight container or bag. They’re perfect for meal prep!
Are these bliss balls suitable for kids?
Absolutely! These bliss balls are a fantastic snack for kids. They’re nutritious, naturally sweet, and packed with energy. Just make sure to check for any nut allergies if you’re sharing with little ones.
Can I add protein powder?
Yes! If you want to boost the protein content, feel free to add a scoop of your favorite protein powder. Just remember to balance it with a little extra moisture, like a splash of plant milk or a bit more maple syrup, so the mixture stays cohesive.
What if I don’t like coconut?
No problem at all! If coconut isn’t your thing, you can skip it entirely or replace it with an equal amount of ground nuts or seeds. You can also roll the bliss balls in crushed nuts, seeds, or even cocoa powder for a different finish.
Are these bliss balls gluten-free?
Yes, they are! All the ingredients used in this bliss balls recipe are gluten-free, making them a great option for anyone with gluten sensitivities or celiac disease.
Hopefully, this clears up any questions you might have had! If there’s anything else you’re curious about, feel free to ask. Happy bliss ball making!
Print
Bliss Balls Recipe Vegan Gluten Free: Irresistibly Delicious Treats
- Total Time: 40 minutes
- Yield: 20 bliss balls 1x
- Diet: Vegan
Description
A simple and healthy recipe for vegan gluten-free bliss balls.
Ingredients
- 1 cup dates, pitted
- 1 cup almond flour
- 1/2 cup cocoa powder
- 1/4 cup maple syrup
- 1/4 cup coconut oil, melted
- 1/2 cup shredded coconut
- 1/2 cup chopped nuts
Instructions
- In a food processor, blend dates until smooth.
- Add almond flour, cocoa powder, maple syrup, and coconut oil. Blend until combined.
- Stir in shredded coconut and chopped nuts.
- Form the mixture into small balls.
- Place the balls on a baking sheet and refrigerate for at least 30 minutes.
Notes
- Store in an airtight container in the fridge.
- These can be rolled in extra shredded coconut for added texture.
- Prep Time: 10 minutes
- Cook Time: 0 minutes
- Category: Snacks
- Method: No-Bake
- Cuisine: Vegan
Nutrition
- Serving Size: 1 bliss ball
- Calories: 100
- Sugar: 8g
- Sodium: 1mg
- Fat: 5g
- Saturated Fat: 3g
- Unsaturated Fat: 2g
- Trans Fat: 0g
- Carbohydrates: 12g
- Fiber: 2g
- Protein: 2g
- Cholesterol: 0mg
Keywords: bliss balls recipe vegan gluten free