
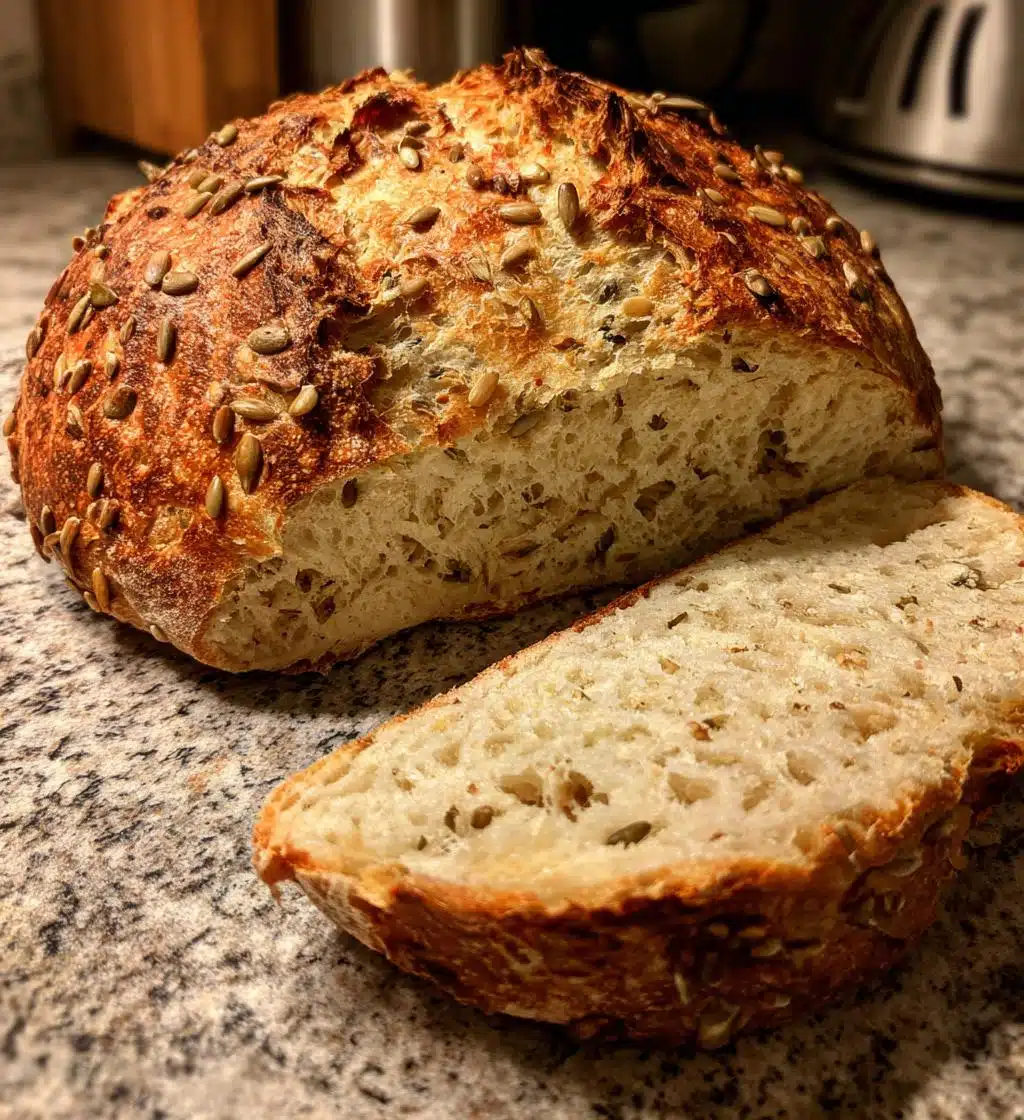
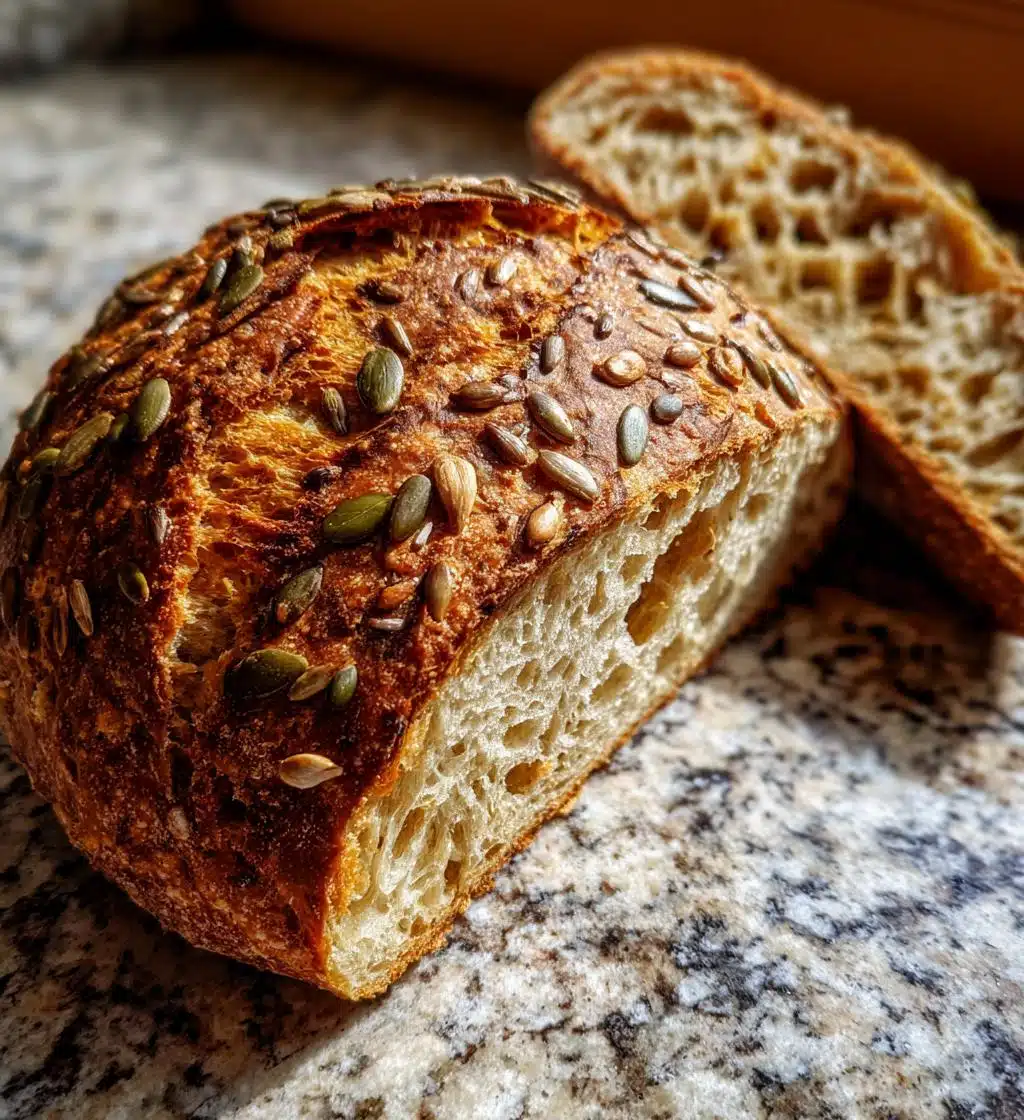
There’s something truly magical about baking, especially when it comes to making my gluten free seeded bread. Every time I mix those wholesome ingredients, I feel like I’m creating a little piece of heaven in my kitchen. This bread is not just gluten-free; it’s packed with nutrients from all those delightful seeds—sunflower, pumpkin, and chia—that give it a fantastic texture and a rich, nutty flavor. Trust me, your taste buds will thank you! Plus, it’s so simple to whip up, you’ll find yourself making it time and time again. Let’s dive in and bring this delicious loaf to life!
Ingredients List
Gather these simple ingredients to create your delicious gluten free seeded bread. Make sure to measure them out accurately for the best results!
- 2 cups gluten free all-purpose flour: This is the base of your bread. Look for a blend that includes xanthan gum for better texture.
- 1 cup warm water: It should feel warm to the touch, not hot, to ensure it activates the yeast properly.
- 1/4 cup sunflower seeds: These add a lovely crunch and nutty flavor to your loaf.
- 1/4 cup pumpkin seeds: Also known as pepitas, they’re packed with nutrients and provide great texture.
- 1/4 cup chia seeds: These little powerhouses are loaded with fiber and help bind the bread together.
- 2 tablespoons olive oil: This adds moisture and richness to the bread.
- 1 tablespoon honey: Just a touch of sweetness helps balance the flavors.
- 1 teaspoon salt: Essential for enhancing all those wonderful flavors.
- 1 tablespoon active dry yeast: This is what makes your bread rise and gives it that delightful airy texture.
How to Prepare Gluten Free Seeded Bread
Now that you’ve gathered all your ingredients, let’s get baking! This step-by-step guide will walk you through the process of making your gluten free seeded bread, ensuring it turns out perfectly every time. Ready? Let’s go!
Step 1: Preheat the Oven
First things first, preheat your oven to 350°F (175°C). Preheating is key to ensure your bread bakes evenly and rises beautifully. Trust me, don’t skip this step!
Step 2: Activate the Yeast
In a bowl, mix the warm water with the active dry yeast. Let this sit for about 5 minutes until it becomes frothy. This step is crucial as it wakes up the yeast and gets it ready to help your bread rise.
Step 3: Combine Wet Ingredients
Once the yeast is activated, add the olive oil, honey, and salt to the mixture. Make sure to add the oil and honey first before the salt, as adding salt directly to the yeast can slow it down. Stir gently until everything is well combined.
Step 4: Mix Dry Ingredients
In a separate bowl, combine the gluten free all-purpose flour and all those wonderful seeds. Make sure to mix them thoroughly to ensure an even distribution of flavors and nutrients throughout your bread.
Step 5: Combine Mixtures
Now, it’s time to bring it all together! Gradually add the wet mixture to the dry ingredients. Stir until you have a thick, cohesive batter. It should be a bit sticky, which is totally normal for gluten-free bread.
Step 6: Prepare for Baking
Pour the batter into a greased loaf pan, spreading it evenly. Cover it with a clean kitchen towel and let it rise in a warm place for about 30 minutes. This step helps your bread get that nice airy texture we all love!
Step 7: Baking Time
After the dough has risen, pop it into your preheated oven and bake for about 40 minutes. You’ll know it’s done when the top is golden brown and a toothpick inserted in the center comes out clean. Your kitchen will smell amazing!
Tips for Success
To ensure your gluten free seeded bread turns out perfectly every time, here are a few tips that I swear by! First, always use fresh ingredients, especially your yeast. Old yeast can lead to a dense loaf, and nobody wants that! Also, don’t rush the rising process; a warm, draft-free spot is ideal for letting your dough puff up. If you can, use a kitchen scale for measuring flour—it’s more accurate and can help you get that perfect texture. Lastly, be patient when it comes to cooling; slicing into hot bread can lead to gummy slices, and trust me, you want those clean, beautiful cuts!
Nutritional Information
Here’s the estimated nutritional breakdown for each slice of my gluten free seeded bread. Keep in mind that these values can vary based on specific ingredients used, so consider them as a guide:
- Calories: 150
- Fat: 7g
- Protein: 5g
- Carbohydrates: 20g
- Sugar: 1g
- Sodium: 150mg
- Fiber: 3g
Enjoy this delicious bread knowing it’s not just tasty, but also good for you!
FAQ Section
Got questions about making gluten free seeded bread? I’ve got you covered! Here are some common queries I hear:
Can I substitute the seeds? Absolutely! You can mix and match seeds like flaxseeds or sesame seeds based on your preference.
How do I store leftover bread? Keep your gluten free seeded bread in an airtight container at room temperature for up to 3 days. You can also freeze it for longer storage!
Can I add herbs or spices? Yes! Feel free to add your favorite herbs like rosemary or spices like garlic powder for an extra flavor boost.
Is this bread suitable for sandwiches? Definitely! This bread has a lovely texture that works perfectly for sandwiches or toast.
Storage & Reheating Instructions
To keep your gluten free seeded bread fresh, store it in an airtight container at room temperature for up to 3 days. If you want to enjoy it later, slice it and freeze the pieces. When you’re ready to eat, simply toast the slices for a quick and delicious treat!
Why You’ll Love This Recipe
Making gluten free seeded bread is not just a rewarding experience, it’s also packed with benefits that will have you coming back for more! Here’s why you’ll adore this recipe:
- Healthy & Nutritious: Loaded with seeds, this bread is rich in fiber, protein, and healthy fats, making it a great choice for a balanced diet.
- Easy to Make: With simple ingredients and straightforward steps, you’ll find that baking this bread is a breeze.
- Versatile: Perfect for sandwiches, toast, or just on its own, this bread fits any meal or snack time.
- Delicious Flavor: The combination of seeds adds a delightful crunch and nutty flavor that’s simply irresistible!
- Great for Meal Prep: Bake a loaf ahead of time and enjoy fresh slices throughout the week.
Gluten Free Seeded Bread: 7 Steps to Irresistible Flavor
- Total Time: 55 minutes
- Yield: 1 loaf 1x
- Diet: Gluten Free
Description
A healthy gluten free seeded bread packed with nutrients.
Ingredients
- 2 cups gluten free all-purpose flour
- 1 cup warm water
- 1/4 cup sunflower seeds
- 1/4 cup pumpkin seeds
- 1/4 cup chia seeds
- 2 tablespoons olive oil
- 1 tablespoon honey
- 1 teaspoon salt
- 1 tablespoon active dry yeast
Instructions
- Preheat your oven to 350°F (175°C).
- In a bowl, mix warm water and yeast. Let it sit for 5 minutes.
- Add olive oil, honey, and salt to the yeast mixture.
- In a separate bowl, combine the flour and seeds.
- Gradually add the wet mixture to the dry ingredients. Stir until combined.
- Pour the batter into a greased loaf pan.
- Let the dough rise for 30 minutes.
- Bake for 40 minutes or until golden brown.
- Allow to cool before slicing.
Notes
- Store in an airtight container.
- Best enjoyed fresh.
- Can be toasted for extra texture.
- Prep Time: 15 minutes
- Cook Time: 40 minutes
- Category: Bread
- Method: Baking
- Cuisine: American
Nutrition
- Serving Size: 1 slice
- Calories: 150
- Sugar: 1g
- Sodium: 150mg
- Fat: 7g
- Saturated Fat: 1g
- Unsaturated Fat: 5g
- Trans Fat: 0g
- Carbohydrates: 20g
- Fiber: 3g
- Protein: 5g
- Cholesterol: 0mg
Keywords: gluten free seeded bread