

Oh my goodness, let me tell you about the magic of lotion bars! These little beauties are a game changer for your skin. Imagine a solid moisturizer that melts right into your skin, leaving it feeling oh-so-soft and hydrated. I fell in love with making lotion bars a few years ago when I realized how perfect they are for those dry winter months. You know, when your skin just feels like it’s begging for moisture? That’s when I started whipping up my own at home, and I haven’t looked back since!
What I adore about lotion bars is that they’re not just effective; they’re also super easy and fun to make! Plus, you can customize them with your favorite scents using essential oils—talk about a little luxury in your daily routine! Over time, I’ve experimented with different blends and found my favorites, but I always come back to the basics because they work so well. Seriously, if you haven’t tried making your own lotion bars yet, you’re in for a treat. Let’s dive in and get your skin glowing!
Ingredients for Lotion Bars
Gathering the right ingredients is the first step to creating your perfect lotion bars! Here’s what you’ll need:
- 1 cup beeswax: This is the backbone of your lotion bars. Beeswax not only helps solidify the bars but also creates a protective barrier on your skin, locking in moisture. Make sure to use high-quality beeswax for the best results!
- 1/2 cup shea butter: This creamy goodness is a fantastic moisturizer. Shea butter is packed with vitamins and fatty acids, making it incredibly nourishing for your skin. It gives your bars a smooth, buttery texture that glides on effortlessly.
- 1/2 cup coconut oil: Oh, coconut oil, how I love thee! This oil adds a lovely scent and is super hydrating. Plus, it melts quickly and easily, making it perfect for our lotion bars. Just make sure it’s in solid form before you start melting!
- Essential oils (optional): This is where you can really get creative! Whether you love lavender for relaxation or peppermint for a refreshing kick, essential oils can add a personal touch to your lotion bars. Just remember to adjust the quantity based on how strong you want the scent!
That’s it! Simple, natural ingredients that come together to create a luxurious treat for your skin. Trust me, once you start making these, you’ll never want to go back to store-bought lotions again!
How to Prepare Lotion Bars
Alright, let’s get into the fun part—making your lotion bars! Don’t worry, I’ll walk you through every step, and I promise it’s easier than you might think. Just follow along, and you’ll be on your way to smooth, glowing skin in no time!
Melting the Base Ingredients
First things first, we need to melt our base ingredients. I recommend using a double boiler for this—it’s the safest way to get that perfect melt without burning anything. If you don’t have a double boiler, you can create one by placing a heat-safe bowl over a pot of simmering water. Just make sure the bottom of the bowl doesn’t touch the water! Now, combine your 1 cup of beeswax, 1/2 cup of shea butter, and 1/2 cup of coconut oil in the bowl. Stir gently and keep an eye on it as it melts. It usually takes about 10 minutes, but you’ll want to keep stirring until everything is fully combined and looks smooth. Oh, and a quick safety tip: the mixture can get really hot, so be careful when handling it!
Combining and Adding Essential Oils
Once everything is melted and combined, it’s time to get creative! Remove the bowl from the heat and let it cool for just a minute (you don’t want it to be scalding hot when you add your essential oils). If you’re using essential oils, now’s the time to add them in! Just a few drops will do; I usually start with about 10-15 drops, but feel free to adjust based on how strong you want the scent to be. Just remember, you can always add more, but you can’t take it out once it’s in! Stir well to make sure the oils are evenly distributed throughout the mixture.
Pouring and Cooling
Now for the fun part—pouring! Carefully pour your mixture into your molds. Don’t worry if it’s not perfect; it’s all going to be fabulous in the end! I like to use silicone molds because they make it super easy to pop the bars out once they’re set. Let them sit at room temperature for about 30 minutes to cool completely. You’ll know they’re ready when they feel solid to the touch. If you’re in a hurry, you can also pop them in the fridge for about 10-15 minutes to speed up the cooling process.
Storing Your Lotion Bars
Once your lotion bars are solid, it’s time to remove them from the molds. Gently flex the silicone molds to release the bars—be careful, as they can be a bit delicate! Now, store your lovely bars in a cool, dry place. I like to keep mine in an airtight container to protect them from moisture and heat. Just a heads up: try to avoid leaving them in direct sunlight, or they might melt back into a gooey mess. And voilà—your homemade lotion bars are ready to pamper your skin!
Why You’ll Love This Recipe
- Super Easy to Make: With just a few simple steps, you’ll have homemade lotion bars ready to go in no time. Seriously, it’s like magic in your kitchen!
- Completely Customizable: You can mix and match essential oils to create your perfect scent. Whether you want something calming, invigorating, or even seasonal, the choice is all yours!
- Eco-Friendly: By making your own lotion bars, you’re cutting down on plastic waste from store-bought lotions. Plus, you know exactly what’s going on your skin—no mystery ingredients here!
- Long-Lasting Moisture: These bars melt into your skin and provide lasting hydration, perfect for combating dryness during those harsh winter months or any time your skin needs a little extra love.
- Perfect for Gifting: Packaged beautifully, these lotion bars make fantastic gifts for friends and family. Who wouldn’t love a thoughtful, handmade present?
- Budget-Friendly: Making lotion bars at home is much cheaper than buying fancy lotions, and you get to make a whole batch at once!
Tips for Success
Alright, my friends, let’s make sure your lotion bars turn out absolutely perfect! I’ve learned a thing or two from my own adventures in the kitchen, and I want to share these nuggets of wisdom with you. Trust me, these tips will help you avoid common pitfalls and achieve that dreamy texture we all want in our lotion bars!
- Use a Kitchen Scale: For the best results, I highly recommend weighing your ingredients instead of using measuring cups. This ensures precision, especially with beeswax, which can be tricky to measure accurately.
- Don’t Rush the Melting: Take your time melting the ingredients. If you crank up the heat too high, you risk burning the oils or the beeswax, which can affect the quality of your bars. Low and slow is the way to go!
- Experiment with Ratios: Feel free to play around with the ratios of beeswax, shea butter, and coconut oil to find your perfect balance. If you want a firmer lotion bar, add a bit more beeswax. For a creamier texture, increase the shea butter.
- Test Your Essential Oils: Essential oils can be potent, so start with a smaller amount, especially if you’re using a new oil. You can always add more, but it’s tough to tone down a scent that’s too strong!
- Cool in a Controlled Environment: Try to let your lotion bars cool in a stable temperature environment. Rapid temperature changes can cause them to lose their shape or create a weird texture. If you’re in a warm room, consider using the fridge for cooling, but don’t forget to check on them!
- Keep It Clean: Make sure all your tools and containers are clean and dry before you start. Any moisture can affect how your lotion bars set and might even cause them to spoil faster.
- Have Fun with Molds: Don’t be afraid to get creative with your molds! Silicone molds come in all shapes and sizes, and they can really add a personal touch to your lotion bars. Plus, they make removal a breeze!
With these tips in your back pocket, you’re all set to create the most fabulous lotion bars ever! Remember, it’s all about having fun and enjoying the process. You’ve got this!
Nutritional Information for Lotion Bars
Now, let’s chat about the nutritional info for these fabulous lotion bars! While they’re not something you’d eat (trust me, they’re for your skin!), it’s good to know what’s in them—especially if you’re mindful of what you put on your body. Here’s a quick rundown of the estimated nutritional values per serving, which is one lotion bar:
- Calories: 120
- Fat: 14g
- Saturated Fat: 10g
- Unsaturated Fat: 4g
- Trans Fat: 0g
- Protein: 0g
- Carbohydrates: 0g
- Sugar: 0g
- Sodium: 0mg
- Cholesterol: 0mg
- Fiber: 0g
Keep in mind that these values are estimates and can vary based on the specific brands and types of ingredients you choose. But regardless, your skin will thank you for the nourishing goodness in these bars! Happy moisturizing!
FAQ About Lotion Bars
Got questions about lotion bars? Don’t worry, I’ve got you covered! Here are some of the most common questions I get, along with my best answers. Let’s dive in!
How do I use lotion bars?
Using lotion bars is super simple! Just rub the bar directly onto your skin, focusing on dry areas like elbows, knees, and hands. The warmth of your skin will melt the bar slightly, releasing that lovely moisture. You can also rub it between your palms and then apply it where you need it. Just a little goes a long way!
Can I add color to my lotion bars?
Absolutely! If you want to get a bit creative, you can add natural colorants like beet powder for pink, turmeric for yellow, or spirulina for green. Just remember to start with a small amount and mix thoroughly to achieve your desired shade. It’s a fun way to personalize your lotion bars!
How long do lotion bars last?
When stored properly in a cool, dry place, lotion bars can last for several months, sometimes even up to a year! Just make sure to keep them away from direct sunlight and heat to maintain their integrity.
Can I use lotion bars on my face?
While lotion bars are great for most areas of your body, I recommend using caution when applying them to your face. If you have oily or acne-prone skin, it might be best to stick to lighter moisturizers. However, if you have dry skin, you can definitely use them, just be sure to do a patch test first to see how your skin reacts!
Are lotion bars suitable for sensitive skin?
Yes, many people find lotion bars to be gentle on their skin, especially since you can control the ingredients. Just be mindful when choosing essential oils, as some can be irritating to sensitive skin. Always do a patch test with any new ingredient to ensure it works for you!
What’s the best way to store lotion bars?
Keep your lotion bars in an airtight container in a cool, dry place. You can also wrap them in paper or place them in a decorative tin for an extra touch. Just avoid leaving them in warm areas, as they can melt!
Hopefully, these answers help you feel more confident about making and using your lotion bars! If you have any other questions, feel free to reach out. Happy moisturizing!
Variations of Lotion Bars
Once you’ve mastered the basic lotion bar recipe, the fun really begins! There are so many ways to customize these lovely bars that it’s hard to choose just one favorite. Let’s explore some of the exciting variations you can try to make your lotion bars uniquely yours!
- Different Oils: While coconut oil and shea butter are fabulous, you can swap them out for other carrier oils! Try sweet almond oil for a lighter texture or olive oil for an extra dose of moisture. Just remember, each oil brings its own benefits and scent, so feel free to experiment!
- Herbal Infusions: If you want to take it up a notch, consider infusing your oils with herbs! Just heat your chosen oil with dried herbs like chamomile or calendula before straining it. This adds not only skin-loving properties but also a lovely hint of fragrance.
- Natural Colorants: Want to add a splash of color to your lotion bars? You can use natural colorants like beetroot powder for pink, turmeric for a sunny yellow, or spirulina for a green hue. Just mix a tiny bit into your melted oils before pouring into molds to achieve that beautiful shade!
- Exfoliating Add-ins: For a little extra pampering, consider adding exfoliants like finely ground coffee, oatmeal, or sugar to your lotion bars. Just a teaspoon or so will give your skin a gentle scrub while moisturizing at the same time. How cool is that?
- Fragrance Combinations: Mix and match essential oils to create your signature scent! For a calming blend, try lavender and chamomile, or for something refreshing, combine peppermint and eucalyptus. The possibilities are endless, and it’s a fantastic way to express your style!
- Seasonal Scents: Why not change things up with the seasons? In the fall, add a bit of cinnamon or clove for a warm, cozy aroma. During the summer, citrus oils like orange or lemon can bring a zesty freshness to your lotion bars. It’s like having a little piece of each season in your skincare routine!
With these variations, you can create lotion bars that not only nourish your skin but also reflect your personality and preferences. Have fun experimenting, and don’t hesitate to mix things up! You’re going to love discovering your own perfect combinations!
Equipment Needed for Lotion Bars
Before we jump into making those fabulous lotion bars, let’s talk about the equipment you’ll need. Trust me, having the right tools makes all the difference! Here’s a handy list of everything you’ll need to whip up your homemade skincare magic:
- Double Boiler: This is essential for safely melting your beeswax, shea butter, and coconut oil. If you don’t have a double boiler, no worries! You can create one by placing a heat-safe bowl over a pot of simmering water. Just make sure the bottom of the bowl doesn’t touch the water!
- Heat-Safe Mixing Bowl: You’ll need a sturdy bowl to combine your melted ingredients. Glass or stainless steel works best, as they can withstand the heat without warping.
- Spoon or Spatula: A good mixing spoon or spatula is key for stirring your ingredients together. I love using silicone spatulas because they’re heat-resistant and make it easy to scrape every last bit out of the bowl!
- Molds: Silicone molds are my absolute favorite for making lotion bars. They’re flexible and make it super easy to pop the bars out once they’re solid. You can find them in all sorts of fun shapes and sizes, so you can get a little creative!
- Measuring Cups and Spoons: Accurate measurements are important, especially with the beeswax. Make sure you have a set of measuring cups and spoons handy to get your ratios just right.
- Kitchen Scale (optional): For the most precise measurements, consider using a kitchen scale. This is particularly helpful for measuring beeswax, which can be a bit tricky with cups!
- Airtight Container: Once your lotion bars are made, you’ll want to store them in an airtight container to keep them fresh and protected from moisture. A pretty tin or jar can also make for a lovely presentation if you’re gifting them!
With these tools in hand, you’re all set to get started on your lotion bar adventure! Just remember, the process is just as enjoyable as the beautiful bars you’ll create. Happy crafting!
Print
Lotion Bars: 7 Magical Recipes for Soft, Glowing Skin
- Total Time: 25 minutes
- Yield: 10 lotion bars 1x
- Diet: Vegan
Description
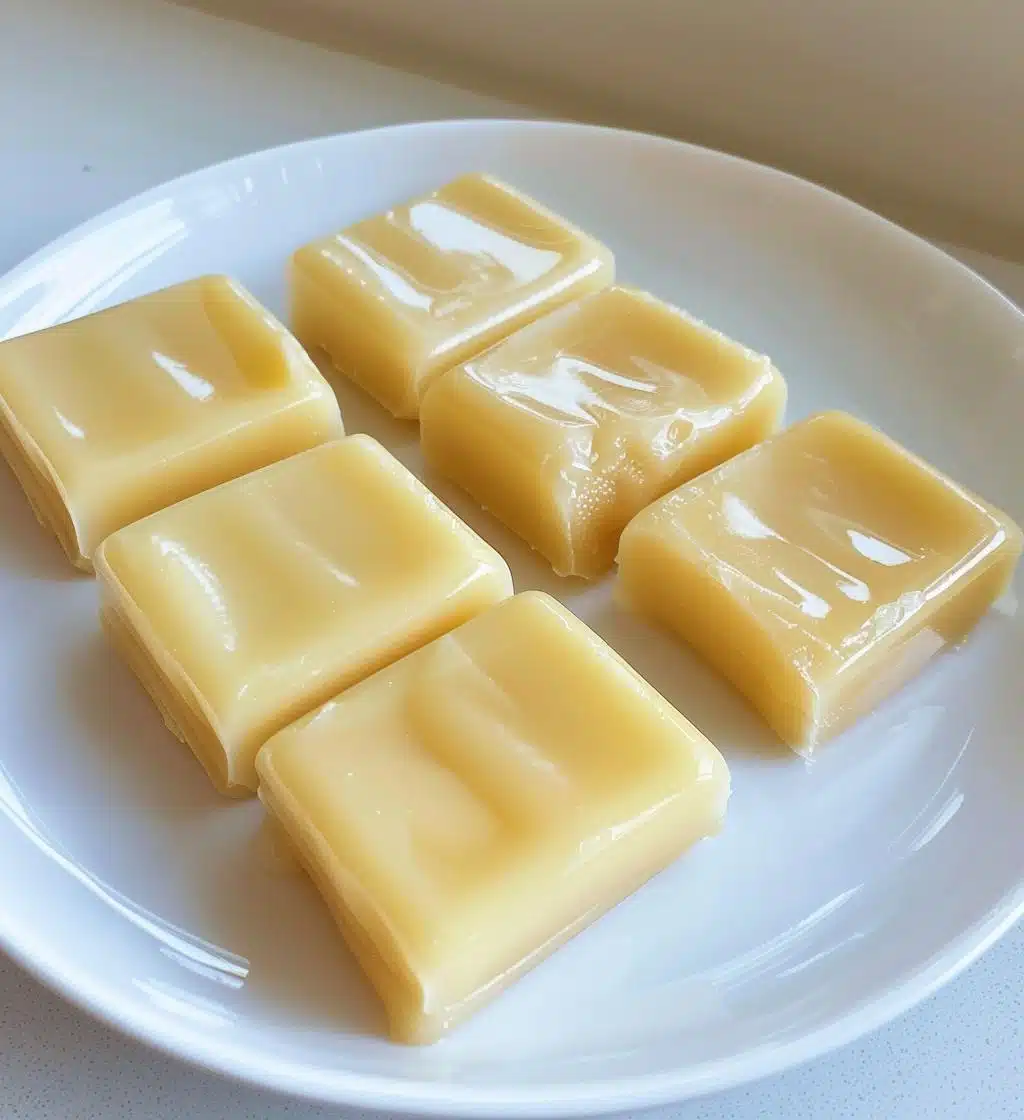
A lotion bar is a solid moisturizer that melts onto your skin.
Ingredients
- 1 cup beeswax
- 1/2 cup shea butter
- 1/2 cup coconut oil
- Essential oils (optional)
Instructions
- Melt beeswax, shea butter, and coconut oil in a double boiler.
- Stir until fully combined.
- Add essential oils if desired.
- Pour mixture into molds.
- Let cool until solid.
- Remove from molds and store in a cool, dry place.
Notes
- Adjust essential oil quantity to your preference.
- Store away from direct sunlight.
- Test on a small area of skin first.
- Prep Time: 10 minutes
- Cook Time: 15 minutes
- Category: Skincare
- Method: Melting and pouring
- Cuisine: N/A
Nutrition
- Serving Size: 1 bar
- Calories: 120
- Sugar: 0g
- Sodium: 0mg
- Fat: 14g
- Saturated Fat: 10g
- Unsaturated Fat: 4g
- Trans Fat: 0g
- Carbohydrates: 0g
- Fiber: 0g
- Protein: 0g
- Cholesterol: 0mg
Keywords: Lotion Bars