
Oh my goodness, let me tell you about these Mini Grilled Cheese Sliders! They’re like little bites of happiness that are perfect for any gathering. Seriously, whether it’s game day, a cozy movie night, or just a casual get-together with friends, these sliders always steal the show. They’re so simple to make, and once you get that gooey cheese melting between the crispy, buttery bread, you’ll be hooked! Trust me, everyone will be coming back for seconds—and maybe even thirds! Plus, you can customize them with your favorite cheeses or add-ins. What’s not to love?
Ingredients for Mini Grilled Cheese Sliders
- 8 slices of bread (I love using sourdough or whole wheat for extra flavor!)
- 4 slices of cheddar cheese (sharp or mild, totally your choice!)
- 4 slices of mozzarella cheese (for that stretchy, melty goodness!)
- 4 tablespoons of butter (unsalted works best for control over the saltiness)
How to Prepare Mini Grilled Cheese Sliders
- First things first, preheat your skillet over medium heat. This is key for getting that perfect golden brown crust!
- While that’s heating up, grab your butter and spread a generous layer on one side of each slice of bread. Don’t skimp on this step—it’s what gives your sliders that mouthwatering flavor!
- Now, place one slice of bread in the skillet, butter side down. You should hear a delightful sizzle! This is a good sign.
- Add one slice of cheddar cheese and one slice of mozzarella on top of the bread. Oh boy, the combo of these cheeses is heavenly!
- Next, cover it up with another slice of bread, butter side up. This will help create that crispy outer layer we all crave.
- Let it cook for about 2-3 minutes. Keep an eye on it; you want that bottom to be golden brown and toasty. If it starts to smell too toasty, don’t panic—just adjust the heat a bit!
- Time to flip! Carefully turn the slider over and cook the other side for an additional 2-3 minutes, or until it’s also golden and the cheese is all melty and gooey. Yum!
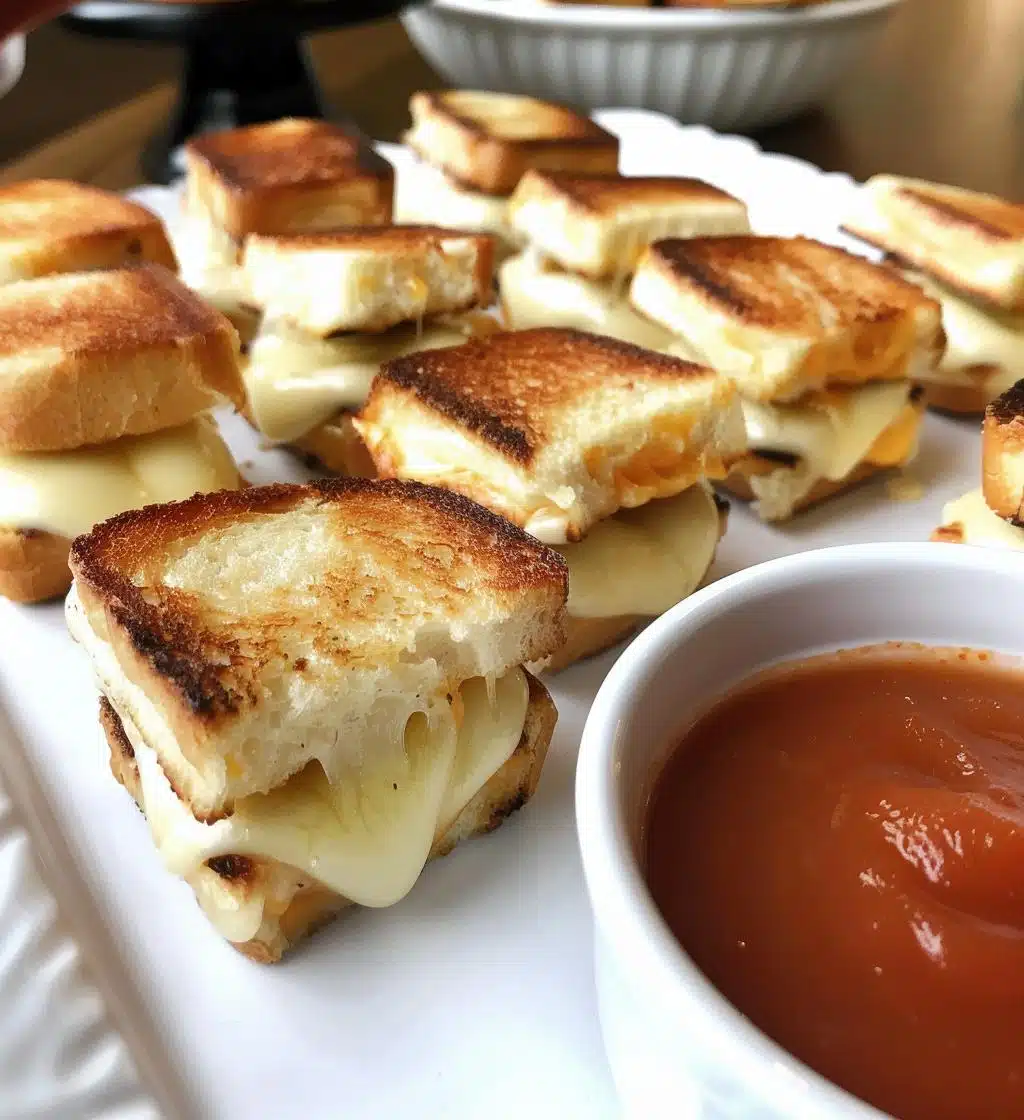
- Once both sides are beautifully browned, remove the slider from the skillet and cut it into quarters. This is where the fun begins—mini sandwiches are meant to be shared!
- Repeat the process with the remaining ingredients, and soon you’ll have a platter full of these delightful Mini Grilled Cheese Sliders ready to impress your guests!
Why You’ll Love This Recipe
- They’re quick and easy to whip up—perfect for last-minute gatherings!
- Cheesy, gooey goodness in every bite—what’s not to love?
- Customizable with your favorite cheeses or extras like bacon or veggies!
- Great for both kids and adults; everyone loves a good grilled cheese!
- Perfectly portioned for snacking or as a fun appetizer for parties!
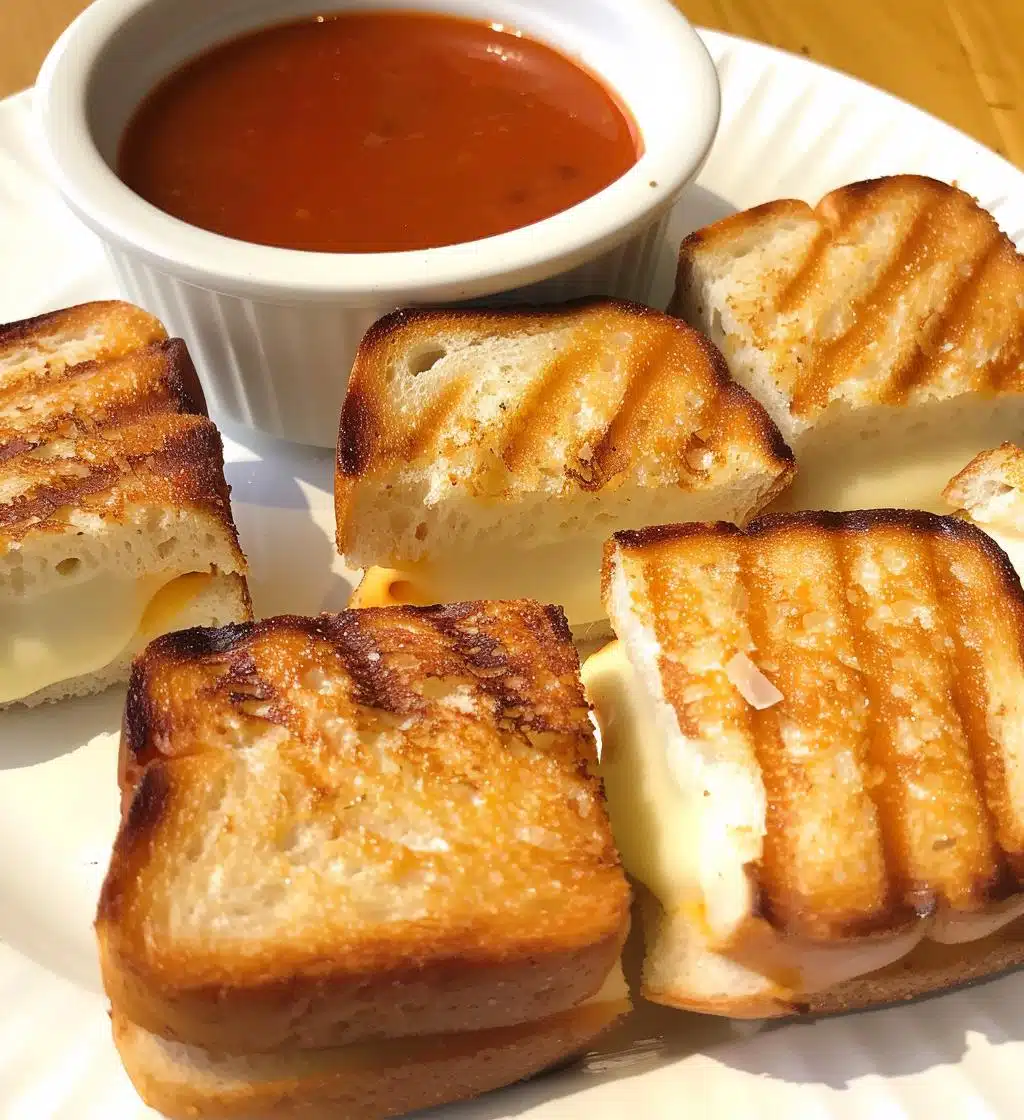
- Pair wonderfully with a warm bowl of tomato soup for dipping!
Tips for Success with Mini Grilled Cheese Sliders
Okay, let’s make sure your Mini Grilled Cheese Sliders turn out absolutely perfect! Here are some of my favorite tips to keep in mind:
- Use the right heat: Keep your skillet at medium heat. If it’s too hot, the bread will burn before the cheese melts—you don’t want that! If it’s too low, you’ll be waiting forever for that golden crust.
- Butter generously: Don’t skimp on the butter! It’s what gives your sliders that gorgeous crispy texture and rich flavor. Plus, it helps prevent sticking, so you’ll have less cleanup later!
- Experiment with cheeses: Feel free to mix and match your cheeses! Gruyère, pepper jack, or even a sprinkle of blue cheese can add a delightful twist. Just be sure to choose cheeses that melt well.
- Keep an eye on them: Don’t walk away while they cook! It’s super easy to get distracted, but trust me, you’ll want to flip them at just the right moment for optimal crispiness.
- Cutting is key: When you cut your sliders into quarters, use a sharp knife and cut gently to avoid squishing all that cheesy goodness out. A serrated knife works wonders here!
- Serve immediately: These sliders are best enjoyed fresh and warm, right off the skillet. If you have to wait, keep them warm in a low oven while you finish up the batch.
Following these tips will help you create sliders that are not just good, but absolutely irresistible! Enjoy the cheesy goodness!
Nutritional Information for Mini Grilled Cheese Sliders
Now, let’s chat about what’s in these delightful little sandwiches! Each serving of Mini Grilled Cheese Sliders (that’s 2 sliders) packs a satisfying punch in terms of flavor and nutrition. Here’s a quick breakdown:
- Calories: 300
- Fat: 20g
- Saturated Fat: 10g
- Unsaturated Fat: 8g
- Trans Fat: 0g
- Cholesterol: 40mg
- Sodium: 600mg
- Carbohydrates: 24g
- Fiber: 1g
- Sugar: 2g
- Protein: 10g
So, there you have it! These sliders are a tasty treat that won’t break the calorie bank. Of course, feel free to adjust the ingredients based on your preferences—like swapping in whole grain bread for added fiber or using different cheeses for a flavor boost! Enjoy every cheesy bite without a hint of guilt!
Serving Suggestions
Now that you have your delicious Mini Grilled Cheese Sliders ready, let’s talk about what to serve alongside them to really elevate the meal! Trust me, these pairings will take your sliders from great to unforgettable!
- Classic Tomato Soup: This is a match made in heaven! The creamy, tangy soup is perfect for dipping those cheesy sliders into. It adds warmth and comfort to your meal.
- Pickles or Pickled Veggies: A side of crunchy pickles or tangy pickled veggies adds a delightful contrast to the rich cheese. It’s a flavor explosion that you won’t want to miss!
- Fresh Salad: A light, crisp salad with a zesty vinaigrette can balance out the richness of the sliders. Try adding some cherry tomatoes, cucumbers, and a sprinkle of feta cheese for extra flavor!
- Sweet Potato Fries: If you’re in the mood for something a bit heartier, serve your sliders with some crispy sweet potato fries. They add a touch of sweetness that complements the savory cheese perfectly!
- Fruit Salad: A refreshing fruit salad can be a great palate cleanser. Think juicy watermelon, sweet strawberries, and zesty citrus for a burst of freshness!
These serving suggestions not only enhance the overall meal experience but also add variety to your table. So go ahead, mix and match, and create a delightful spread that everyone will love! Enjoy your sliders and the wonderful flavors they bring!
FAQ About Mini Grilled Cheese Sliders
Got questions about these delightful Mini Grilled Cheese Sliders? I’ve got you covered! Here are some of the most common queries I get, along with my answers to help you make the best sliders ever!
Can I use different types of bread?
Absolutely! While I love the classic flavors of sourdough or whole wheat, feel free to experiment with any bread you like. Brioche adds a lovely touch of sweetness, while a good rye can bring a unique flavor profile. Just make sure it’s sturdy enough to hold all that cheesy goodness!
How do I make these sliders dairy-free?
No problem at all! You can use dairy-free cheese alternatives, and there are some fantastic options out there that melt beautifully. Just be sure to check the packaging for any specific cooking instructions, as they may vary a bit!
Can I add extras to my sliders?
Yes, yes, yes! These Mini Grilled Cheese Sliders are super customizable. You can add cooked bacon, sliced tomatoes, or even sautéed spinach for a veggie boost. Just keep in mind that too many extras can make the sliders a bit tricky to flip, so balance is key!
What’s the best way to keep them warm if I’m serving a crowd?
If you’re making a big batch, keep the sliders warm in a low oven (about 200°F or 93°C) while you finish cooking the rest. Just place them on a baking sheet lined with parchment paper. This way, they’ll stay toasty and delicious for your guests!
How do I store leftovers?
Leftover Mini Grilled Cheese Sliders can be stored in an airtight container in the fridge for up to 3 days. When you’re ready to enjoy them again, just reheat them in a skillet over medium heat until warmed through. This will help keep that lovely crispiness!
Feel free to reach out if you have more questions. I’m always happy to help you make your Mini Grilled Cheese Sliders the best they can be! Enjoy your cheesy adventures!
Storage & Reheating Instructions
So, you’ve made a big batch of these heavenly Mini Grilled Cheese Sliders, and now you’ve got some leftovers—lucky you! Storing them properly is key to keeping that deliciousness for later. Here’s how to do it:
- Storing Leftovers: Place any uneaten sliders in an airtight container. This keeps them from getting dry or losing that delightful crispy texture. They’ll stay fresh in the fridge for up to 3 days. Just make sure they’re completely cooled before sealing them up!
Now, when you’re ready to enjoy those cheesy delights again, here’s how to reheat them while maintaining that scrumptious quality:
- Reheating: The best way to reheat your Mini Grilled Cheese Sliders is in a skillet over medium heat. Just pop them in and let them warm through for about 3-5 minutes on each side. This way, you’ll bring back that lovely golden crispiness and melty cheese! If you’re in a hurry, you can also use the microwave, but they won’t be quite as crispy. Just heat them in short bursts (about 30 seconds), checking frequently so you don’t overdo it.
Following these tips will ensure your Mini Grilled Cheese Sliders stay just as delicious as when they were freshly made. Enjoy every gooey, cheesy bite, even the next day!
Print
Mini Grilled Cheese Sliders: 8 Irresistible Bites of Joy
- Total Time: 25 minutes
- Yield: 4 servings 1x
- Diet: Vegetarian
Description
Mini Grilled Cheese Sliders are small, delicious sandwiches perfect for any gathering.
Ingredients
- 8 slices of bread
- 4 slices of cheddar cheese
- 4 slices of mozzarella cheese
- 4 tablespoons of butter
Instructions
- Preheat a skillet over medium heat.
- Butter one side of each slice of bread.
- Place one slice of bread, butter side down, in the skillet.
- Add one slice of cheddar and one slice of mozzarella on top.
- Cover with another slice of bread, butter side up.
- Cook until golden brown, about 2-3 minutes.
- Flip and cook the other side until golden and cheese is melted.
- Remove from skillet and cut into quarters.
- Repeat with remaining ingredients.
Notes
- Use any cheese of your choice.
- Serve with tomato soup for dipping.
- Prep Time: 10 minutes
- Cook Time: 15 minutes
- Category: Appetizer
- Method: Grilling
- Cuisine: American
Nutrition
- Serving Size: 2 sliders
- Calories: 300
- Sugar: 2g
- Sodium: 600mg
- Fat: 20g
- Saturated Fat: 10g
- Unsaturated Fat: 8g
- Trans Fat: 0g
- Carbohydrates: 24g
- Fiber: 1g
- Protein: 10g
- Cholesterol: 40mg
Keywords: Mini Grilled Cheese Sliders, Grilled Cheese, Sliders, Appetizers