
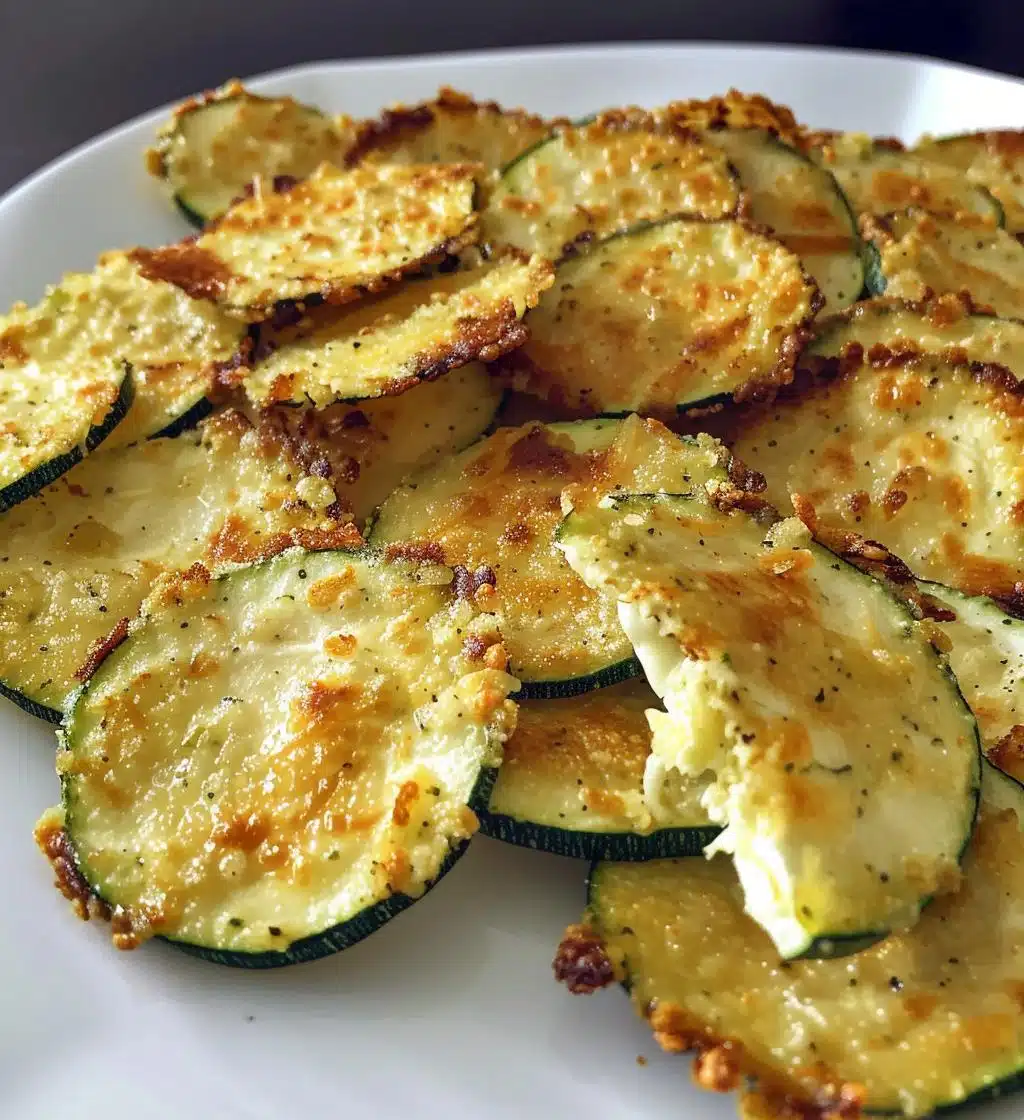
You know, there’s something magical about zucchini snacks that just makes my heart sing! I can hardly contain my excitement when I think about these Zucchini Cheese Crisps. They’re crispy, cheesy, and downright addictive! Trust me, if you’re looking for a tasty way to sneak in some veggies, this is it. They’re so easy to whip up and perfect for any occasion—whether you’re hosting a party, enjoying a movie night, or just craving a crunchy snack. Plus, they’re a delightful, healthier alternative to your usual chips! You’ll love how they satisfy that craving for something savory without the guilt. Seriously, these little gems are a game changer in the snack world, and I can’t wait for you to try them!

Ingredients List
- 2 medium zucchinis, grated: These beauties are the star of the show! Grating them makes it easier to mix with the other ingredients and helps them crisp up beautifully.
- 1 cup shredded cheese: I love using a sharp cheddar for that extra flavor kick, but feel free to mix it up with mozzarella or even pepper jack if you’re feeling adventurous!
- 1/2 cup almond flour: This is the secret to keeping our Zucchini Cheese Crisps gluten-free while adding that lovely texture. It helps bind everything together.
- 1/2 teaspoon garlic powder: Just a dash of this adds a wonderful depth of flavor! Trust me, it elevates the taste to a whole new level.
- 1/2 teaspoon salt: A little salt goes a long way in enhancing all the flavors. Adjust according to your taste preference, of course!
- 1/4 teaspoon black pepper: This adds a subtle kick and pairs perfectly with the cheese and zucchini.
How to Prepare Zucchini Cheese Crisps
Preheat and Prepare
First things first, you’ll want to preheat your oven to 425°F (220°C). This is super important because a hot oven ensures our Zucchini Cheese Crisps get that perfect crunch! While the oven is warming up, grab those zucchinis and give them a good wash. After that, it’s grating time! I like to use the large holes on a box grater to get nice, fluffy shreds. But here’s a little secret: after grating, you really need to squeeze out as much moisture as possible. I grab a clean kitchen towel, throw the grated zucchini in, and give it a good twist. You wouldn’t believe how much water comes out! This step is crucial for getting those crisps nice and crispy.
Mixing the Ingredients
Now, let’s move on to the fun part—mixing! In a large bowl, combine your grated zucchini, the shredded cheese, almond flour, garlic powder, salt, and black pepper. I like to use a fork or a spatula to mix everything together. Just make sure you’re mixing gently but thoroughly, so every bit of zucchini gets coated in that cheesy goodness. You want the mixture to be well combined but not overmixed. It should hold together nicely when you squeeze it in your hand, like a little veggie cheese ball!
Baking the Crisps
Alright, it’s time to get baking! Line a baking sheet with parchment paper—this helps prevent sticking and makes cleanup a breeze. Using a spoon, drop spoonfuls of the mixture onto the sheet, leaving some space between each one, and gently flatten them a bit. You want them to be about 1/2 inch thick for even cooking. Pop them in the oven and set a timer for 15-20 minutes. Keep an eye on them, and you’ll know they’re ready when they’re golden brown and crispy! Let them cool for a few minutes before serving, and get ready to enjoy the deliciousness!
Why You’ll Love This Recipe
- Quick Preparation: You can whip these up in just about 30 minutes, making them perfect for a last-minute snack or party appetizer!
- Easy Clean-Up: With just one bowl and a baking sheet, clean-up is a breeze! Less time cleaning means more time enjoying your delicious crisps.
- Healthy Snack Option: These Zucchini Cheese Crisps are a guilt-free alternative to traditional chips, letting you indulge without the extra calories.
- Gluten-Free: Thanks to the almond flour, these crisps are gluten-free, making them suitable for anyone with dietary restrictions.
- Customizable: Feel free to switch up the cheese or add your favorite herbs and spices! Experimenting with different flavors keeps things exciting.
Nutritional Information
Alright, let’s talk numbers! Here’s the estimated nutritional data for one serving of these Zucchini Cheese Crisps. Keep in mind, this is just an estimate, but it gives you a good idea of what you’re munching on:
- Calories: 150
- Fat: 10g
- Saturated Fat: 5g
- Unsaturated Fat: 3g
- Trans Fat: 0g
- Cholesterol: 20mg
- Carbohydrates: 5g
- Fiber: 1g
- Sugar: 2g
- Protein: 8g
- Sodium: 200mg
So there you have it! These little crisps are not just tasty but also pack a nice protein punch while keeping things light. Perfect for those snack attacks, right?
Tips for Success
Now, let’s make sure your Zucchini Cheese Crisps turn out absolutely perfect! Here are some of my go-to tips for success:
- Moisture Extraction: This is key! After grating the zucchini, don’t skip the squeezing step. I can’t stress enough how important it is to remove excess moisture. The drier the zucchini, the crispier your crisps will be!
- Cheese Selection: Choose your cheese wisely! While sharp cheddar is my favorite for flavor, you can experiment with others like mozzarella for stretchiness or a spicy pepper jack for a kick. Just keep in mind that moisture content varies with different cheeses, so adjust accordingly.
- Baking Techniques: Make sure to space out your mixture on the baking sheet. If they’re too close, they might steam instead of crisp up. Also, flattening them to about 1/2 inch thick helps them cook evenly, so don’t be shy about giving them a gentle press!
- Watch the Timing: Ovens can vary, so start checking around the 15-minute mark. You want that beautiful golden brown color, and a little extra time can make all the difference in achieving that perfect crunch!
- Cooling Time: Let them cool on the baking sheet for a few minutes before transferring them to a plate. This resting period helps them firm up a bit more and enhances that crunch factor!
With these tips in your back pocket, you’ll be well on your way to making the crispiest, tastiest Zucchini Cheese Crisps ever! Enjoy the process, and happy snacking!
Variations
If you’re anything like me, you love to mix things up in the kitchen! The great thing about these Zucchini Cheese Crisps is how flexible they are. You can easily customize them to suit your taste buds or whatever you have on hand. Here are some fun ideas to get you started:
- Herb Infusion: Add a teaspoon of dried herbs like oregano, basil, or thyme for an aromatic twist. Fresh herbs work too—just chop ‘em finely and mix them in!
- Spicy Kick: If you’re a fan of heat, sprinkle in some red pepper flakes or cayenne pepper. Just a pinch can elevate the flavor and provide that spicy edge!
- Cheese Variety: While I adore sharp cheddar, why not try feta for a tangy flavor, or a melty mozzarella for that gooey texture? Even a blue cheese can add a bold punch if you’re feeling adventurous!
- Veggie Boost: Consider adding some finely chopped spinach, bell peppers, or even grated carrots to the mixture. It’s a fantastic way to sneak in more veggies and add different textures!
- Nutty Flavor: Swap out the almond flour for other nut flours like hazelnut or cashew if you want to switch things up a bit. Just be mindful of the moisture content and adjust accordingly!
Remember, the base recipe is super flexible, so feel free to experiment while keeping the proportions roughly the same. Just have fun with it, and don’t be afraid to get creative. You’re going to love discovering new flavor combinations in your Zucchini Cheese Crisps! Happy experimenting!
Storage & Reheating Instructions
So, you’ve made a batch of these delicious Zucchini Cheese Crisps, and now you’re wondering how to keep them fresh for later. No worries! Storing them is super simple. Just place any leftovers in an airtight container and pop them in the fridge. They’ll stay good for about 3 days, but trust me, they’re so tasty you might not even have any left!
Now, when it comes to reheating, we want to keep that lovely crispiness intact! I recommend using the oven for the best results. Preheat your oven to 350°F (175°C) and spread the crisps out on a baking sheet in a single layer. Bake them for about 5-7 minutes, keeping a close eye on them. This will help restore their crunchiness without making them soggy. You can also use an air fryer if you have one—just toss them in for a few minutes and they’ll crisp right back up!
Microwaving is an option too, but be careful! If you go that route, only heat them for short bursts of 20 seconds at a time. Too long in the microwave can make them chewy, and we definitely want to avoid that. With these simple steps, your Zucchini Cheese Crisps will be just as delightful the second time around! Enjoy every crunchy bite!
FAQ Section
Got questions about these delicious Zucchini Cheese Crisps? Don’t worry, I’ve got you covered! Here are some common queries I get, along with my answers:
What type of cheese works best?
While I love sharp cheddar for its bold flavor, you can absolutely experiment! Mozzarella gives that lovely gooey texture, and pepper jack adds a spicy twist. Just remember that different cheeses have varying moisture levels, so adjust the almond flour if you’re using a cheese that’s creamier!
Are these crisps gluten-free?
Yes! As long as you stick to almond flour and cheese that doesn’t contain gluten, your Zucchini Cheese Crisps will be gluten-free. They’re a perfect snack for anyone with gluten sensitivities!
How should I store leftovers?
Simply pop any leftovers in an airtight container and stash them in the fridge. They’ll stay fresh for about 3 days. Just keep in mind, they’re best enjoyed right after baking for that ultimate crispiness!
Can I make these ahead of time?
Absolutely! You can prep the mixture ahead and store it in the fridge for up to a day before baking. Just remember to give it a good mix again before you drop spoonfuls onto the baking sheet!
What if my crisps are too soggy?
If that happens, it usually means the zucchini had too much moisture left in it. Make sure to squeeze out as much water as possible after grating. If you find your crisps are soggy after baking, just pop them back in the oven for a few more minutes to help them crisp up!
Can I freeze these crisps?
I wouldn’t recommend freezing them once baked, as they tend to lose their delightful crunch. However, you can freeze the uncooked mixture in small portions. Just thaw it in the fridge overnight before baking!
Hopefully, these answers help you on your journey to making the best Zucchini Cheese Crisps! If you have more questions, feel free to reach out. Happy cooking!
Print
Zucchini Cheese Crisps: 5 Irresistibly Crunchy Bites
- Total Time: 30 minutes
- Yield: 4 servings 1x
- Diet: Gluten Free
Description
Crispy and cheesy zucchini snacks.
Ingredients
- 2 medium zucchinis, grated
- 1 cup shredded cheese
- 1/2 cup almond flour
- 1/2 teaspoon garlic powder
- 1/2 teaspoon salt
- 1/4 teaspoon black pepper
Instructions
- Preheat your oven to 425°F (220°C).
- Grate the zucchinis and squeeze out excess moisture.
- In a bowl, mix the grated zucchini, cheese, almond flour, garlic powder, salt, and pepper.
- Line a baking sheet with parchment paper.
- Drop spoonfuls of the mixture onto the baking sheet, flattening them slightly.
- Bake for 15-20 minutes or until golden brown and crispy.
- Let cool before serving.
Notes
- Store leftovers in an airtight container.
- Can use different cheese types for varied flavor.
- Prep Time: 10 minutes
- Cook Time: 20 minutes
- Category: Snack
- Method: Baking
- Cuisine: American
Nutrition
- Serving Size: 1 serving
- Calories: 150
- Sugar: 2g
- Sodium: 200mg
- Fat: 10g
- Saturated Fat: 5g
- Unsaturated Fat: 3g
- Trans Fat: 0g
- Carbohydrates: 5g
- Fiber: 1g
- Protein: 8g
- Cholesterol: 20mg
Keywords: Zucchini Cheese Crisps