

Let me tell you about my absolute favorite treat: Cherry Icebox Cookies! These little gems are not only packed with the delightful sweetness of cherries but are also incredibly easy to whip up. I remember the first time I made them for a family gathering; the aroma of buttery cookies baking filled the kitchen, and everyone couldn’t wait to dig in! The best part? You can prepare the dough in advance, pop it in the fridge, and slice it up whenever the cookie craving strikes. They’re perfect for any occasion, whether it’s a cozy night in, a festive celebration, or just because you deserve a sweet treat. Trust me, once you take that first bite, you’ll be hooked!
Ingredients for Cherry Icebox Cookies
Gathering the right ingredients is key to making these delicious Cherry Icebox Cookies. Here’s what you’ll need:
- 1 cup unsalted butter, softened: Make sure it’s at room temperature for easy creaming!
- 1 cup granulated sugar: This adds sweetness and helps create that lovely texture.
- 2 cups all-purpose flour: The base of our cookie dough, giving it structure.
- 1/2 teaspoon salt: Just a pinch to enhance the flavors and balance the sweetness.
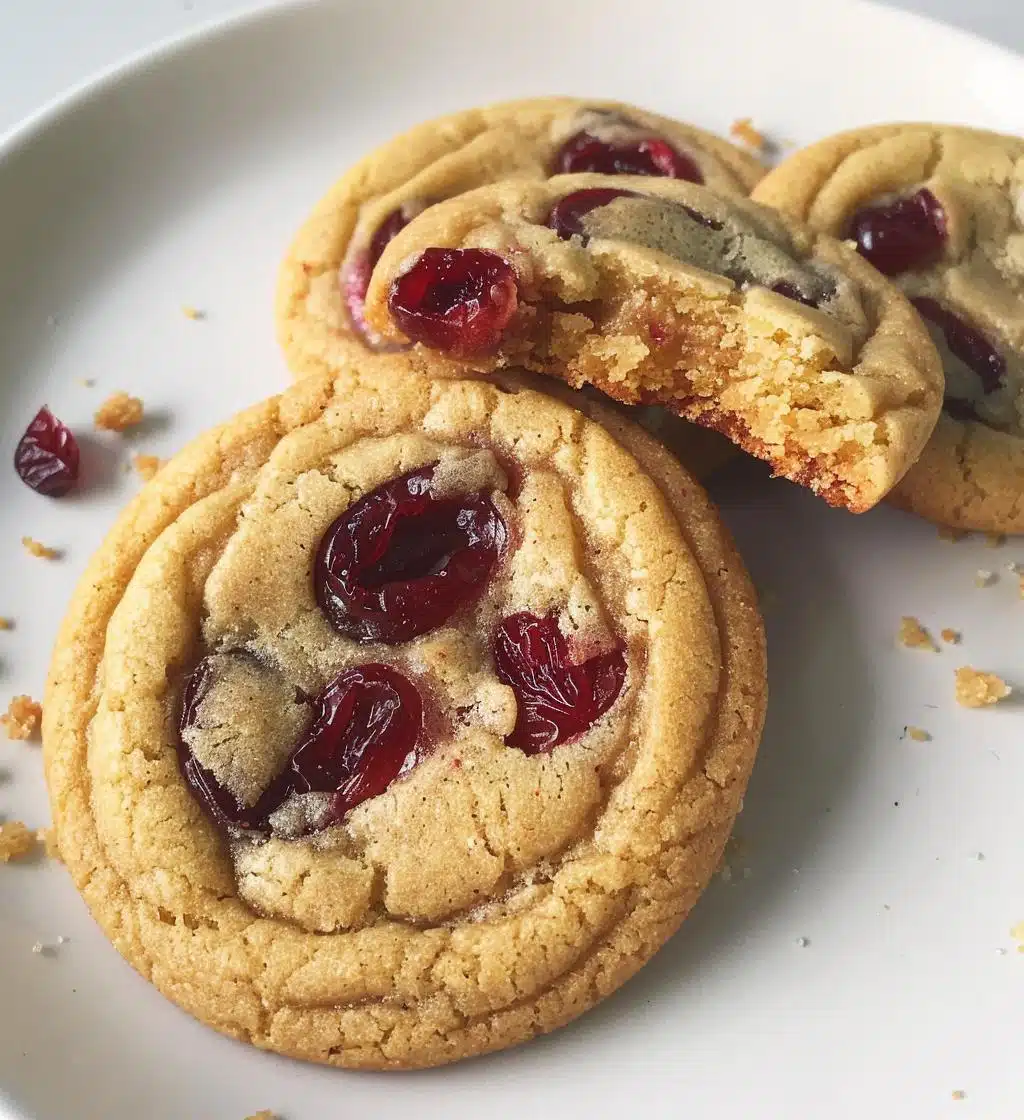
- 1 cup dried cherries, chopped: These are the real stars! Chop them up for little bursts of cherry goodness in every bite.
- 1 teaspoon vanilla extract: For that warm, inviting flavor that pairs perfectly with cherries.
Make sure you have everything on hand before you start, and trust me, your kitchen will smell heavenly once these cookies are in the oven!
How to Prepare Cherry Icebox Cookies
Now that you’ve got your ingredients ready, let’s dive into the delightful process of making these Cherry Icebox Cookies! Trust me, it’s super simple and oh-so-rewarding. Just follow these easy steps, and you’ll have a batch of cookies that will impress everyone!
Step-by-Step Instructions
- Cream the butter and sugar: In a large mixing bowl, use an electric mixer to cream the softened butter and granulated sugar together. You want this mixture to be light and fluffy, which usually takes about 2-3 minutes. This is where all that delicious air gets in, making your cookies tender!
- Add the vanilla: Once your butter and sugar are looking fluffy, mix in that lovely teaspoon of vanilla extract. It’s going to add warmth to your dough, and you’ll love the aroma!
- Combine the dry ingredients: In a separate bowl, whisk together the all-purpose flour and salt. Then, gradually add this dry mixture to the butter-sugar mixture. Mix just until combined—don’t overdo it! You want to keep that nice, airy texture.
- Fold in the cherries: This is the fun part! Gently fold in the chopped dried cherries using a spatula. You want to make sure they’re evenly distributed without overmixing the dough.
- Shape the dough: Once everything is combined, take the dough and shape it into two logs, about 2 inches in diameter. Wrap each log tightly in plastic wrap. This is where they’ll get their icebox name!
- Chill the dough: Pop those wrapped logs into the refrigerator and let them chill for at least 2 hours, or even overnight if you can wait! Chilling is crucial because it helps the cookies maintain their shape while baking.
- Preheat the oven: When you’re ready to bake, preheat your oven to 350°F (175°C). This ensures a nice, even bake!
- Slice and bake: Unwrap the chilled dough and slice it into rounds about 1/4-inch thick. Place them on a baking sheet lined with parchment paper, leaving a little space between each cookie. Bake for 12-15 minutes or until the edges are lightly golden.
- Cool before serving: Once they’re out of the oven, let the cookies cool on the baking sheet for a few minutes before transferring them to a wire rack to cool completely. I know it’s hard to resist, but they taste even better once cooled!
And there you have it! Follow these steps, and you’ll be rewarded with scrumptious Cherry Icebox Cookies that are perfect for sharing—or keeping all to yourself! Enjoy every bite!
Why You’ll Love This Recipe
- Quick and easy preparation—perfect for busy days or last-minute gatherings!
- Deliciously sweet with the perfect balance of buttery cookie dough and chewy cherries.
- Chilling the dough means you can make it ahead of time and bake fresh cookies whenever the craving hits.
- Versatile recipe—swap in different dried fruits or even nuts to make it your own!
- They look impressive but are simple enough for any home baker to tackle!
- Great for sharing at parties, picnics, or just enjoying at home with a cup of tea.
- Each bite is a delightful surprise with those chewy cherry pieces—pure cookie bliss!
Tips for Success with Cherry Icebox Cookies
To make sure your Cherry Icebox Cookies turn out absolutely perfect every time, I’ve got some handy tips to share with you! Trust me, these little nuggets of wisdom will elevate your cookie game:
- Chill Longer for Flavor: If you can, let the dough chill overnight. It really enhances the flavors and helps the cookies hold their shape while baking.
- Check Your Butter: Make sure your butter is softened but not melted! If it’s too warm, your cookies might spread too much while baking. Aim for that perfect creamy texture.
- Don’t Overmix: When adding the flour and folding in the cherries, mix just until combined. Overmixing can lead to tough cookies, and we want them to be tender and delicious!
- Use Parchment Paper: Line your baking sheet with parchment paper for easy cleanup and to help prevent sticking. Plus, it gives your cookies a nice, even bake.
- Watch the Bake Time: Every oven is a little different, so keep an eye on your cookies as they bake. You want to pull them out as soon as the edges are lightly golden for that perfect texture!
- Experiment with Add-ins: Feel free to get creative! Try adding a sprinkle of cinnamon, some chopped nuts, or even a drizzle of chocolate on top after they cool for a fun twist.
With these tips in your back pocket, you’re all set to create the most scrumptious Cherry Icebox Cookies that will have everyone asking for seconds!
Variations of Cherry Icebox Cookies
If you’re like me and love to mix things up in the kitchen, you’ll be thrilled to know that Cherry Icebox Cookies are super versatile! You can easily customize this recipe to fit your taste or to use whatever you have on hand. Here are some of my favorite variations that I think you’ll enjoy:
- Dried Cranberries: Swap out the cherries for dried cranberries for a tart twist that adds a pop of color and flavor!
- Apricots: Chopped dried apricots bring a lovely sweetness and a chewy texture that complements the buttery cookie base beautifully.
- Chocolate Chips: For the chocolate lovers out there, toss in some semi-sweet or dark chocolate chips along with the cherries for a decadent treat.
- Pineapple: Try using dried pineapple for a tropical flair! It adds a unique sweetness that’ll have everyone guessing what’s in your cookies.
- Nuts: Add some chopped walnuts or pecans for a delightful crunch and a nutty flavor that pairs perfectly with the sweetness of the fruits.
- Coconut: Mix in some shredded coconut for an extra layer of flavor that brings a lovely chewiness and an island vibe!
- Spices: Don’t hesitate to sprinkle in some cinnamon or nutmeg for a warm, spiced flavor that’s especially lovely during the colder months.
Feel free to experiment and combine these ideas! Each variation can give your Cherry Icebox Cookies a whole new personality, making them a fun treat for any occasion. Happy baking!
Storage & Reheating Instructions
Once you’ve baked up a batch of these delightful Cherry Icebox Cookies, you’ll want to make sure they stay fresh and delicious for as long as possible! Here’s how to store them properly:
- Store in an Airtight Container: Allow the cookies to cool completely before transferring them to an airtight container. This keeps them from getting soggy and helps maintain that perfect texture. They can last up to a week at room temperature!
- For Longer Storage: If you want to keep your cookies for a longer period, you can freeze them! Just layer the cookies in a freezer-safe container, separating each layer with parchment paper to prevent sticking. They’ll stay fresh for up to 3 months in the freezer.
- Thawing Frozen Cookies: When you’re ready to enjoy those frozen treats, simply take them out and let them thaw at room temperature for about 30 minutes. If you prefer them warm, you can pop them in a preheated oven at 350°F (175°C) for just a few minutes to freshen them up.
With these storage tips, you’ll be able to savor your Cherry Icebox Cookies at their best, no matter when you decide to indulge. Enjoy every last crumb!
Nutritional Information for Cherry Icebox Cookies
When it comes to enjoying Cherry Icebox Cookies, it’s always nice to know what you’re indulging in! Here’s a general breakdown of the typical nutritional values per cookie, based on standard ingredients:
- Calories: 120
- Fat: 6g
- Saturated Fat: 4g
- Unsaturated Fat: 2g
- Trans Fat: 0g
- Cholesterol: 30mg
- Sodium: 50mg
- Carbohydrates: 14g
- Fiber: 0g
- Sugar: 8g
- Protein: 1g
Keep in mind that these values are estimates and can vary depending on the specific brands and quantities you use. But hey, a little sweetness in your day is always worth it, right? Enjoy your cookies guilt-free!
FAQ About Cherry Icebox Cookies
If you’re diving into the world of Cherry Icebox Cookies, you might have a few questions swirling around in your mind. No worries—I’ve got you covered! Here are some common queries folks have about this scrumptious recipe:
Can I use fresh cherries instead of dried?
While fresh cherries would be delicious, they contain a lot of moisture which can affect the texture of your cookies. Stick with dried cherries for that perfect chewy bite!
How do I know when the cookies are done baking?
Keep an eye on the edges! They should be lightly golden. The centers might look a tad soft, but they’ll firm up as they cool. If they start turning too dark, it’s time to pull them out.
Can I make the dough ahead of time?
Absolutely! In fact, I recommend it! You can prepare the dough, shape it into logs, wrap them, and keep them in the fridge for up to 3 days. Just slice and bake when you’re ready for fresh cookies!
What if I don’t have plastic wrap to chill the dough?
No problem! You can use parchment paper or even wax paper to wrap the dough. Just make sure it’s tightly sealed to prevent air from getting in.
Can I add nuts or other mix-ins?
Absolutely! Feel free to toss in some chopped nuts or even chocolate chips if you’re feeling adventurous! Just remember to adjust the total amount of mix-ins so you don’t throw off the balance of the dough.
Got more questions? Don’t hesitate to ask! These cookies are meant to be fun and easy, so let’s make sure you get it just right. Happy baking!
Print
Cherry Icebox Cookies: 7 Blissful Bites to Savor
- Total Time: 2 hours 30 minutes
- Yield: 24 cookies 1x
- Diet: Vegetarian
Description
Cherry Icebox Cookies are a delightful treat that combines sweet cherries with a buttery cookie dough. They are chilled and sliced, making them easy to prepare and serve.
Ingredients
- 1 cup unsalted butter, softened
- 1 cup granulated sugar
- 2 cups all-purpose flour
- 1/2 teaspoon salt
- 1 cup dried cherries, chopped
- 1 teaspoon vanilla extract
Instructions
- In a bowl, cream the butter and sugar until light and fluffy.
- Mix in the vanilla extract.
- Gradually add the flour and salt, mixing until combined.
- Fold in the chopped cherries.
- Shape the dough into logs and wrap in plastic wrap.
- Chill in the refrigerator for at least 2 hours.
- Preheat the oven to 350°F (175°C).
- Slice the chilled dough into rounds.
- Place on a baking sheet and bake for 12-15 minutes.
- Allow to cool before serving.
Notes
- Store cookies in an airtight container.
- For a variation, use other dried fruits.
- Chill the dough overnight for better flavor.
- Prep Time: 15 minutes
- Cook Time: 15 minutes
- Category: Dessert
- Method: Baking
- Cuisine: American
Nutrition
- Serving Size: 1 cookie
- Calories: 120
- Sugar: 8g
- Sodium: 50mg
- Fat: 6g
- Saturated Fat: 4g
- Unsaturated Fat: 2g
- Trans Fat: 0g
- Carbohydrates: 14g
- Fiber: 0g
- Protein: 1g
- Cholesterol: 30mg
Keywords: Cherry Icebox Cookies