

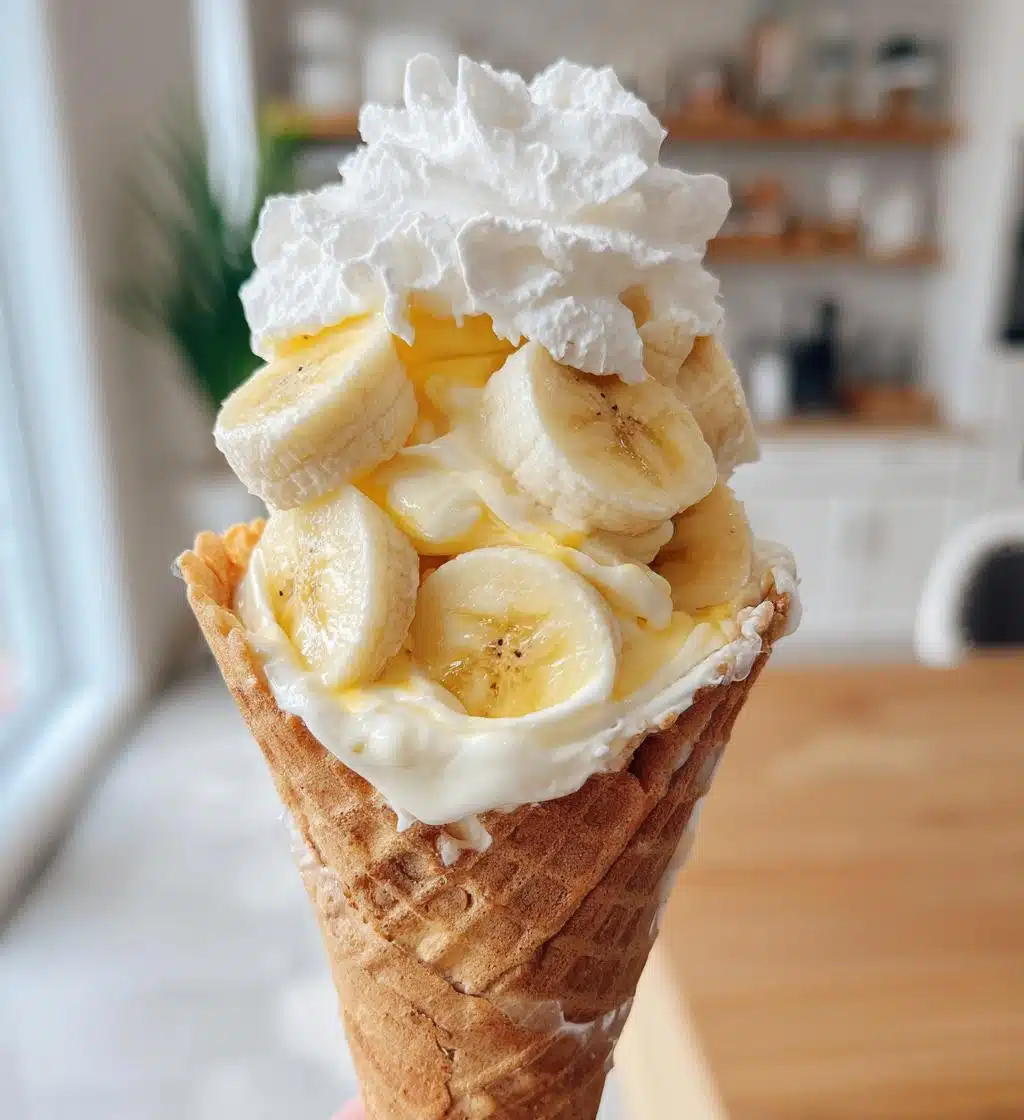
If you’re looking for a dessert that’s both fun and delicious, you’ve got to try these banana pudding cheesecake cones! I remember the first time I made them; I was hosting a little get-together, and I wanted something that would impress my friends without keeping me in the kitchen for hours. These cones are the perfect blend of creamy cheesecake and classic banana pudding, all nestled in a crunchy cone that makes it easy to enjoy. Plus, they’re incredibly versatile—whether it’s a summer BBQ or a cozy family night, these treats always steal the show. Trust me, once you take a bite, you’ll be hooked on this delightful combination!
Ingredients List
To whip up these delightful banana pudding cheesecake cones, you’ll need a handful of simple ingredients that pack a punch of flavor!
- 1 cup crushed graham crackers: These will form a crunchy, sweet base that perfectly complements the creamy filling.
- 1/4 cup melted butter: This helps bind the graham cracker crumbs together to create a sturdy crust.
- 2 ripe bananas, sliced: Choose bananas that are spotty for the best sweetness and flavor.
- 8 oz cream cheese, softened: Make sure it’s nice and soft to ensure a smooth, creamy texture.
- 1 cup powdered sugar: This adds sweetness and lightness to the cheesecake filling.
- 1 cup whipped cream: Fold this in for a light and airy texture that makes every bite indulgent.
- 1 tsp vanilla extract: This adds a lovely depth of flavor to the cheesecake.
- 4 ice cream cones: The perfect vessel for holding all this deliciousness—get plain or sugar cones based on your preference!
How to Prepare Banana Pudding Cheesecake Cones
Ready to dive into making these scrumptious banana pudding cheesecake cones? Let’s get started! It’s super simple, and I promise you’ll love every moment of it.
Step-by-Step Instructions
- First things first, preheat your oven to 350°F (175°C). This ensures that your graham cracker crust bakes up nice and crisp.
- In a medium bowl, mix together the 1 cup crushed graham crackers and 1/4 cup melted butter until everything is well combined. You want it to feel like wet sand.
- Next, take your cone molds (or even a muffin tin if you don’t have molds) and press the graham cracker mixture into the bottom. Make sure it’s packed tightly so it holds its shape after baking.
- Bake these for about 5 minutes, just until they’re slightly golden. Then, let them cool completely on a wire rack.
- While the crusts are cooling, it’s time to prepare the cheesecake filling. In a separate bowl, beat the 8 oz softened cream cheese until it’s smooth and creamy—this might take a minute, but it’s worth it!
- Then, add in 1 cup powdered sugar and 1 tsp vanilla extract, mixing until everything is well incorporated.
- Now, gently fold in 1 cup whipped cream until you have a light and fluffy mixture. Be careful not to overmix; you want to keep that airy texture!
- Once your cones are cool, layer in the sliced bananas and the cheesecake filling alternately until the cones are filled to the top. Don’t be shy—pack it in!
- Finally, top each cone with a dollop of whipped cream and a few extra banana slices for that beautiful finishing touch. Then, pop them in the fridge to chill for at least 1 hour before serving. This allows the flavors to meld beautifully!
And there you have it! Your banana pudding cheesecake cones are ready to be devoured. Enjoy the delightful combination of flavors and textures with every bite!
Nutritional Information
Before you dig into these delicious banana pudding cheesecake cones, it’s always good to know what you’re indulging in! Keep in mind that the nutritional values can vary based on the specific brands and ingredients you use, so these are just estimates. Each cone contains approximately:
- Calories: 250
- Fat: 12g
- Saturated Fat: 7g
- Trans Fat: 0g
- Cholesterol: 30mg
- Sodium: 150mg
- Carbohydrates: 32g
- Sugar: 15g
- Fiber: 1g
- Protein: 3g
So, treat yourself to these cones—after all, life is all about balance! Enjoy every creamy, banana-filled bite!
Why You’ll Love This Recipe
- Quick and easy to prepare—perfect for any occasion!
- Deliciously creamy with a delightful crunch from the cone.
- Fun, portable dessert that’s great for sharing.
- Combines the classic flavors of banana pudding and cheesecake.
- Customizable with your favorite toppings and fruits.
Tips for Success
To make your banana pudding cheesecake cones truly shine, here are some tried-and-true tips that I swear by!
- Soften your cream cheese: Let it sit at room temperature for about 30 minutes before mixing. This ensures a smooth, lump-free filling that blends beautifully.
- Use ripe bananas: Spotty, sweet bananas will give you the best flavor and make your cones taste heavenly. Don’t skimp on this step!
- Chill before serving: Allow your cones to chill for at least an hour. This helps the flavors meld and the filling to firm up a bit, making each bite even more delightful.
- Don’t overmix: When folding in the whipped cream, do it gently to maintain that light and airy texture—this is key for a luscious cheesecake filling!
- Experiment with toppings: Add crushed graham crackers, chocolate shavings, or a drizzle of caramel on top for an extra touch of yum!
With these tips in mind, you’ll be well on your way to impressing everyone with your delicious creations!
Variations
One of the best things about these banana pudding cheesecake cones is how easily you can customize them to suit your taste! Here are some fun variations to try:
- Berry Bliss: Swap out the bananas for fresh strawberries, blueberries, or raspberries for a burst of fruity flavor that pairs beautifully with the cheesecake.
- Chocolate Lovers: Mix in some cocoa powder with the cream cheese or add chocolate chips to the filling for a rich, chocolatey twist.
- Pineapple Paradise: Use crushed pineapple instead of bananas for a tropical vibe that’s super refreshing!
- Nutty Delight: Fold in some chopped nuts like pecans or walnuts into the cheesecake mixture for added crunch and flavor.
- Spiced Up: Add a pinch of cinnamon or nutmeg to the filling for a warm, cozy flavor that’s perfect for fall.
Feel free to get creative—these cones are a blank canvas for your dessert dreams!
Storage & Reheating Instructions
Got leftovers? No problem! To keep your banana pudding cheesecake cones fresh and delicious, store them in an airtight container in the refrigerator. This helps maintain their creamy texture and keeps those banana slices from browning too quickly. They’ll stay good for about 2-3 days, but trust me, they’re usually gone long before that!
If you need to make them ahead of time, just assemble the cones and chill them until you’re ready to serve. Oops! Just remember to add any toppings, like whipped cream or extra fruit, right before serving for that fresh, delightful taste. Enjoy every last bite!
Serving Suggestions
To elevate your banana pudding cheesecake cones, consider pairing them with a scoop of vanilla ice cream or a drizzle of chocolate sauce on the side. Freshly brewed coffee or a light herbal tea also complements the sweetness beautifully. For an extra touch, serve them alongside a fruit salad for a refreshing contrast. These additions will make your dessert experience even more delightful!
For more delicious dessert ideas, check out this banana pudding recipe or strawberry crunch cheesecake cones!
Print
Banana Pudding Cheesecake Cones: 7 Reasons to Indulge
- Total Time: 1 hour 25 minutes
- Yield: 4 cones 1x
- Diet: Vegetarian
Description
A delightful dessert combining banana pudding and cheesecake in a cone.
Ingredients
- 1 cup crushed graham crackers
- 1/4 cup melted butter
- 2 ripe bananas, sliced
- 8 oz cream cheese, softened
- 1 cup powdered sugar
- 1 cup whipped cream
- 1 tsp vanilla extract
- 4 ice cream cones
Instructions
- Preheat the oven to 350°F (175°C).
- Mix crushed graham crackers and melted butter in a bowl.
- Press the mixture into the bottom of cone molds.
- Bake for 5 minutes, then let cool.
- In a separate bowl, beat cream cheese until smooth.
- Add powdered sugar and vanilla extract, mix well.
- Fold in whipped cream gently until combined.
- Layer banana slices and cheesecake mixture in each cone.
- Top with additional whipped cream and banana slices.
- Chill for at least 1 hour before serving.
Notes
- Use ripe bananas for better flavor.
- Store leftovers in the refrigerator.
- Serve chilled for best taste.
- Prep Time: 20 minutes
- Cook Time: 5 minutes
- Category: Dessert
- Method: Baking
- Cuisine: American
Nutrition
- Serving Size: 1 cone
- Calories: 250
- Sugar: 15g
- Sodium: 150mg
- Fat: 12g
- Saturated Fat: 7g
- Unsaturated Fat: 4g
- Trans Fat: 0g
- Carbohydrates: 32g
- Fiber: 1g
- Protein: 3g
- Cholesterol: 30mg
Keywords: banana pudding cheesecake cones