

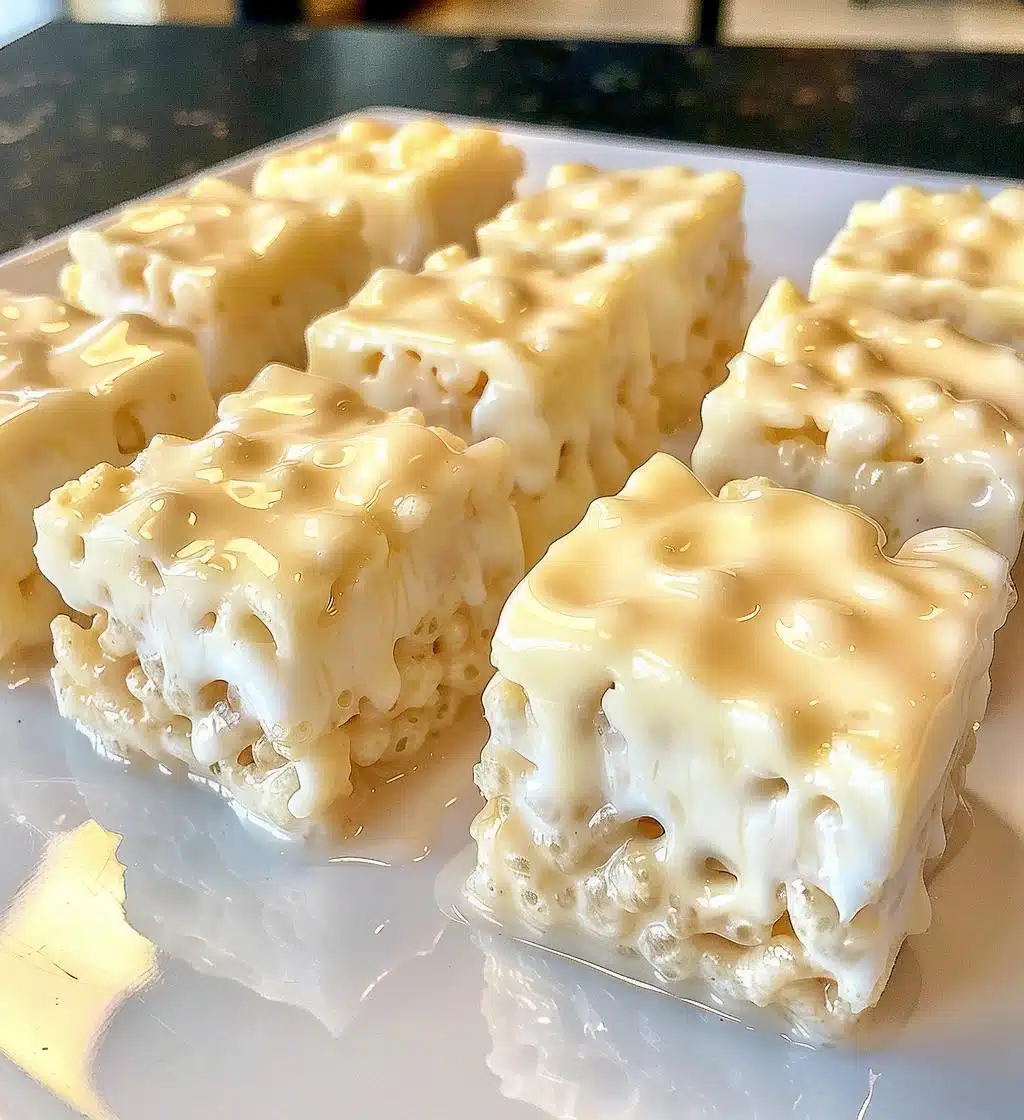
Oh my goodness, let me tell you, there’s something absolutely magical about no-bake desserts! They’re like the little wonders of the kitchen, allowing you to whip up something sweet and delicious without ever needing to turn on the oven. And that’s why I’m so excited to share my recipe for *Cheesecake Rice Krispie Treats*. Trust me, these little squares are a total game changer! They combine that classic, creamy cheesecake flavor with the nostalgic crunch of Rice Krispies, all in one delightful treat. Whether you’re looking for a last-minute dessert for a gathering or just want something to satisfy that sweet tooth, these are perfect. Plus, they take hardly any time to make! Let’s dive in and get started!
Ingredients List
- 4 cups Rice Krispies
- 1 cup cream cheese, softened
- 1/2 cup powdered sugar
- 1/2 cup whipped topping
- 1/4 cup butter
- 1 teaspoon vanilla extract
How to Prepare *Cheesecake Rice Krispie Treats*
Step-by-Step Instructions
- First things first, grab a large mixing bowl and let’s get started by mixing the cream cheese, powdered sugar, and vanilla extract together. I like to use a hand mixer for this part because it makes everything super smooth and creamy—trust me, you want that perfect cheesecake texture!
- In a separate bowl, melt the butter until it’s nice and gooey. You can do this in the microwave or on the stove—just make sure it’s melted but not bubbling away. Once it’s melted, pour it over the Rice Krispies in that bowl and mix until all the cereal is coated. This is where the fun starts!
- Now comes the best part! Gently fold the Rice Krispies mixture into the cream cheese mixture. Use a spatula to combine them well, but be careful not to crush the Rice Krispies too much. We want that delightful crunch to shine through!
- Next, grab a greased 9×9-inch pan (or whatever you have handy) and press the mixture firmly into the bottom. I like to use another piece of parchment paper to help me press it down evenly. You want it to be nice and compact so it holds together when you cut it!
- Now, pop that pan in the refrigerator and let it chill for about 2 hours. This is crucial, my friends! The chilling time helps everything set up beautifully, so don’t rush this part!
- Once the chilling is done, take it out and slice it into squares. And voila! You’ve got yourself some delicious *Cheesecake Rice Krispie Treats* ready to be devoured!
Why You’ll Love This Recipe
- It’s a *no-bake* dessert, so you can skip the oven and keep your kitchen cool!
- Quick and easy to prepare—whip them up in just about 15 minutes!
- Rich, creamy cheesecake flavor combined with the delightful crunch of Rice Krispies.
- Perfect for gatherings, parties, or just a sweet treat at home.
- Minimal ingredients—most of which you probably already have in your pantry!
- Customizable with toppings or mix-ins to suit your taste.
- Kids love them, making them a great family-friendly dessert!
- Leftovers (if there are any!) store well for a few days in an airtight container.
Tips for Success
Alright, my fellow dessert enthusiasts! Here are some of my top tips to ensure your *Cheesecake Rice Krispie Treats* turn out absolutely fabulous every time:
- Use room temperature cream cheese: This makes it so much easier to blend with the sugar and vanilla, giving you that dreamy creamy texture we all love.
- Don’t overmix: When you combine the Rice Krispies with the cream cheese mixture, be gentle! Overmixing can crush the Rice Krispies, and we want that delightful crunch to remain intact.
- Press firmly: When you’re packing the mixture into the pan, really press it down firmly. This helps the treats hold their shape when you cut them into squares.
- Chill adequately: Don’t skip the chilling time! It’s essential for the treats to firm up nicely. If you’re in a hurry, try to leave them in the fridge for at least an hour, but two hours is ideal.
- Add your personal touch: Feel free to get creative! Whether it’s adding a sprinkle of chocolate chips or a drizzle of caramel on top, make these treats your own!
Follow these tips, and you’ll be well on your way to impressing everyone with your delicious *Cheesecake Rice Krispie Treats*! Enjoy the process—it’s all part of the fun!
Variations on *Cheesecake Rice Krispie Treats*
Now, let’s get a little creative! One of the best things about these *Cheesecake Rice Krispie Treats* is how easily you can switch things up. Here are some of my favorite variations that’ll take your treats to the next level:
- Chocolate Lovers: Mix in some cocoa powder with the cream cheese for a rich chocolate cheesecake flavor, or fold in mini chocolate chips for those melty bites!
- Fruity Twist: Add in some crushed pineapple or fresh strawberries to the cream cheese mixture for a refreshing fruity taste. You’ll get a delightful burst of flavor in every bite!
- Nutty Delight: Stir in some chopped nuts, like walnuts or pecans, for a crunchy texture. You could even sprinkle some on top for a beautiful finish!
- Caramel Drizzle: Drizzle some caramel sauce over the top before chilling for an extra layer of sweetness. Trust me, it’s a game changer!
- Peanut Butter Bliss: Swirl in some creamy peanut butter with the cream cheese for a decadent peanut butter cheesecake flavor. It’s like a dream come true for peanut butter fans!
- Seasonal Flavors: Get festive by adding pumpkin puree and pumpkin spice for a fall-inspired treat or crushed peppermint candies for a holiday twist!
Don’t be afraid to experiment and make these treats your own! Each variation brings a new twist to the classic recipe, keeping things fun and exciting. Enjoy the process and happy creating!
Storage & Reheating Instructions
So, you’ve made these delightful *Cheesecake Rice Krispie Treats* and now you’re wondering how to keep them fresh? No worries! Storing these treats is super easy.
First off, make sure to let them cool completely after you slice them into squares. Once they’re cool, place any leftovers in an airtight container. This will help keep them fresh and delicious for up to 5 days in the refrigerator. Trust me, these treats are so good, they won’t last long, but it’s always nice to have a few extra on hand for late-night snacking!
Now, if you want to store them for a longer period, you can freeze them! Just wrap each square tightly in plastic wrap and then place them in a freezer-safe container. They’ll be good for up to 2 months. When you’re ready to enjoy a square again, just let it thaw in the fridge for a few hours or overnight. There’s no need to reheat them—these treats are best enjoyed chilled!
So, whether you’re savoring them right away or saving some for later, you’ve got all the tips you need to keep your *Cheesecake Rice Krispie Treats* tasting amazing!
Nutritional Information
Alright, let’s talk numbers! Here’s the estimated nutritional breakdown for each square of these delightful *Cheesecake Rice Krispie Treats*. Keep in mind that these values can vary based on the specific ingredients you use, but they’re a good guideline to keep in mind:
- Serving Size: 1 square
- Calories: 150
- Total Fat: 7g
- Saturated Fat: 4g
- Trans Fat: 0g
- Cholesterol: 20mg
- Sodium: 90mg
- Total Carbohydrates: 20g
- Dietary Fiber: 0g
- Total Sugars: 8g
- Protein: 1g
So, when you’re indulging in these sweet treats, you’ve got a pretty good idea of what you’re enjoying. They’re a delightful mix of creamy and crunchy goodness, and with these numbers in mind, you can savor every bite with a bit of knowledge. Enjoy your treats and remember, everything in moderation is key!
FAQ Section
Can I use a different type of cereal?
Absolutely! While Rice Krispies give these treats that classic crunch, you can swap them out for other cereals like Crispy Rice or even Cornflakes. Just make sure whatever you choose will hold up well when mixed with the creamy cheesecake mixture!
How do I know when they’re set?
Patience is key here! After chilling in the refrigerator for about 2 hours, the *Cheesecake Rice Krispie Treats* should feel firm to the touch. If they hold their shape when you press down lightly, they’re ready to be sliced and served!
Can I make these ahead of time?
You bet! These treats are perfect for making a day or two in advance. Just store them in an airtight container in the fridge, and they’ll be just as delicious when you’re ready to enjoy them. Plus, they’re a great make-ahead dessert for parties!
What can I do if the mixture is too sticky?
If you find that the mixture is sticking to your hands or the spatula, just lightly grease your hands or the spatula with a bit of butter or cooking spray. This will make it much easier to press the mixture into the pan without a mess!
Can I add toppings to these treats?
Definitely! You can get creative with toppings like chocolate drizzle, sprinkles, or fresh fruit. Just sprinkle them on top after you’ve pressed the mixture into the pan and before chilling. It adds a nice touch and makes them even more fun to eat!

Cheesecake Rice Krispie Treats: 7 Irresistible Variations
- Total Time: 2 hours 15 minutes
- Yield: 12 squares 1x
- Diet: Vegetarian
Description
Delicious no-bake cheesecake rice krispie treats.
Ingredients
- 4 cups Rice Krispies
- 1 cup cream cheese, softened
- 1/2 cup powdered sugar
- 1/2 cup whipped topping
- 1/4 cup butter
- 1 teaspoon vanilla extract
Instructions
- In a large bowl, mix cream cheese, powdered sugar, and vanilla extract.
- In a separate bowl, melt butter and mix with Rice Krispies.
- Combine the Rice Krispies mixture with the cream cheese mixture.
- Press the mixture into a greased pan.
- Chill in the refrigerator for 2 hours.
- Cut into squares and serve.
Notes
- Store leftovers in an airtight container.
- For a chocolate twist, add cocoa powder.
- Top with fruit for added flavor.
- Prep Time: 15 minutes
- Cook Time: 0 minutes
- Category: Dessert
- Method: No-bake
- Cuisine: American
Nutrition
- Serving Size: 1 square
- Calories: 150
- Sugar: 8g
- Sodium: 90mg
- Fat: 7g
- Saturated Fat: 4g
- Unsaturated Fat: 2g
- Trans Fat: 0g
- Carbohydrates: 20g
- Fiber: 0g
- Protein: 1g
- Cholesterol: 20mg
Keywords: Cheesecake, Rice Krispie Treats, No-bake Dessert