

Oh, the joy of the holiday season! There’s something magical about making Christmas cake pops that fills my heart with festive cheer. These little bites of joy are not only delicious but also the perfect way to spread some holiday spirit. Picture this: a rich chocolate cake, crumbled and mixed with frosting, all coated in silky white chocolate and topped with colorful sprinkles. Trust me, they’re a hit at every gathering! I love making these with my kids—it’s a fun activity that gets everyone involved. So let’s dive into this merry treat that’s sure to bring smiles to faces young and old!
Ingredients List
- 1 box of chocolate cake mix
- 1 cup of frosting (your favorite flavor works great!)
- 1 cup of white chocolate chips (for that luscious coating)
- Sprinkles for decoration (go wild with colors and shapes!)
- Wooden sticks (or lollipop sticks, whatever you have handy)
How to Prepare Christmas Cake Pops
Prepare the Cake
To start, grab your box of chocolate cake mix and follow the package instructions. Usually, it involves mixing the cake mix with water, eggs, and oil. Once it’s all blended, pour it into a greased baking pan and pop it into a preheated oven. Bake according to the time specified on the box—typically around 30 minutes. I like to check for doneness by inserting a toothpick in the center; if it comes out clean, you’re golden! After baking, let the cake cool completely on a wire rack. Trust me, this cooling step is important; it helps prevent a soggy mixture later.
Crumbling the Cake
Once your cake has cooled, it’s time to crumble! Take a large bowl and break the cake into pieces—this is a fun part! I usually use my hands to crumble it into fine crumbs, but a fork works too. You want it to be nice and fluffy, so no large chunks, please. The finer the crumbs, the better they’ll mix with the frosting.
Mixing Cake and Frosting
Now, add your cup of frosting to the bowl of cake crumbs. I like to start with half the frosting and mix it in, then check the consistency. You’re aiming for a mixture that holds together well—think cookie dough! If it seems too dry, add the rest of the frosting. Just make sure it’s well combined; I usually use my hands for this part, it’s so satisfying!
Forming the Cake Balls
Next, you’ll want to form the mixture into small balls, about the size of a golf ball. I find it’s easiest to scoop out a portion with my hands, roll it into a smooth ball, and then place it on a baking sheet lined with parchment paper. Make sure to leave a little space between each ball so they don’t stick together.
Chilling the Cake Balls
Here comes a crucial step: chill those cake balls! Pop them in the refrigerator for at least 30 minutes. This helps them firm up and makes them easier to dip later. Don’t skip this step, or they might fall apart when you’re coating them.
Dipping and Decorating
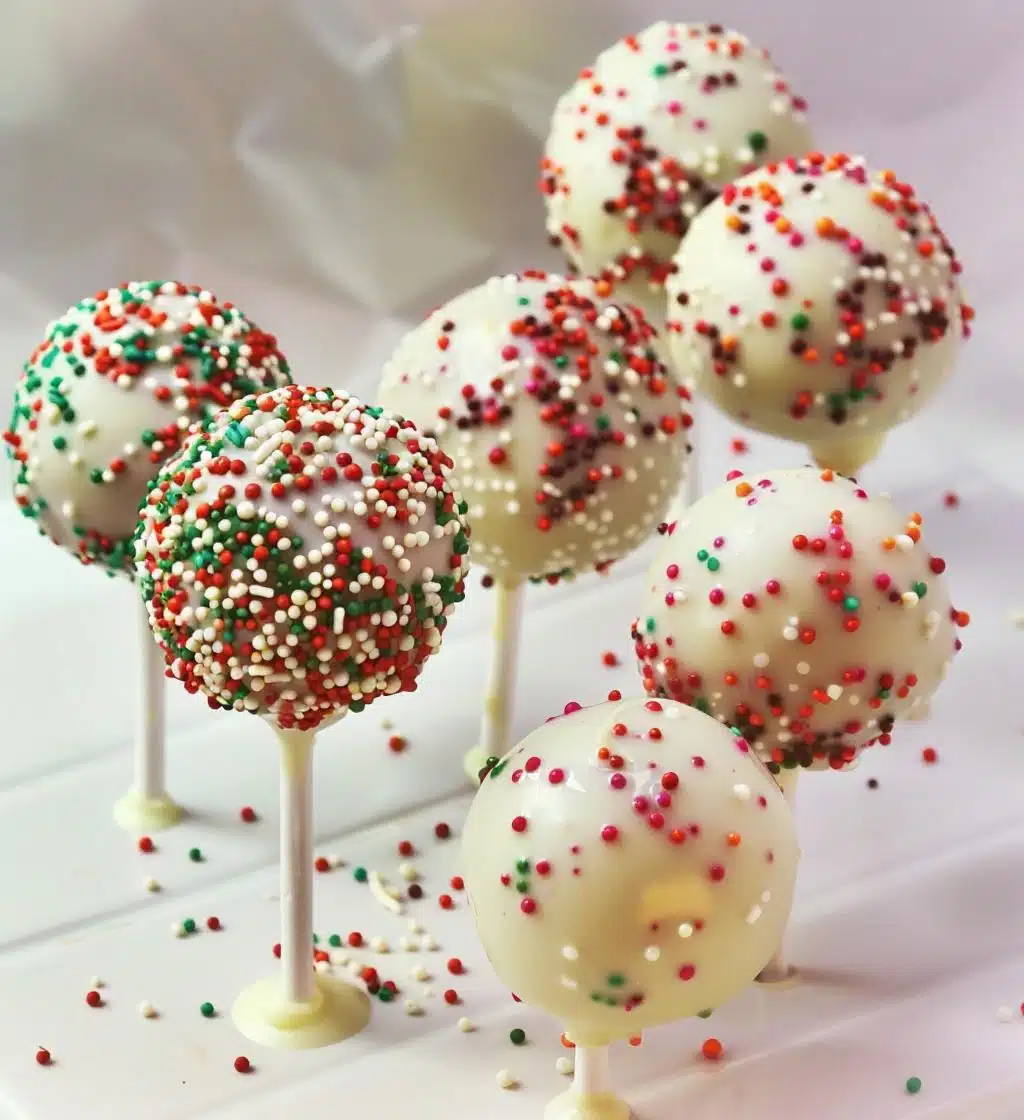
Alright, it’s time for some fun! Melt your white chocolate chips in a microwave-safe bowl—start with 30 seconds, stir, then heat in 10-second bursts until smooth. Dip the end of each wooden stick into the melted chocolate, then insert it into a cake ball (this helps the stick stay put!). Now, coat each cake pop in that luscious melted chocolate, letting the excess drip off. Finally, sprinkle on your colorful decorations before the chocolate hardens. Set them to cool on a stand or a piece of foam, and voilà! You’ve got festive Christmas cake pops ready to be devoured!
Why You’ll Love This Recipe
- Quick and easy to make, even for beginner bakers!
- Perfectly festive—these cake pops are a delightful addition to any holiday spread.
- Completely customizable: mix and match flavors, colors, and decorations to suit your style.
- A fun activity for kids and adults alike; everyone can join in on the decorating!
- Perfect for gatherings, parties, or just a sweet treat to enjoy at home.
- They make great gifts—pack them in cute boxes for a thoughtful homemade present!
Tips for Success
Let’s make sure your Christmas cake pops turn out absolutely perfect! Here are some of my best tips to help you nail this festive treat:
- Use quality frosting: The type of frosting can really affect the flavor and texture of your cake pops. I recommend using a creamy buttercream for the best results—it adds richness and helps the cake hold together nicely.
- Chill, chill, chill: Make sure to chill the cake balls for at least 30 minutes, as mentioned earlier. If they’re too warm, they can crumble or lose their shape when you dip them. If you’re in a hurry, a quick 10-minute freeze can work too!
- Don’t overheat the chocolate: When melting your white chocolate, go slow! Overheating can make it seize up. Stirring frequently will keep it nice and smooth. If it does seize, you can add a bit of vegetable oil to loosen it up.
- Experiment with flavors: Don’t be shy about mixing it up! Try using flavored cake mixes or adding extracts like peppermint or almond to the frosting for a fun twist. You can even use different types of chocolate or colored candy melts for the coating.
- Perfect your dipping technique: When dipping your cake pops, consider inserting the stick into the cake ball after dipping the stick in chocolate—this helps it stick better. Also, try to dip quickly to keep the chocolate from hardening before you’re done!
- Storage secrets: If you have leftovers (which is rare!), store them in an airtight container in the fridge. Just remember to let them come to room temperature before serving; they taste even better that way!
With these tips in your back pocket, you’ll be well on your way to creating the best Christmas cake pops ever. Happy baking!
Serving Suggestions
Ready to elevate your holiday dessert table? Pairing your Christmas cake pops with the right treats can create a festive and delightful spread that everyone will love. Here are some of my favorite ideas:
- Hot Cocoa Bar: Set up a cozy hot cocoa station with different toppings like whipped cream, chocolate shavings, and marshmallows. The rich flavors of hot chocolate complement the sweetness of the cake pops perfectly!
- Assorted Cookies: Bake or buy a variety of holiday cookies—think gingerbread, sugar cookies, and peppermint bark. These will add a lovely selection alongside your cake pops and give everyone options to choose from.
- Fruit Platter: Balance the sweetness with a colorful fruit platter. Fresh strawberries, kiwi, and mandarin oranges add a refreshing touch and a pop of color to your dessert table.
- Cheese and Charcuterie Board: For a savory option, consider a cheese and charcuterie board. Include some nuts, dried fruits, and honey to create a beautiful contrast to the sweet cake pops.
- Mini Cupcakes: Add some festive mini cupcakes to the mix! They’re cute, delicious, and can be decorated in holiday themes, making them a fun addition to your dessert lineup.
- Festive Drinks: Serve some holiday-themed beverages like spiced apple cider or peppermint-infused cocktails to wash it all down. These drinks will pair wonderfully with the flavors of your cake pops.
Mix and match these suggestions to create a dessert spread that brings joy and festivity to your holiday gatherings. Trust me, your guests will love the variety, and there’ll be something for everyone to enjoy!
Storage & Reheating Instructions
Got some leftovers from your delightful Christmas cake pops? No worries, I’ve got you covered! To keep them fresh and tasty, store your cake pops in an airtight container. If you have space, keep them in the refrigerator, where they can last for about a week. Just make sure they’re not squished together to maintain their shape and coating.
If you want to freeze them for future enjoyment, that’s totally doable too! Just wrap each cake pop individually in plastic wrap and then place them in a freezer-safe bag or container. They can stay in the freezer for up to two months. When you’re ready to enjoy them again, simply take them out and let them thaw in the fridge for a few hours. There’s no need to reheat them—serve them chilled for the best flavor and texture!
So, whether you’re savoring them right away or saving some for later, these storage tips will keep your Christmas cake pops delicious and festive!
Nutritional Information
Curious about the nutritional value of these festive Christmas cake pops? Here’s a handy estimate based on standard ingredients. Keep in mind that values can vary depending on the specific brands and ingredients you choose, but this should give you a good idea:
- Serving Size: 1 cake pop
- Calories: 150
- Fat: 7g
- Saturated Fat: 4g
- Unsaturated Fat: 2g
- Trans Fat: 0g
- Cholesterol: 20mg
- Sodium: 50mg
- Carbohydrates: 20g
- Fiber: 1g
- Sugar: 12g
- Protein: 2g
These delightful bites are sweet treats that pack a punch of flavor without going overboard on the calories. Perfect for holiday gatherings, just remember to enjoy them in moderation. Happy indulging!
FAQ Section
Can I use a different flavor of cake mix for my Christmas cake pops?
Absolutely! Feel free to experiment with any flavor of cake mix you love. Red velvet, vanilla, or even spice cake could add a fun twist to your holiday treats. Just remember to match the frosting to your cake flavor for the best taste!
What if my cake pops are falling apart when I dip them?
Oh no! If your cake pops are crumbling, it might be because they haven’t chilled long enough. Make sure to give them at least 30 minutes in the fridge to firm up. If they’re still too soft, consider adding a bit more frosting to help them hold together.
How can I make my Christmas cake pops look extra festive?
Get creative with decorations! You can use different colored sprinkles, edible glitter, or even drizzle some melted chocolate over the top for a stylish touch. I love using themed sprinkles that match the holiday season—like snowflakes or Christmas trees!
Can I prepare the cake pops in advance?
Definitely! You can make the cake balls a day or two ahead of time and store them in the fridge until you’re ready to dip and decorate. Just make sure they’re well-wrapped so they don’t dry out.
What’s the best way to store leftover cake pops?
Store your leftover cake pops in an airtight container in the refrigerator for up to a week. If you want to keep them longer, you can freeze them as mentioned earlier. Just remember to let them thaw in the fridge before serving to maintain their delightful texture!

Christmas Cake Pops: 5 Sweet Ways to Spread Cheer
- Total Time: 1 hour
- Yield: 24 cake pops 1x
- Diet: Vegetarian
Description
Delicious and festive Christmas cake pops.
Ingredients
- 1 box of chocolate cake mix
- 1 cup of frosting
- 1 cup of white chocolate chips
- Sprinkles for decoration
- Wooden sticks
Instructions
- Prepare the chocolate cake mix according to package instructions.
- Bake the cake and let it cool completely.
- Crumb the cake into a large bowl.
- Add frosting to the crumbs and mix until well combined.
- Form the mixture into small balls and place them on a baking sheet.
- Chill the balls in the refrigerator for at least 30 minutes.
- Melt the white chocolate chips in a microwave-safe bowl.
- Dip the end of each stick into the melted chocolate, then insert it into a cake ball.
- Coat each cake pop in the melted chocolate and add sprinkles on top.
- Let the cake pops set on a stand or foam block.
Notes
- Use any flavor of cake mix you prefer.
- Store pops in a cool place to maintain shape.
- Feel free to customize decorations for different occasions.
- Prep Time: 30 minutes
- Cook Time: 30 minutes
- Category: Dessert
- Method: Baking
- Cuisine: American
Nutrition
- Serving Size: 1 cake pop
- Calories: 150
- Sugar: 12g
- Sodium: 50mg
- Fat: 7g
- Saturated Fat: 4g
- Unsaturated Fat: 2g
- Trans Fat: 0g
- Carbohydrates: 20g
- Fiber: 1g
- Protein: 2g
- Cholesterol: 20mg
Keywords: Christmas cake pops, festive treats, dessert