
There’s something truly magical about baking during the holiday season, and my Christmas cookie box is where that magic comes to life! I love gathering my family in the kitchen, the air filled with the sweet aroma of butter and sugar, laughter echoing as we cut out festive shapes. It’s not just about the cookies; it’s about creating cherished memories that will last a lifetime. When I finally pack those colorful, delicious cookies into beautifully decorated boxes, I can’t help but feel a warm glow, knowing I’m sharing a piece of my heart with loved ones. Trust me, this sweet tradition is one you’ll want to embrace year after year!

Ingredients List
Gathering the right ingredients is key to making your Christmas cookie box a success! Here’s what you’ll need for these delightful cookies:
- 2 cups all-purpose flour
- 1 cup unsalted butter, softened (make sure it’s at room temperature for easy mixing!)
- 1 cup granulated sugar
- 1/2 cup powdered sugar
- 1 large egg
- 1 tsp vanilla extract (this adds such a lovely flavor!)
- 1/2 tsp baking powder
- 1/4 tsp salt
- Decorative sprinkles (for that festive touch!)
These simple ingredients come together to create cookies that are not only delicious but also perfect for sharing. Don’t worry if you don’t have all the fancy tools; as long as you have these basics, you’re ready to go!
How to Prepare Instructions
Now that you’ve got your ingredients ready, let’s dive into the fun part—baking these delightful cookies! I promise, it’s easier than you think. Just follow these steps, and you’ll have a beautiful Christmas cookie box to share with everyone!
Step 1: Preheat the Oven
First things first, you’ll want to preheat your oven to 350°F (175°C). This is super important because it ensures your cookies bake evenly and come out perfectly golden. Trust me, a preheated oven is the secret to cookie perfection!
Step 2: Cream the Butters and Sugars
In a large mixing bowl, cream together 1 cup of softened unsalted butter, 1 cup of granulated sugar, and 1/2 cup of powdered sugar. I usually use an electric mixer for this, but you can totally do it by hand if you prefer. Mix until it’s fluffy and light, which usually takes about 2-3 minutes. This step is key because it helps to aerate the butter, giving your cookies that wonderful texture!
Step 3: Add Egg and Vanilla
Next, add in 1 large egg and 1 teaspoon of vanilla extract to your buttery mixture. Mix until everything is well combined. I can’t stress enough how much the vanilla adds to the flavor! It’s like a warm hug in cookie form.
Step 4: Combine Dry Ingredients
In another bowl, whisk together 2 cups of all-purpose flour, 1/2 teaspoon of baking powder, and 1/4 teaspoon of salt. This dry mixture is where the magic happens! Be sure to whisk thoroughly to avoid any clumps. It’s all about that smooth cookie dough!
Step 5: Form the Dough
Now, gradually add your dry ingredients to the wet mixture. I usually do this in thirds, mixing until a dough forms. Don’t overmix; just blend until everything is combined. You want a nice, smooth dough that’s not too sticky—just perfect for rolling out!
Step 6: Shape the Cookies
Time to get creative! Roll out the dough on a floured surface to about 1/4 inch thick. Then, use your favorite cookie cutters to cut out festive shapes. I love using stars and Christmas trees, but hey, use whatever you like! It’s all about personalizing your Christmas cookie box!
Step 7: Bake the Cookies
Place the shaped cookies on a baking sheet lined with parchment paper. Before you pop them in the oven, sprinkle with those fun decorative sprinkles. Bake for 10-12 minutes, or until the edges are lightly golden. Your kitchen will soon be filled with the most incredible smell!
Step 8: Cooling and Packaging
Once baked, let the cookies cool on the baking sheet for a few minutes before transferring them to a wire rack. Make sure they’re completely cool before placing them in your decorative cookie box. This is the best part—pack them up and get ready to share your love with friends and family!
Why You’ll Love This Recipe
This Christmas cookie box recipe is truly special, and here’s why you’re going to fall in love with it:
- Festive Appeal: These cookies are a colorful addition to any holiday gathering, making them perfect for sharing and gifting.
- Easy to Prepare: With straightforward steps and simple ingredients, even beginner bakers can whip these up with confidence!
- Delicious Taste: Buttery, sweet, and sprinkled with love, these cookies are delightful with every bite.
- Customizable: You can easily mix and match shapes and decorations to make each cookie unique and personal.
- Memory-Making: Baking together with loved ones creates cherished holiday memories that you’ll treasure for years to come.
- Perfect for Gifting: Pack them in a beautiful box, and you’ve got the perfect homemade gift that everyone will appreciate.
Trust me, once you start baking these cookies, you’ll be hooked on the joy they bring to your holiday season!
Tips for Success
To make sure your cookies turn out perfectly every time, here are some of my favorite tips that I swear by:
- Use Room Temperature Ingredients: Make sure your butter and egg are at room temperature before you start. This helps everything blend together smoothly and creates that lovely, fluffy texture!
- Even Thickness is Key: When rolling out your dough, aim for a consistent thickness of about 1/4 inch. This ensures that all your cookies bake evenly. If some are thicker than others, they might not bake at the same rate, which can lead to some cookies being undercooked or overdone.
- Don’t Overmix the Dough: Once you’ve combined your wet and dry ingredients, mix just until everything is incorporated. Overmixing can lead to tough cookies, and we definitely want them to be soft and tender!
- Chill the Dough (If Needed): If your dough feels too soft to roll out, don’t hesitate to pop it in the fridge for about 30 minutes. Chilling helps to firm it up, making it easier to work with and less likely to spread while baking.
- Keep an Eye on Baking Time: Every oven is different, so start checking your cookies a minute or two before the suggested baking time. You want them to be lightly golden around the edges—this is where the magic happens!
- Let Them Cool Completely: Once baked, let your cookies cool on a wire rack. This helps them firm up and makes them easier to handle when you’re ready to package them in your Christmas cookie box.
With these tips in your back pocket, you’ll be well on your way to creating the most delightful cookies ever. Happy baking!
Variations
If you’re like me, you love to get a little creative in the kitchen! There are so many fun ways to mix things up with your Christmas cookie box. Here are a few ideas to inspire you:
- Flavor Infusions: Try adding different extracts for a twist! Almond extract instead of vanilla adds a lovely nutty flavor, or consider a dash of peppermint extract for a refreshing holiday touch!
- Spices Galore: Mix in some ground cinnamon or nutmeg for that cozy, warm holiday taste. Just a teaspoon can elevate the flavor profile and make your cookies extra festive!
- Chocolate Chips: Who doesn’t love chocolate? Fold in some semi-sweet or white chocolate chips to your dough for a delicious surprise in every bite. Yum!
- Decorative Themes: Get creative with your sprinkles! Use holiday-themed sprinkles like snowflakes or Christmas trees, or even drizzle melted chocolate on top for a more elegant finish.
- Stuffed Cookies: For a fun surprise, consider making stuffed cookies! Roll a little dough around a chocolate kiss or a piece of candy before baking for a gooey center that’s sure to impress.
- Gluten-Free Option: If you need to accommodate gluten-free diets, swap the all-purpose flour with a gluten-free baking blend. Just make sure to check that your other ingredients are also gluten-free!
These variations not only make baking more fun but also allow you to personalize your Christmas cookie box for friends and family. So go ahead, let your imagination run wild, and make these cookies truly your own!
Storage & Reheating Instructions
Once your beautiful cookies are cool and nestled in their festive Christmas cookie box, you’ll want to store them properly to keep them fresh. Here’s how to do it right:
- Airtight Container: Place your cookies in an airtight container to maintain their delightful texture and flavor. This will help prevent them from getting stale. I usually layer parchment paper between the cookies to keep them from sticking together!
- Room Temperature: You can store your cookies at room temperature for up to a week. Just make sure they’re kept in a cool, dry place away from direct sunlight.
- Freezing for Later: If you want to save some cookies for later, they freeze beautifully! Just wrap each cookie in plastic wrap and then place them in a freezer-safe bag or container. They can last up to 3 months in the freezer. When you’re ready to enjoy them, simply let them thaw at room temperature.
If you find yourself needing to reheat your cookies, don’t worry! Here’s what I recommend:
- Gentle Reheating: Preheat your oven to 300°F (150°C). Place the cookies on a baking sheet and heat them for about 5-10 minutes. This will warm them up and make them soft again, just like fresh out of the oven!
- Microwave Option: If you’re in a hurry, you can pop a cookie in the microwave for about 10-15 seconds. Just be careful not to overdo it, or they might turn rubbery!
With these storage and reheating tips, your cookies will stay delicious and ready to enjoy whenever the craving strikes! Happy munching!
Nutritional Information
When indulging in these delightful cookies from your Christmas cookie box, it’s nice to know what you’re enjoying! Here’s a typical nutritional breakdown per cookie, but keep in mind these values can vary slightly based on ingredient brands and measurements:
- Calories: 150
- Fat: 8g
- Saturated Fat: 5g
- Unsaturated Fat: 2g
- Trans Fat: 0g
- Cholesterol: 20mg
- Sodium: 50mg
- Carbohydrates: 18g
- Fiber: 0g
- Sugar: 10g
- Protein: 2g
This is just an estimate, but it gives you a good idea of what to expect. So, go ahead and enjoy these cookies knowing they bring a little bit of joy (and a few calories) to your festive season!
FAQ Section
I know you might have some questions while baking up a storm, so let’s tackle a few common ones together! These will help you make the most of your Christmas cookie box experience.
Can I freeze the cookies?
Absolutely! Freezing these festive cookies is a fantastic way to save some for later. Just wrap each cookie in plastic wrap and store them in an airtight container or freezer-safe bag. They can last up to 3 months in the freezer. When you’re ready to enjoy them, let them thaw at room temperature, and they’ll taste just as delicious!
What types of sprinkles work best for decorating?
Oh, the sprinkles! They’re what give your Christmas cookie box that extra festive flair. I love using a mix of classic holiday colors—red, green, and white are always a hit! You can also find fun shapes like snowflakes or Christmas trees that add a playful touch. Just make sure to use nonpareils or jimmies since they hold up well during baking and don’t melt away!
Can I use different shapes for my cookies?
Definitely! One of the best parts about this recipe is that you can use any cookie cutter shapes you love. Whether it’s stars, bells, or even gingerbread people, the sky’s the limit! Just remember to adjust your baking time slightly for larger or smaller shapes.
What if my dough is too sticky?
If you find your dough is a bit too sticky to roll out, don’t panic! You can chill it in the refrigerator for about 30 minutes. This will firm it up and make it easier to handle. Just be sure to dust your surface with a little flour when you roll it out!
Can I add nuts or chocolate chips to the dough?
Absolutely! Mixing in some chopped nuts or chocolate chips can take your cookies to the next level. Just fold them in gently after you’ve combined your dry and wet ingredients. It’s a delicious way to customize your Christmas cookie box and add some extra texture!
How long do the cookies stay fresh?
When stored in an airtight container, your cookies will stay fresh for about a week at room temperature. If you’re looking to keep them longer, freezing is the way to go. Just remember, they might not last long with all that deliciousness!
I hope this helps clear up any questions you might have. Happy baking and enjoy every sweet moment with your Christmas cookie box!
Print
Christmas Cookie Box: 7 Secrets for Perfect Holiday Joy
- Total Time: 42 minutes
- Yield: 24 cookies 1x
- Diet: Vegetarian
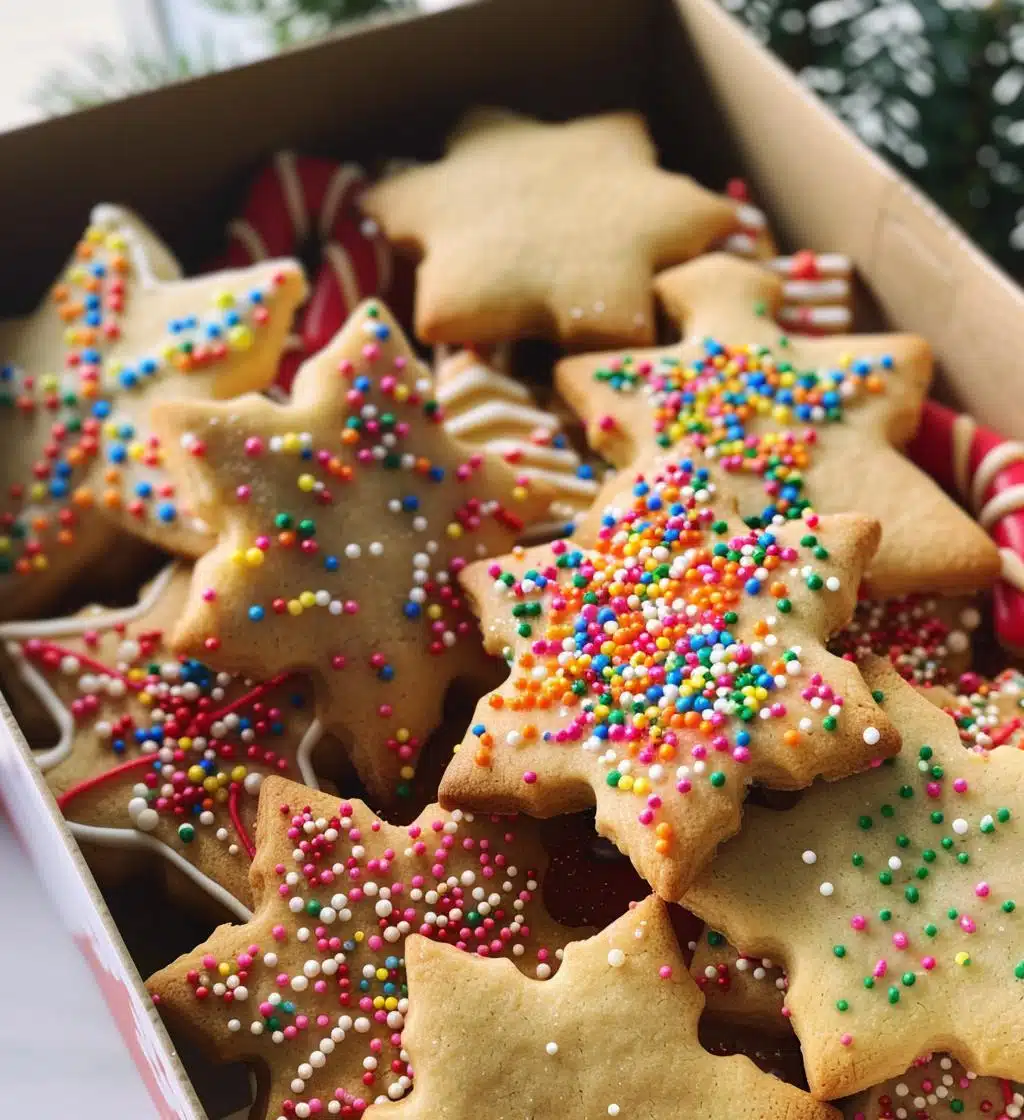
Description
A festive collection of Christmas cookies packaged in a decorative box.
Ingredients
- 2 cups all-purpose flour
- 1 cup unsalted butter, softened
- 1 cup granulated sugar
- 1/2 cup powdered sugar
- 1 large egg
- 1 tsp vanilla extract
- 1/2 tsp baking powder
- 1/4 tsp salt
- Decorative sprinkles
Instructions
- Preheat your oven to 350°F (175°C).
- In a bowl, cream together the butter, granulated sugar, and powdered sugar.
- Add the egg and vanilla, mixing until well combined.
- In another bowl, whisk together the flour, baking powder, and salt.
- Gradually add the dry ingredients to the wet mixture, mixing until a dough forms.
- Roll out the dough and cut into desired shapes.
- Place cookies on a baking sheet lined with parchment paper.
- Sprinkle with decorative sprinkles.
- Bake for 10-12 minutes or until edges are lightly golden.
- Let cool before placing in the cookie box.
Notes
- Store cookies in an airtight container.
- Mix different colored sprinkles for a festive look.
- These cookies can be decorated with icing once cooled.
- Prep Time: 30 minutes
- Cook Time: 12 minutes
- Category: Dessert
- Method: Baking
- Cuisine: American
Nutrition
- Serving Size: 1 cookie
- Calories: 150
- Sugar: 10g
- Sodium: 50mg
- Fat: 8g
- Saturated Fat: 5g
- Unsaturated Fat: 2g
- Trans Fat: 0g
- Carbohydrates: 18g
- Fiber: 0g
- Protein: 2g
- Cholesterol: 20mg
Keywords: Christmas cookie box, holiday cookies, festive treats