
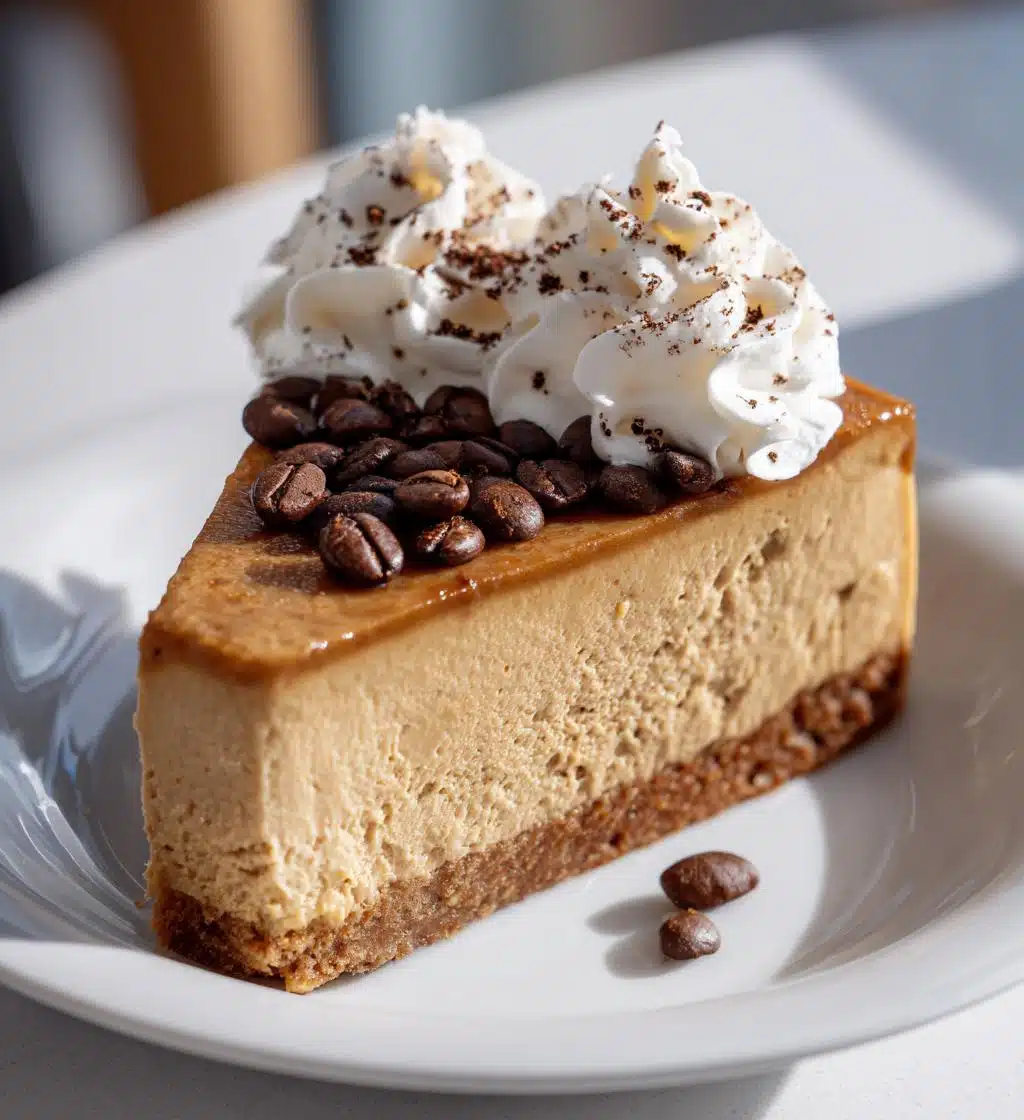
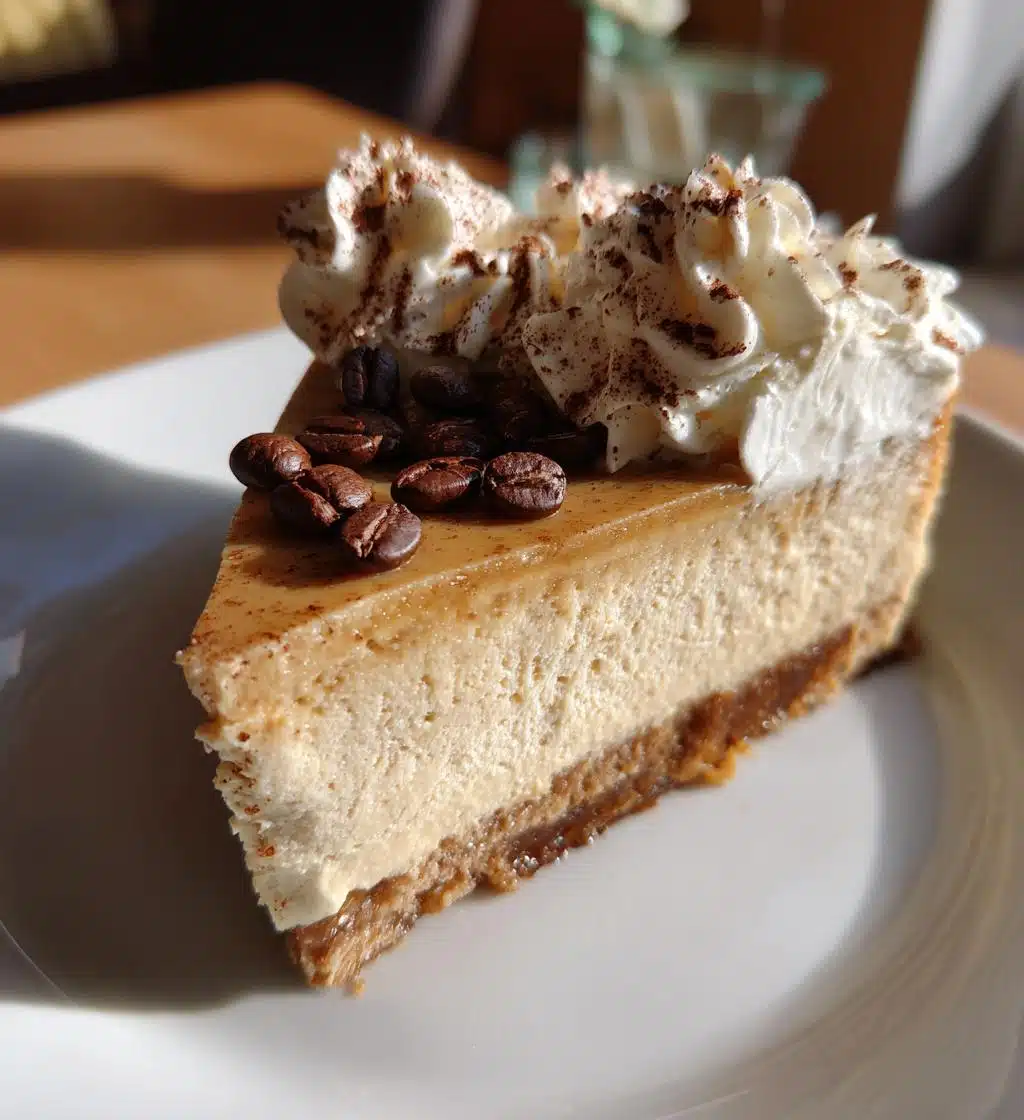
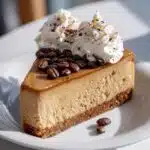
Let me tell you about my absolute favorite dessert: coffee cheesecake! It’s this rich, creamy delight that perfectly balances the bold flavor of coffee with that classic cheesecake texture we all love. Every bite is like a warm hug, and the best part? It’s so easy to whip up! I remember the first time I made it for a family gathering—everyone couldn’t stop raving about it. The combination of the buttery graham cracker crust and the smooth, coffee-infused filling just makes my heart sing. Trust me, once you try this coffee cheesecake, it will become your go-to dessert for any occasion. Whether it’s a casual dinner at home or a fancy celebration, this cheesecake is sure to impress!
Ingredients for Coffee Cheesecake
- 1 1/2 cups graham cracker crumbs – these will form the delicious crust, so make sure they’re finely crushed!
- 1/4 cup sugar – a little sweetness to enhance the crust’s flavor.
- 1/2 cup unsalted butter, melted – this helps bind the crust together and adds richness.
- 3 (8 ounce) packages cream cheese, softened – the star of the show! Make sure they’re nice and creamy for that smooth texture.
- 1 cup sugar – this sweetens the filling just right without overpowering the coffee flavor.
- 3 large eggs – these provide structure and creaminess to the cheesecake.
- 1 tablespoon vanilla extract – a splash of vanilla adds depth to the flavor profile.
- 1/2 cup brewed coffee, cooled – the key ingredient! Make sure it’s cooled down so it won’t affect the cream cheese.
- 1 tablespoon all-purpose flour – this helps stabilize the filling, giving it that perfect set.
How to Prepare Coffee Cheesecake
- First things first, preheat your oven to 325°F (160°C). This step is crucial because we want our cheesecake to bake evenly.
- In a medium bowl, combine the graham cracker crumbs, 1/4 cup sugar, and melted butter. Mix it until it resembles wet sand—trust me, you’ll want to press this mixture firmly into the bottom of a 9-inch springform pan to create a solid crust.
- Once the crust is ready, pop it in the oven for about 10 minutes. This little bake helps set it up nicely and adds a bit of toasty flavor.
- While that’s baking, let’s work on the filling! In a large mixing bowl, beat the softened cream cheese and 1 cup of sugar together until it’s super smooth and creamy. This is where the magic starts—don’t rush it!
- Next, add the eggs, one at a time, mixing well after each one. This helps incorporate air for a lighter texture, so don’t skip this step! You want to make sure each egg is fully blended before adding the next.
- Now, stir in the vanilla extract and the cooled brewed coffee. The aroma will be heavenly! Mix until everything is well combined.
- Finally, add in the tablespoon of flour and mix just until combined. You don’t want to overmix here; we want that lovely creamy texture in the end.
- Carefully pour the cream cheese mixture over the crust in the springform pan, smoothing the top with a spatula. Make sure to get it nice and even!
- Now it’s time to bake! Place the cheesecake in the oven and let it bake for 55-60 minutes. You’ll know it’s done when the edges are set but the center has a slight jiggle—don’t worry, it will firm up as it cools!
- Once baked, remove it from the oven and let it cool to room temperature. Then, cover it and refrigerate for at least 4 hours (or overnight, if you can wait!). This chilling time is essential for achieving that perfect slice.
Why You’ll Love This Recipe
- Rich Coffee Flavor: The deep, robust flavor of coffee shines through in every creamy bite, making it a true coffee lover’s dream.
- Silky Smooth Texture: With the perfect blend of cream cheese and brewed coffee, the texture is velvety and luxurious.
- Easy to Make: Simple ingredients and straightforward steps mean you’ll be enjoying this dessert with minimal fuss!
- Perfect for Any Occasion: Whether it’s a cozy family dinner or a fancy dinner party, this cheesecake is sure to impress your guests.
- Make-Ahead Delight: It’s ideal for prepping a day in advance, giving you time to relax before your gathering.
- Customizable: You can easily add toppings like whipped cream or chocolate shavings to make it even more indulgent!
Tips for Success
Now that you’re ready to dive into making this coffee cheesecake, here are some of my top tips to ensure it turns out perfectly every time!
- Room Temperature Ingredients: Make sure your cream cheese and eggs are at room temperature before you start. This helps them blend smoothly and prevents lumps in your cheesecake, giving you that silky texture we all crave.
- Don’t Overmix: When you add the eggs and flour, mix just until combined. Overmixing can lead to cracks in your cheesecake, and we want it to be as smooth and perfect as possible!
- Water Bath Method: If you’re worried about cracks, consider baking your cheesecake in a water bath. Just wrap the outside of your springform pan with aluminum foil and place it in a larger baking dish filled with hot water. This helps maintain a consistent temperature and keeps moisture in the oven.
- Check for Doneness: When the baking time is almost up, keep an eye on it! The edges should be set, while the center should have a slight jiggle. It’ll firm up as it cools, so don’t be tempted to bake it until it’s completely firm.
- Cool Gradually: After baking, let your cheesecake cool in the oven with the door slightly ajar for about an hour. This helps prevent sudden temperature changes that can cause cracks.
- Chill, Chill, Chill: Patience is key! Allowing your cheesecake to chill for at least 4 hours (or overnight, if you can resist) helps it set beautifully and enhances the flavors.
- Garnish Wisely: Just before serving, top your cheesecake with a dollop of whipped cream and a sprinkle of coffee beans or chocolate shavings for an elegant touch that also adds a little extra flavor.
With these tips in your back pocket, you’ll be well on your way to baking a coffee cheesecake that will wow everyone at your next gathering!
Variations of Coffee Cheesecake
If you’re feeling adventurous and want to mix things up, there are so many fun variations you can try with this coffee cheesecake! Here are some of my favorite ideas that add a little twist while keeping that delicious coffee flavor intact:
- Chocolate Coffee Cheesecake: Add 1 cup of melted dark chocolate to the cream cheese mixture for a rich, decadent chocolate coffee cheesecake. You can even swirl some melted chocolate on top before baking for a pretty design!
- Mocha Swirl: Create a mocha-flavored cheesecake by adding 1 tablespoon of cocoa powder to the filling along with the coffee. Swirl in a bit of extra brewed coffee for a stunning marbled effect!
- Hazelnut Coffee Cheesecake: Incorporate 1/2 cup of hazelnut spread into your cream cheese filling. It pairs beautifully with coffee, creating a nutty and creamy delight that’s simply irresistible.
- Spiced Coffee Cheesecake: Add a pinch of cinnamon and nutmeg to the filling for a warm, spiced flavor that’s perfect for fall or winter gatherings. It adds a cozy touch to the classic cheesecake!
- Flavored Coffee Variations: Experiment with different brewed coffee flavors! Try using vanilla or hazelnut coffee for an extra kick of flavor. Just make sure it’s cooled before adding it to the mixture!
- Caramel Drizzle: For an indulgent twist, drizzle some homemade or store-bought caramel sauce over the top before serving. It adds a sweet, gooey layer that complements the coffee beautifully.
These variations are a great way to personalize your coffee cheesecake and impress your friends and family with unique flavors. Enjoy getting creative in the kitchen!
Storage & Reheating Instructions
So, you’ve made this fabulous coffee cheesecake and have some leftovers—first of all, lucky you! Storing it properly is key to keeping that creamy goodness intact. Here’s how I do it:
- Refrigeration: Once your cheesecake has chilled for at least 4 hours, cover it tightly with plastic wrap or aluminum foil, or simply use the springform pan’s removable sides to keep it fresh. It can be stored in the refrigerator for up to 5 days. Just make sure it’s well covered to prevent any fridge odors from sneaking in!
- Freezing: If you want to enjoy your coffee cheesecake later, you can freeze it! Just wrap individual slices in plastic wrap and then in aluminum foil to keep them protected. It’ll stay good for about 2-3 months in the freezer. When you’re ready to enjoy a slice, let it thaw in the fridge overnight for the best texture.
As for reheating, I don’t usually recommend it for cheesecake since it’s best served chilled. However, if you want to enjoy it slightly warmed, just pop it in a preheated oven at 300°F (149°C) for about 10-15 minutes. Keep an eye on it so it doesn’t get too warm. But trust me, the creamy, cold texture is where it’s at!
With these storage tips, you’ll be able to savor your coffee cheesecake for days to come—if it lasts that long, that is!
Nutritional Information
Before you dive into this delicious coffee cheesecake, it’s good to know what you’re indulging in! Here’s a general idea of the nutritional information per slice:
- Calories: 350
- Sugar: 25g
- Sodium: 200mg
- Fat: 22g
- Saturated Fat: 13g
- Unsaturated Fat: 7g
- Trans Fat: 0g
- Carbohydrates: 30g
- Fiber: 1g
- Protein: 5g
- Cholesterol: 80mg
Keep in mind that nutrition can vary based on the specific ingredients and brands you use, so this information is just an estimate. It’s always a good idea to check your own ingredients if you’re keeping a close eye on your dietary needs. Enjoy every creamy bite guilt-free!
FAQ About Coffee Cheesecake
Can I make coffee cheesecake without a springform pan?
Absolutely! If you don’t have a springform pan, you can use a regular round cake pan. Just make sure to line the bottom with parchment paper for easy removal. You might need to let it cool a bit longer before slicing, but it’ll still be delicious!
How do I know when my cheesecake is done baking?
Great question! The edges should be set, and the center should have a slight jiggle when you give it a gentle shake. It’ll firm up as it cools, so don’t worry if it looks a little wobbly at first. Just remember, overbaking is a no-no for that creamy texture!
Can I use instant coffee instead of brewed coffee?
Yes, you can! Just dissolve about 2 tablespoons of instant coffee granules in a half cup of hot water to make your brewed coffee. This works well and still gives that great coffee flavor you’re looking for in your cheesecake.
Is it possible to make this recipe gluten-free?
Sure thing! Just swap out the graham cracker crumbs for gluten-free cookies or a gluten-free graham cracker alternative. The filling is already gluten-free, so you’re halfway there!
How long does coffee cheesecake last in the fridge?
Once you’ve made your coffee cheesecake, it can be stored in the refrigerator for up to 5 days. Just make sure it’s tightly covered to keep it fresh and prevent it from absorbing any other fridge smells. But honestly, it probably won’t last that long because it’s so delicious!
Coffee Cheesecake: 7 Heavenly Reasons to Indulge
- Total Time: 4 hours 20 minutes
- Yield: 12 servings 1x
- Diet: Vegetarian
Description
A rich and creamy coffee-flavored cheesecake.
Ingredients
- 1 1/2 cups graham cracker crumbs
- 1/4 cup sugar
- 1/2 cup unsalted butter, melted
- 3 (8 ounce) packages cream cheese, softened
- 1 cup sugar
- 3 large eggs
- 1 tablespoon vanilla extract
- 1/2 cup brewed coffee, cooled
- 1 tablespoon all-purpose flour
Instructions
- Preheat the oven to 325°F (160°C).
- In a bowl, mix graham cracker crumbs, 1/4 cup sugar, and melted butter.
- Press the mixture into the bottom of a 9-inch springform pan.
- In a large bowl, beat cream cheese and 1 cup sugar until smooth.
- Add eggs one at a time, mixing well after each addition.
- Stir in vanilla extract and brewed coffee.
- Add flour and mix until just combined.
- Pour the cream cheese mixture over the crust.
- Bake for 55-60 minutes or until set.
- Let cool and refrigerate for at least 4 hours before serving.
Notes
- Use room temperature ingredients for best results.
- Top with whipped cream and coffee beans for garnish.
- Store leftovers in the refrigerator.
- Prep Time: 20 minutes
- Cook Time: 60 minutes
- Category: Dessert
- Method: Baking
- Cuisine: American
Nutrition
- Serving Size: 1 slice
- Calories: 350
- Sugar: 25g
- Sodium: 200mg
- Fat: 22g
- Saturated Fat: 13g
- Unsaturated Fat: 7g
- Trans Fat: 0g
- Carbohydrates: 30g
- Fiber: 1g
- Protein: 5g
- Cholesterol: 80mg
Keywords: coffee cheesecake