

There’s something truly magical about a cookie exchange! I just love how this tradition brings friends and family together, all in the spirit of sharing delicious homemade treats. Last year, I hosted my first cookie exchange, and let me tell you, it was a blast! Everyone brought their favorite cookies, and the room was filled with laughter and the sweet aroma of baked goods. We swapped stories over a plate of warm cookies, and it felt like a cozy gathering right out of a holiday movie. Trust me, once you dive into this fun event, you’ll be hooked on the joy of sharing and savoring every bite!
Ingredients for the Perfect Cookie Exchange
Gathering the right ingredients is essential for baking cookies that will wow your friends and family at your cookie exchange! Here’s what you’ll need:
- 2 cups all-purpose flour – This is the base of your cookies, giving them structure. Make sure to spoon it into your measuring cup and level it off for accuracy!
- 1 teaspoon baking soda – This little powerhouse helps your cookies rise and gives them that perfect chewy texture.
- 1/2 teaspoon salt – Just a touch enhances all the flavors and balances the sweetness!
- 1 cup unsalted butter, softened – This is where the magic begins! Softened butter creates a creamy, dreamy batter. Take it out of the fridge ahead of time to let it come to room temperature.
- 1 cup granulated sugar – This sweetener adds a delightful crunch and sweetness to your cookies.
- 1 cup brown sugar, packed – Brown sugar adds moisture and a rich flavor. Don’t worry if it’s a bit lumpy; just pack it firmly in the measuring cup!
- 2 large eggs – These bind everything together and give your cookies that tender texture.
- 2 teaspoons vanilla extract – Trust me, this is a must! It infuses every bite with a warm and inviting flavor.
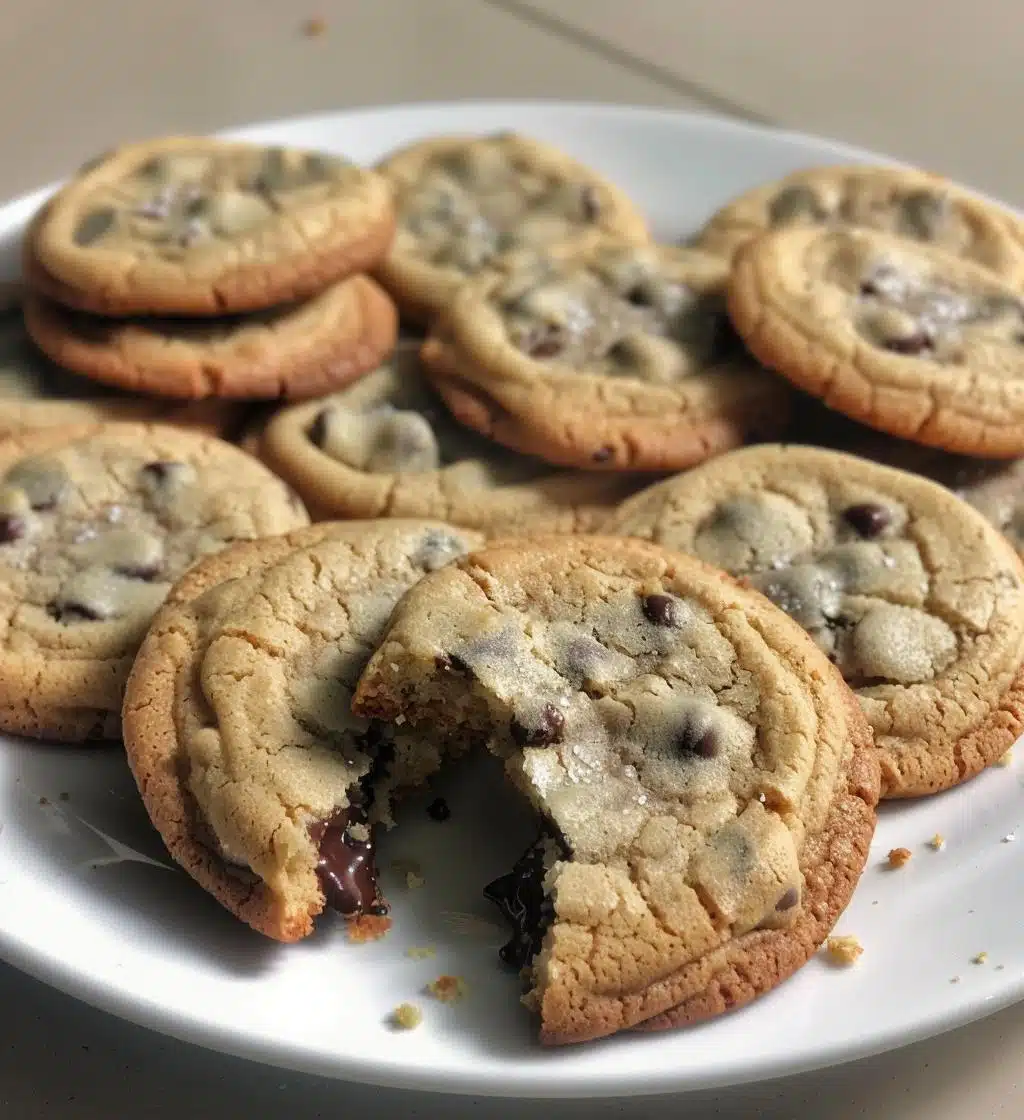
- 2 cups chocolate chips – The star of the show! You can use semi-sweet, dark, or even a mix of your favorites. Feel free to sprinkle in some nuts if you want extra crunch!
Having everything measured and ready to go makes the baking process so much smoother and more enjoyable!
How to Prepare for Your Cookie Exchange
Preparing for your cookie exchange is a delightful journey! Let’s dive right into the steps to create these yummy cookies together.
Preheat the Oven
First things first, preheat your oven to 350°F (175°C). This is super important because starting with a hot oven helps your cookies bake evenly and achieve that perfect golden brown color. So, don’t skip this step!
Mixing the Dry Ingredients
In a medium bowl, whisk together the flour, baking soda, and salt. This step is key because it ensures the baking soda is evenly distributed throughout the flour. A good mix means your cookies will rise beautifully!
Creaming the Butter and Sugars
Now, in a large mixing bowl, cream together the softened butter, granulated sugar, and brown sugar until it’s light and fluffy. I usually use an electric mixer for this, but you can totally do it by hand if you’re feeling strong! This step is where the magic happens—it creates a lovely base for your cookies.
Incorporating Eggs and Vanilla
Once your butter and sugars are creamed, add in the eggs and vanilla extract. Mix until everything is well combined; it should look smooth and creamy. This is where the flavor really starts to shine!
Combining Wet and Dry Ingredients
Next, gradually add your dry ingredients to the wet mixture. I like to do this in batches, mixing just until combined. Be careful not to overmix; we want our cookies to stay tender and delicious!
Adding Chocolate Chips
Now for the best part—gently fold in those chocolate chips! Use a spatula to ensure they’re evenly distributed throughout the dough. You want each cookie to have a melty chocolate surprise!
Baking the Cookies
Finally, drop spoonfuls of dough onto a baking sheet lined with parchment paper, leaving some space between each one. Bake them for 10-12 minutes or until they’re golden brown around the edges. Your kitchen will smell heavenly, and you’ll be counting down the seconds until you can dig in!
Tips for a Successful Cookie Exchange
Pulling off a fantastic cookie exchange is all about a little planning and a sprinkle of love! Here are my top tips to ensure your cookie exchange is a hit:
- Make a Variety: Encourage your friends to bring different kinds of cookies. This way, everyone gets to sample a little bit of everything! Think about classic chocolate chip, festive peppermint, or even unique flavors like lavender or chai.
- Label Your Cookies: If you’re feeling fancy, label your cookies with their names and ingredients. This is especially helpful for guests with dietary restrictions or allergies. Plus, it adds a personal touch!
- Presentation Matters: Arrange your cookies on beautiful platters or tiered stands. The visual appeal of your cookie display will wow your guests and make the whole event feel special.
- Storage Tips: To keep your cookies fresh, store them in an airtight container. If you’ve made a variety, consider separating them with parchment paper to prevent sticking. Some cookies, like chocolate chip, taste even better the next day!
- Enjoy the Process: Remember, the best part of a cookie exchange is the joy of sharing with friends and family. Don’t stress too much about perfection—just have fun and enjoy each bite!
With these tips, you’ll be well on your way to hosting an unforgettable cookie exchange that everyone will talk about long after the last crumb is gone!
Nutritional Information Disclaimer
It’s important to note that the nutritional information provided for these cookies is just an estimate. Actual values can vary based on the specific ingredients and brands you choose. Factors like the type of chocolate chips or butter can significantly change the calorie count and other nutritional details. So, if you’re counting calories or monitoring specific nutrients, be sure to check the labels of your ingredients to get the most accurate information. Happy baking!
FAQ About Cookie Exchanges
Cookie exchanges are filled with joy, but you might have some questions along the way! Here are some common queries I’ve encountered, along with the answers to help you navigate this sweet tradition:
What types of cookies work best for a cookie exchange?
Honestly, the sky’s the limit! Classic choices like chocolate chip, snickerdoodles, and oatmeal raisin are always crowd-pleasers. But don’t hesitate to get creative! Try unique flavors like matcha cookies or salted caramel. The more variety, the better!
How should I store my cookies after baking?
To keep your cookies fresh and delicious, store them in an airtight container at room temperature. If you’ve made different types, it’s a good idea to layer them with parchment paper to prevent them from sticking together. Some cookies, like those with frosting, might need to be refrigerated to stay fresh longer.
Can I make the dough ahead of time?
Absolutely! You can prepare the dough a day in advance and refrigerate it. Just let it sit at room temperature for a bit before baking to make it easier to scoop. It saves time on the day of your exchange, and the flavors can even improve with a little rest!
What if I have dietary restrictions among my friends?
No worries at all! You can easily accommodate various dietary needs. Consider making some gluten-free cookies using almond flour or coconut flour. Vegan cookies are another great option! Just swap out the eggs for flaxseed meal or applesauce, and use a dairy-free butter substitute.
How can I make my cookies more festive for the exchange?
Presentation is key! Consider using colorful sprinkles, festive packaging, or even themed decorations. You can also play with flavors—think peppermint extract for a holiday twist or pumpkin spice for the fall. A little creativity goes a long way in making your cookies stand out!
Can I mix and match cookie types in one batch?
Definitely! You can get inventive by creating cookie bars with different flavors in one pan. Just remember to adjust baking times as needed, so all flavors bake evenly. This way, you’ll have a delightful surprise when everyone bites into your creations!
With these tips, you’ll feel confident hosting your cookie exchange and making it a memorable event for everyone involved. Happy baking and sharing!
Why You’ll Love This Cookie Exchange Recipe
This cookie exchange recipe is a true gem, and here’s why I absolutely adore it:
- Quick and Easy: With just a handful of simple ingredients and about 32 minutes from start to finish, you’ll be on your way to cookie bliss in no time!
- Deliciously Versatile: You can easily customize this recipe by swapping in different chocolate chips, nuts, or even dried fruits. The flavor possibilities are endless!
- Perfect for Sharing: Yielding 24 delightful cookies, this recipe is just right for a cookie exchange. It’s all about spreading the joy of homemade treats!
- Taste of Nostalgia: Each bite brings back memories of childhood baking days and cozy gatherings with loved ones. It’s like a warm hug in cookie form!
- Impressive Presentation: These cookies look as good as they taste! You can easily arrange them on a platter for a stunning display at your cookie exchange.
- Crowd-Pleasing Flavor: The combination of buttery goodness and melty chocolate chips is simply irresistible. Trust me, everyone will be coming back for seconds!
So gather your friends and family, and let’s make some cookie magic together!
Print
Cookie Exchange: 7 Tips for an Unforgettable Celebration
- Total Time: 32 minutes
- Yield: 24 cookies 1x
- Diet: Vegetarian
Description
A fun event where friends and family gather to exchange homemade cookies.
Ingredients
- 2 cups all-purpose flour
- 1 teaspoon baking soda
- 1/2 teaspoon salt
- 1 cup unsalted butter, softened
- 1 cup granulated sugar
- 1 cup brown sugar, packed
- 2 large eggs
- 2 teaspoons vanilla extract
- 2 cups chocolate chips
Instructions
- Preheat your oven to 350°F (175°C).
- In a bowl, mix flour, baking soda, and salt.
- In another bowl, cream together butter, granulated sugar, and brown sugar.
- Add eggs and vanilla to the butter mixture and mix well.
- Gradually add the dry ingredients to the wet ingredients.
- Fold in chocolate chips.
- Drop spoonfuls of dough onto a baking sheet.
- Bake for 10-12 minutes or until golden brown.
- Let cool before transferring to a wire rack.
Notes
- Store cookies in an airtight container.
- Experiment with different types of chips or nuts.
- Use parchment paper for easy cleanup.
- Prep Time: 20 minutes
- Cook Time: 12 minutes
- Category: Dessert
- Method: Baking
- Cuisine: American
Nutrition
- Serving Size: 1 cookie
- Calories: 150
- Sugar: 10g
- Sodium: 100mg
- Fat: 7g
- Saturated Fat: 4g
- Unsaturated Fat: 2g
- Trans Fat: 0g
- Carbohydrates: 20g
- Fiber: 1g
- Protein: 2g
- Cholesterol: 25mg
Keywords: Cookie exchange, cookies, baking, dessert