

Ah, holiday baking! It’s one of my favorite parts of the festive season. I still remember the aroma of freshly baked cookies wafting through my grandmother’s kitchen as we gathered around, laughter filling the air. There’s just something magical about mixing those simple ingredients together, and watching them transform into delightful treats that bring everyone joy. This time of year, as we share these sweet creations with family and friends, it feels like love is baked right into each cookie. Trust me, incorporating holiday baking into your traditions not only fills your home with warmth but also creates cherished memories that last a lifetime. Let’s dive into this delicious recipe that’s perfect for sharing and celebrating! You won’t regret it!
Ingredients List
Gather these simple yet essential ingredients to make your holiday cookies shine! You’ll need:
- 2 cups all-purpose flour
- 1 cup granulated sugar
- 1/2 cup unsalted butter, softened to room temperature
- 1 cup semi-sweet chocolate chips (feel free to use milk chocolate if that’s your jam!)
- 2 large eggs
- 1 teaspoon pure vanilla extract for that extra warmth
- 1 teaspoon baking powder to help them rise
- 1/2 teaspoon salt to enhance all those lovely flavors
Make sure your butter’s nice and soft; it makes a world of difference when you cream it with sugar! Trust me, you’ll want every bite to melt in your mouth.
How to Prepare Instructions
Alright, let’s get those cookies baking! This step-by-step guide will help ensure your holiday baking goes smoothly. It’s all about having fun and getting that perfect batch of cookies, so let’s dive in!
Step-by-Step Baking Process
- First things first, preheat your oven to 350°F (175°C). You want it nice and toasty for those cookies!
- In a large mixing bowl, cream together the softened butter and sugar. I usually use an electric mixer on medium speed until the mixture is light and fluffy. This should take about 2-3 minutes, and trust me, it’s worth the wait!
- Next, add in the eggs, one at a time, mixing well after each addition. Then stir in the vanilla extract. The smell will start to fill your kitchen, and it’s divine!
- In another bowl, whisk together the all-purpose flour, baking powder, and salt. This helps to evenly distribute those dry ingredients, ensuring your cookies rise beautifully.
- Gradually add the dry mixture to the wet ingredients. I like to do this in three parts, mixing until just combined. You don’t want to overmix—keeping some air in there is key!
- Now, gently fold in the chocolate chips. This is my favorite part because it means those gooey bits of chocolate are on their way to melt into your cookies!
- Using a spoon or a cookie scoop, drop spoonfuls of dough onto a lined baking sheet, leaving a little space between each one for spreading.
- Pop the baking sheet into the oven and bake for 10-12 minutes, or until the edges are golden brown. Don’t worry if they look a little soft; they’ll firm up as they cool!
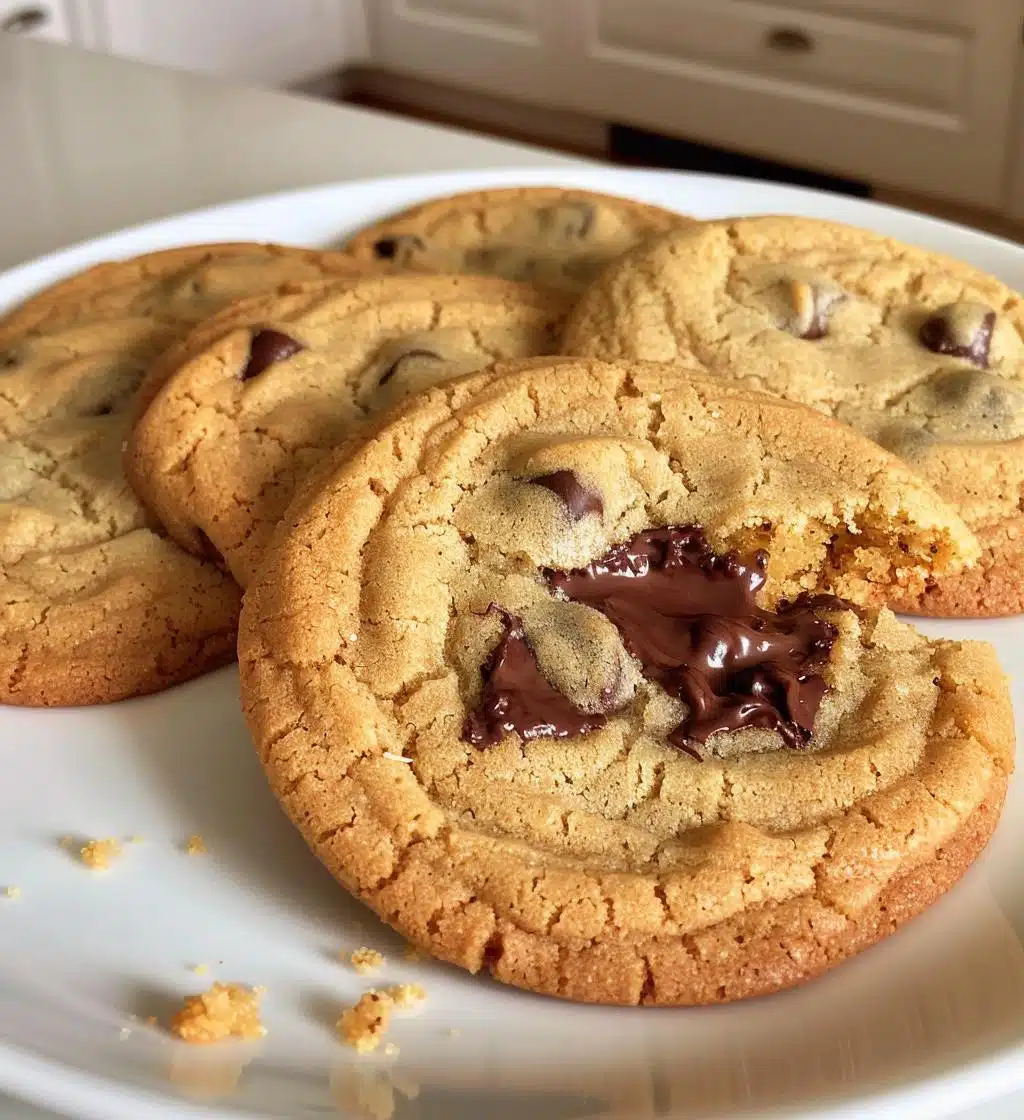
Once baked, let them cool on the baking sheet for a few minutes before transferring them to a wire rack. Enjoy the delightful aroma filling your home while you wait—it’s pure holiday magic!
Why You’ll Love This Recipe
- Perfectly soft and chewy cookies that melt in your mouth
- Quick and easy to make—just 27 minutes from start to finish!
- Great for sharing at holiday gatherings or cookie swaps
- Customizable with your favorite mix-ins or flavors
- A delightful way to create warm memories with loved ones
Tips for Success
To get the best results from your holiday baking, here are some handy tips you won’t want to miss! First, make sure your butter is truly softened; it should be at room temperature for easy creaming with sugar. If you’re short on time, you can cut it into small cubes and let it sit for a few minutes. Also, don’t skip the chilling step if you prefer a firmer texture—just pop the dough in the fridge for about 30 minutes before baking. Keep an eye on your cookies as they bake; every oven is different, and you want them just golden around the edges for that perfect chewy center. Enjoy your holiday baking adventure!
Variations
Let’s get creative with those holiday cookies! One of my favorite variations is to swap out the chocolate chips for chopped nuts or dried fruits like cranberries or apricots for a festive twist. You could also add a teaspoon of cinnamon or nutmeg for a warm spice flavor that just screams holiday cheer! If you’re feeling adventurous, try mixing in some peanut butter chips or even a splash of peppermint extract for a refreshing kick. The options are endless, so don’t be afraid to experiment and make these cookies your own!
Storage & Reheating Instructions
To keep your holiday cookies fresh and delicious, store them in an airtight container at room temperature. They’ll stay good for about a week, but trust me, they probably won’t last that long because they’re just too good! If you want to keep them longer, you can freeze them. Just place the cookies in a single layer on a baking sheet to freeze them initially, then transfer to a freezer-safe bag or container. When you’re ready to enjoy them, simply let them thaw at room temperature. No need to reheat unless you want that warm, gooey chocolate experience again—then just pop them in the microwave for about 10 seconds!
Nutritional Information Section
Just a heads up, nutritional values can vary based on the specific ingredients and brands you use, so these numbers are just an estimate. Each cookie packs about 150 calories, with 7g of fat, 2g of protein, and 20g of carbohydrates. They also contain 10g of sugar and 80mg of sodium. Enjoy these treats in moderation, and savor every bite during your holiday baking festivities!
FAQ Section
Got questions about holiday baking? I’ve got you covered! Here are some of the most common inquiries I hear:
Can I use margarine instead of butter?
You can, but I recommend using real butter for the best flavor and texture. It really makes a difference!
What if I don’t have baking powder?
No worries! You can substitute it with 1/4 teaspoon of baking soda and 1/2 teaspoon of vinegar for a similar effect.
How do I know when my cookies are done?
Look for golden edges and a soft center. They’ll firm up as they cool, so don’t overbake!
Can I make the dough ahead of time?
Absolutely! You can store the dough in the fridge for up to 3 days or freeze it for up to a month. Just thaw it before baking.
What’s the best way to transport my cookies?
Use a sturdy container with layers of parchment paper in between to keep them from sticking together. Happy holiday baking!
For more tips on holiday baking, check out this holiday baking guide that offers great insights!
Print
Holiday Baking: 7 Magical Cookies to Share Joy
- Total Time: 27 minutes
- Yield: 24 cookies 1x
- Diet: Vegetarian
Description
A delightful holiday baking recipe to share with family and friends.
Ingredients
- 2 cups all-purpose flour
- 1 cup sugar
- 1/2 cup butter, softened
- 1 cup chocolate chips
- 2 eggs
- 1 teaspoon vanilla extract
- 1 teaspoon baking powder
- 1/2 teaspoon salt
Instructions
- Preheat your oven to 350°F (175°C).
- In a bowl, cream butter and sugar until light and fluffy.
- Add eggs and vanilla, mixing well.
- In another bowl, combine flour, baking powder, and salt.
- Gradually add the dry ingredients to the wet mixture.
- Fold in chocolate chips.
- Drop spoonfuls of dough onto a baking sheet.
- Bake for 10-12 minutes or until golden.
Notes
- Store in an airtight container.
- Can substitute chocolate chips with nuts.
- Chill dough for 30 minutes for a firmer texture.
- Prep Time: 15 minutes
- Cook Time: 12 minutes
- Category: Dessert
- Method: Baking
- Cuisine: American
Nutrition
- Serving Size: 1 cookie
- Calories: 150
- Sugar: 10g
- Sodium: 80mg
- Fat: 7g
- Saturated Fat: 4g
- Unsaturated Fat: 3g
- Trans Fat: 0g
- Carbohydrates: 20g
- Fiber: 1g
- Protein: 2g
- Cholesterol: 20mg
Keywords: Holiday baking