
Oh my gosh, let me tell you about the joy of making your own homemade shampoo bar! Not only is it a fun and creative process, but it’s also a fantastic way to ditch those plastic bottles and embrace a more eco-friendly routine. I remember the first time I decided to dive into DIY soap making—I was a little nervous, but as soon as I got started, I couldn’t believe how easy and rewarding it was!
This homemade shampoo bar DIY soap recipe is super straightforward, and I love how you can customize it with your favorite essential oils. The moment you mix those oils in, the scent just fills the room, and you can already imagine how luxurious it will feel in your hair. Plus, you’ll be using natural ingredients that nourish your scalp and hair, which is a win-win in my book!
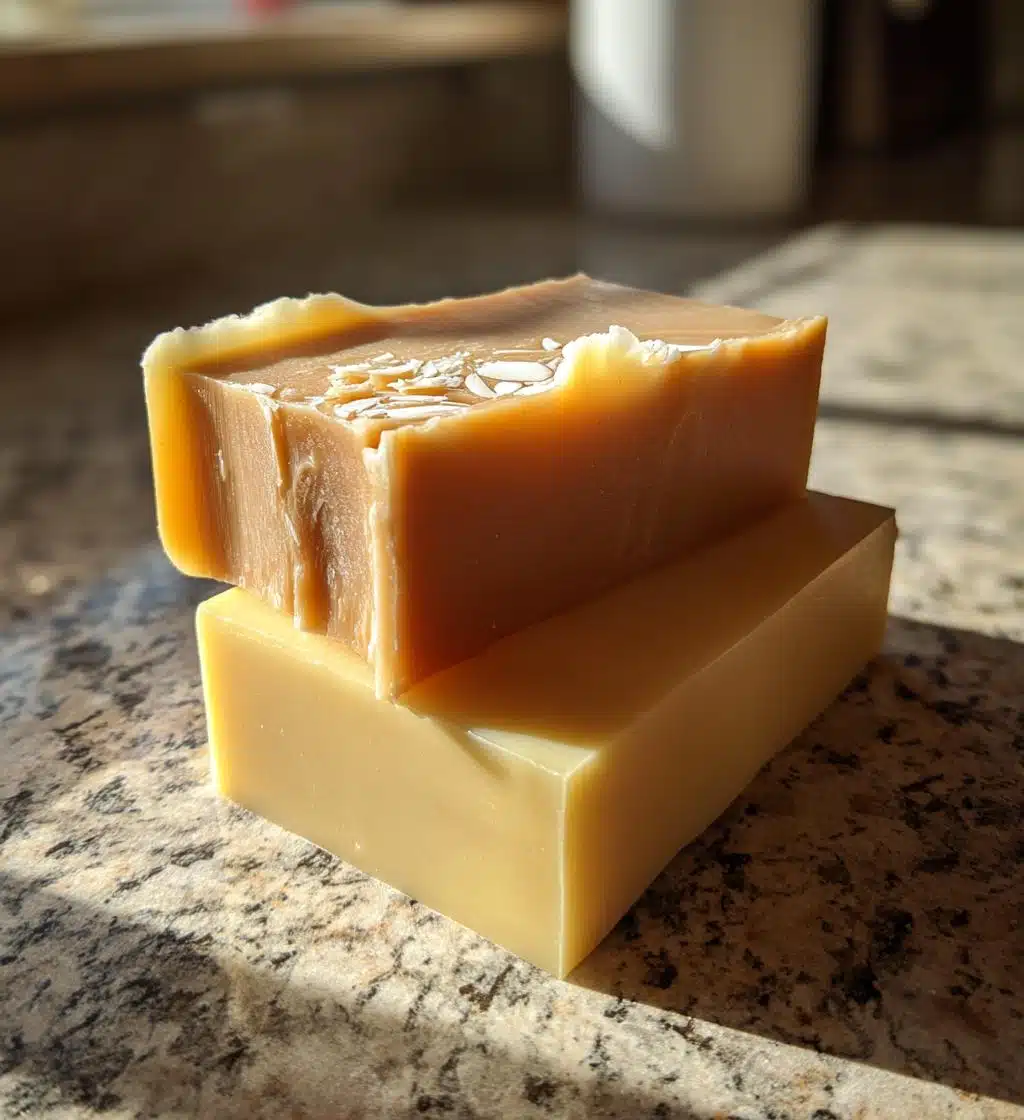
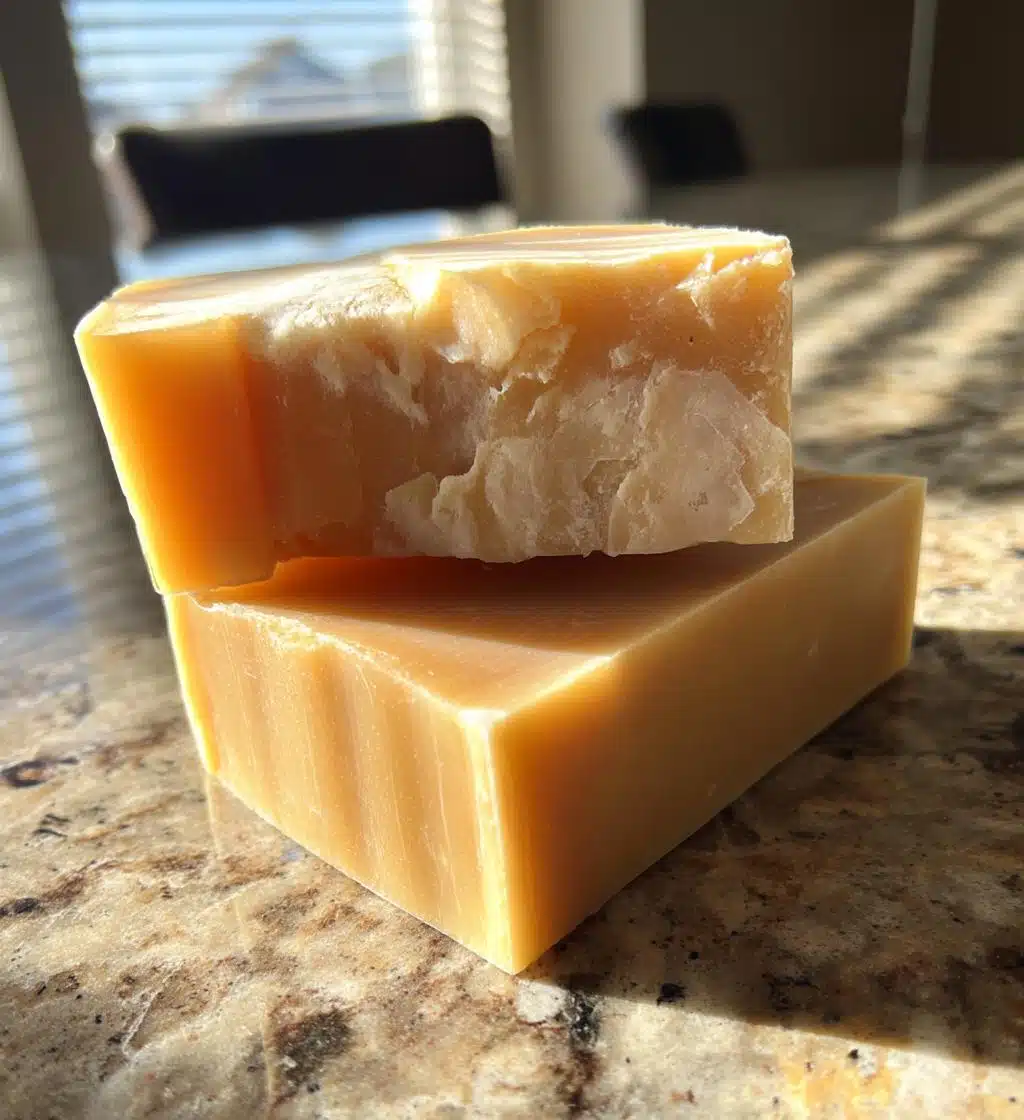
And let’s not forget about the satisfaction of cutting those bars after curing. It feels like a mini celebration every time I unwrap a new batch! I just know you’re going to love this experience as much as I do. So grab your supplies, roll up your sleeves, and let’s create something amazing together!
Ingredients for Homemade Shampoo Bar DIY Soap Recipe
Alright, let’s gather our ingredients! This recipe is super simple, and trust me, having everything prepped and measured out beforehand makes the whole process a breeze. Here’s what you’ll need:
- 200g coconut oil: This is your base oil that will give the shampoo bar its lovely, moisturizing properties. Make sure it’s in a solid state before we start, but we’ll melt it down soon!
- 100g olive oil: I love using olive oil for its nourishing qualities. It adds a nice slip to the bar and helps keep your hair shiny and healthy.
- 100g castor oil: This one’s a superstar for lather! Castor oil helps create that rich, bubbly foam we all love when we wash our hair.
- 150g sodium hydroxide (lye): Now, here’s where we need to be careful! Lye is essential for the saponification process, but make sure to handle it with respect. Always wear gloves and goggles when working with it!
- 400g distilled water: This is going to mix with your lye to create the lye solution. Using distilled water ensures that there are no impurities that could interfere with the reaction.
- Essential oils (optional): This is where you can really make this shampoo bar your own! I love adding a few drops of lavender or tea tree oil for their fabulous scents and potential benefits for the scalp.
Once you have everything ready, you’ll feel like a soap-making rockstar! Trust me, it’s going to be so satisfying to see all these ingredients come together into something amazing.
How to Prepare Your Homemade Shampoo Bar DIY Soap Recipe
Alright, let’s dive into the fun part—making your homemade shampoo bar! This section is all about the steps you’ll take to transform those simple ingredients into luxurious bars of soap. Don’t worry; I’ll guide you through each stage, and I promise it’s easier than it sounds!
Preparing the Ingredients
First things first, let’s get everything prepped! Measure out all your ingredients carefully. I like to lay everything out in front of me—it makes the process feel organized and keeps me from forgetting anything. Use a kitchen scale for accuracy—trust me, it makes a difference! Having your oils measured and ready to go will help the process flow smoothly.
Mixing the Lye Solution
Now, this part is super important! Carefully combine the sodium hydroxide with the distilled water. Make sure you do this in a well-ventilated area—safety first! I usually do it near an open window or outside if it’s nice out. Always remember to add the lye to the water, not the other way around. It’ll create a reaction that can produce fumes, so be cautious. Stir gently until the lye is completely dissolved, and set it aside to cool.
Melting the Oils
Next up, let’s melt those oils! In a pot, gently heat the coconut oil, olive oil, and castor oil together over low to medium heat. You want the oils to be completely melted but be careful not to overheat them. A good rule of thumb is to keep them around 120°F (49°C). You can check the temperature with a kitchen thermometer. Once melted, remove from heat and let them cool slightly until they’re about the same temperature as your lye solution.
Combining Mixtures
Okay, now for the magic moment! When your lye solution and oils are both around the same temperature—ideally between 95°F and 105°F (35°C to 40°C)—it’s time to combine them. Slowly pour the lye solution into the melted oils while stirring gently. I like to use an immersion blender for this part, but a whisk will work too! Just make sure everything is well mixed.
Achieving Trace
Here’s where the fun really begins! Blend the mixture until you reach what’s called “trace.” This is when the soap mixture thickens to a pudding-like consistency, and if you drizzle some over the surface, it should leave a little trail. It can take anywhere from a few minutes to about 10 minutes of blending. Be patient, and don’t rush it—this step is crucial for the texture of your bars!
Adding Essential Oils
If you want to add some lovely scents, now’s the time! Once you’ve hit trace, stir in your chosen essential oils. I adore using lavender for its calming aroma, but feel free to experiment with others like peppermint or eucalyptus. Just a few drops will do—start small and add more if you want a stronger scent!
Molding and Curing
Finally, let’s get that soap into molds! Pour the mixture into your soap molds, smoothing the top if needed. Cover them with a towel to keep the heat in and let them sit for about 24-48 hours to harden. After they’ve set, carefully remove the bars from the molds and cut them into your desired sizes. But don’t rush to use them just yet! Allow your bars to cure in a cool, dry place for 4-6 weeks. This curing time is essential for the soap to fully saponify and become gentle enough for your hair.
And there you have it—a step-by-step guide to creating your very own shampoo bars! It’s a bit of a process, but I promise it’s so worth it when you finally get to use them. Happy soaping!
FAQ Section
Alright, let’s tackle some common questions you might have about making your homemade shampoo bar! I get it—this whole process can feel a bit overwhelming at first, but I promise it’s really not as complicated as it seems. Here are some FAQs to help you out:
Is it safe to work with lye?
Absolutely, but safety is key! Always wear gloves and goggles when handling lye, and work in a well-ventilated area. If you follow the instructions carefully, you’ll be just fine. Just remember—lye is caustic, so treat it with respect!
How do I store my shampoo bars?
Once your bars are fully cured, store them in a cool, dry place. I like to keep mine in a cardboard box or a breathable bag to avoid moisture buildup. Just keep them away from direct sunlight or heat sources, and they’ll stay fresh and ready to use!
How long do the shampoo bars last?
If stored properly, these bars can last quite a while! I’ve found that they can remain effective for up to a year. Just make sure they’re kept dry between uses to avoid mushiness.
Can I use these shampoo bars on all hair types?
Yes! One of the best things about making your own shampoo bars is that you can customize them to suit your hair’s needs. If you have specific concerns—like dryness or oiliness—experiment with different oils or essential oils to find the perfect blend for you!
How do I use the shampoo bars?
Using them is super simple! Just wet your hair, rub the bar directly onto your scalp, and massage it in. You can also create a lather in your hands first, then apply it. Rinse thoroughly, and follow up with a conditioner if you need extra moisture!
What if my shampoo bar is too hard or too soft?
If your bars turn out too hard, it might be because of too much lye or not enough water. If they’re too soft, you may have had too much water or not enough curing time. Don’t worry—this is all part of the learning process! Adjust your recipe next time based on your experience.
Hopefully, these answers help clear up any questions you might have! If you think of more, feel free to reach out. I’m here to help you on this soapy adventure!
Why You’ll Love This Recipe
- Eco-Friendly: By making your own shampoo bars, you’re reducing plastic waste and opting for a more sustainable beauty routine. How awesome is that?
- Customizable: You get to choose the oils and scents that work best for your hair and preferences. Want a refreshing minty smell? Go for it! Prefer calming lavender? You got it!
- Cost-Effective: Once you invest in the basic ingredients, you can whip up multiple bars for a fraction of the cost of store-bought shampoo. Plus, it’s a fun project!
- Natural Ingredients: You know exactly what’s going into your shampoo bars. No weird chemicals here—just nourishing oils and butters that your hair will love.
- Great Lather: Trust me, the castor oil does wonders for creating a bubbly, rich lather that makes washing your hair feel like a spa experience.
- Long-Lasting: One bar can last for months! You’ll be amazed at how long they hold up compared to liquid shampoo.
- Fun and Creative Process: Making shampoo bars is not just a chore; it’s a delightful activity that lets you express your creativity. Plus, there’s something so satisfying about watching your soap come to life!
Tips for Success
Alright, let’s make sure you absolutely nail this homemade shampoo bar DIY soap recipe! Here are some of my favorite pro tips that I’ve gathered from my own soapy adventures to help ensure your success:
- Measure Accurately: Seriously, using a kitchen scale is a must! Accurate measurements are key when working with lye and oils. A little too much or too little can really affect the outcome, so double-check those numbers!
- Safety First: Always wear gloves and goggles when handling lye. I can’t stress this enough! It’s essential to protect yourself, so take the time to gear up properly before you start mixing.
- Ventilation is Key: Make sure you’re in a well-ventilated area when mixing the lye solution. It helps to avoid any fumes and keeps the air fresh while you work. I usually do this part outside or near an open window.
- Temperature Matters: Pay attention to the temperatures of your lye solution and oils. They should be within 10 degrees of each other before combining. This helps the saponification process go smoothly and gives you the best texture!
- Patience with Trace: When blending to reach trace, take your time! It can be tempting to rush, but letting it blend until it’s just right is crucial for the quality of your shampoo bars. You want that nice pudding-like consistency!
- Experiment with Scents: Don’t be afraid to get creative with your essential oils! Start with a small amount and adjust to your liking. A little goes a long way, and you can create a signature scent that’s uniquely yours!
- Follow Curing Times: Be patient and allow your bars to cure for the full 4-6 weeks. I know it’s hard to wait, but this step ensures your shampoo bars are gentle and ready for your hair. Trust me, it’ll be worth it!
- Keep Records: If you decide to tweak the recipe or experiment with different oils and scents, jot down what you did! It’ll help you remember what worked well or what you might want to change for next time.
With these tips in your back pocket, I’m confident you’ll create some amazing shampoo bars! It’s all about enjoying the process and letting your creativity shine. Happy soaping!
Nutritional Information Disclaimer
Just a little note to keep in mind: the nutritional information for these homemade shampoo bars can vary quite a bit based on the specific ingredients and brands you use. So, while I’ve provided some general figures, they’re not set in stone! Remember, we’re focusing on creating a nourishing product for your hair, and the key is to enjoy the process and the benefits of all those lovely natural ingredients. If you’re tracking nutrition closely, be sure to calculate based on your exact recipe. Happy soaping!
Final Thoughts
So, there you have it! I just can’t wait for you to try this homemade shampoo bar DIY soap recipe and experience the joy of crafting your very own hair care solution. It’s such a gratifying feeling to see your hard work come to life and know that you’re treating your hair to something gentle and nourishing.
As you dive into this soapy adventure, remember to have fun with it! Don’t hesitate to experiment with different oils, scents, and even shapes for your bars. Each batch can be a little different, and that’s part of the charm! I’d love to hear about your experiences, so feel free to share your creations and any tips you pick up along the way. We’re all in this together, and your insights could inspire someone else to take the plunge into the world of DIY soap making.
Happy soaping, my friend! I can’t wait to see how your shampoo bars turn out!
Print
Homemade Shampoo Bar DIY Soap Recipe: 5 Joyful Steps
- Total Time: 1 hour 30 minutes
- Yield: 10 shampoo bars 1x
- Diet: Vegan
Description
A simple recipe for making your own homemade shampoo bar soap.
Ingredients
- 200g coconut oil
- 100g olive oil
- 100g castor oil
- 150g sodium hydroxide (lye)
- 400g distilled water
- Essential oils (optional)
Instructions
- Measure and prepare all ingredients.
- Combine sodium hydroxide with distilled water in a well-ventilated area.
- Heat the oils in a pot until melted.
- Mix the lye solution with the oils when both are at a similar temperature.
- Blend until trace is achieved.
- Add essential oils if desired.
- Pour the mixture into molds.
- Let it sit for 24-48 hours to harden.
- Remove from molds and cut into bars.
- Allow bars to cure for 4-6 weeks before use.
Notes
- Always wear gloves and goggles when working with lye.
- Use a scale for accurate measurements.
- Store bars in a cool, dry place.
- Prep Time: 30 minutes
- Cook Time: 1 hour
- Category: Soap Making
- Method: Cold Process
- Cuisine: N/A
Nutrition
- Serving Size: 1 bar
- Calories: 100
- Sugar: 0g
- Sodium: 20mg
- Fat: 10g
- Saturated Fat: 8g
- Unsaturated Fat: 2g
- Trans Fat: 0g
- Carbohydrates: 0g
- Fiber: 0g
- Protein: 0g
- Cholesterol: 0mg
Keywords: homemade shampoo bar, DIY soap, shampoo recipe