
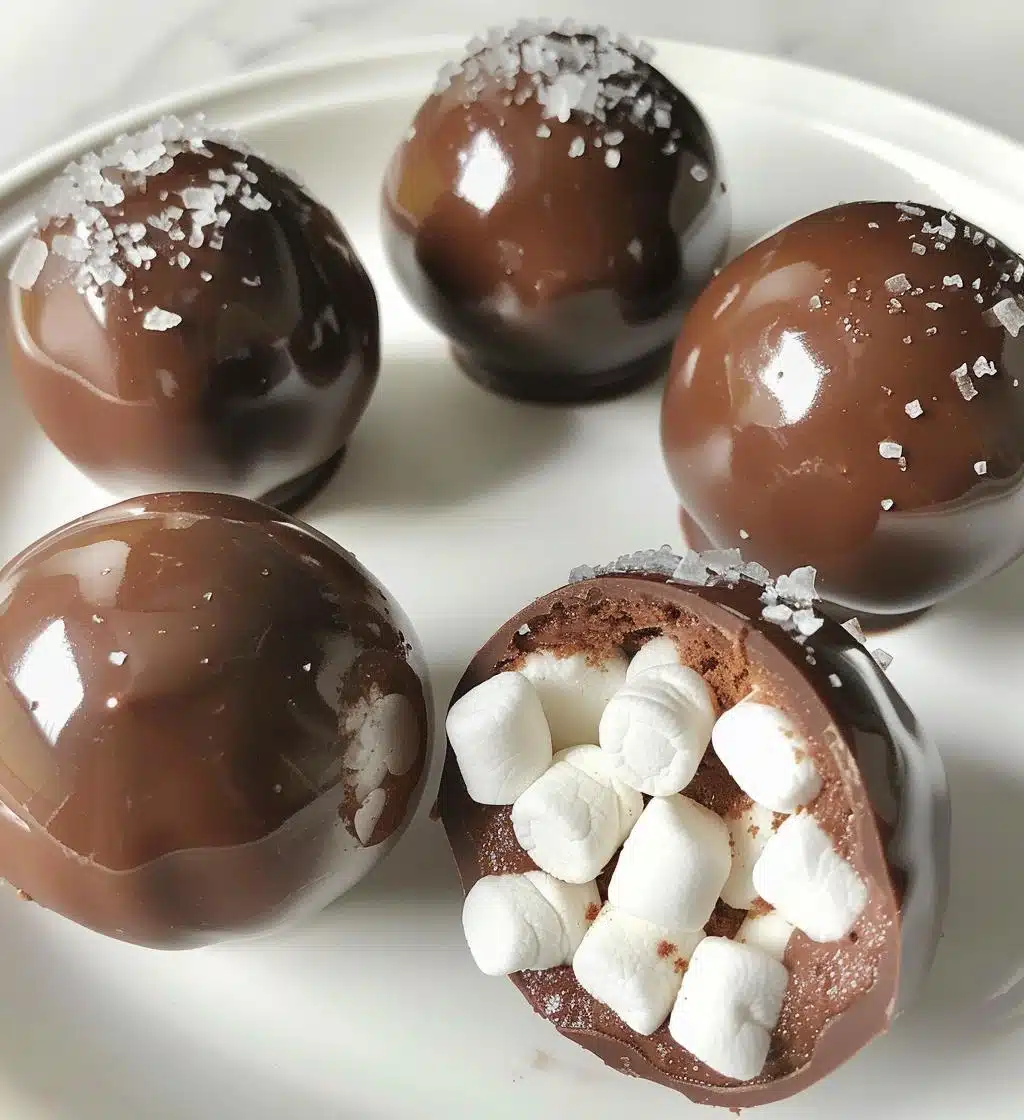
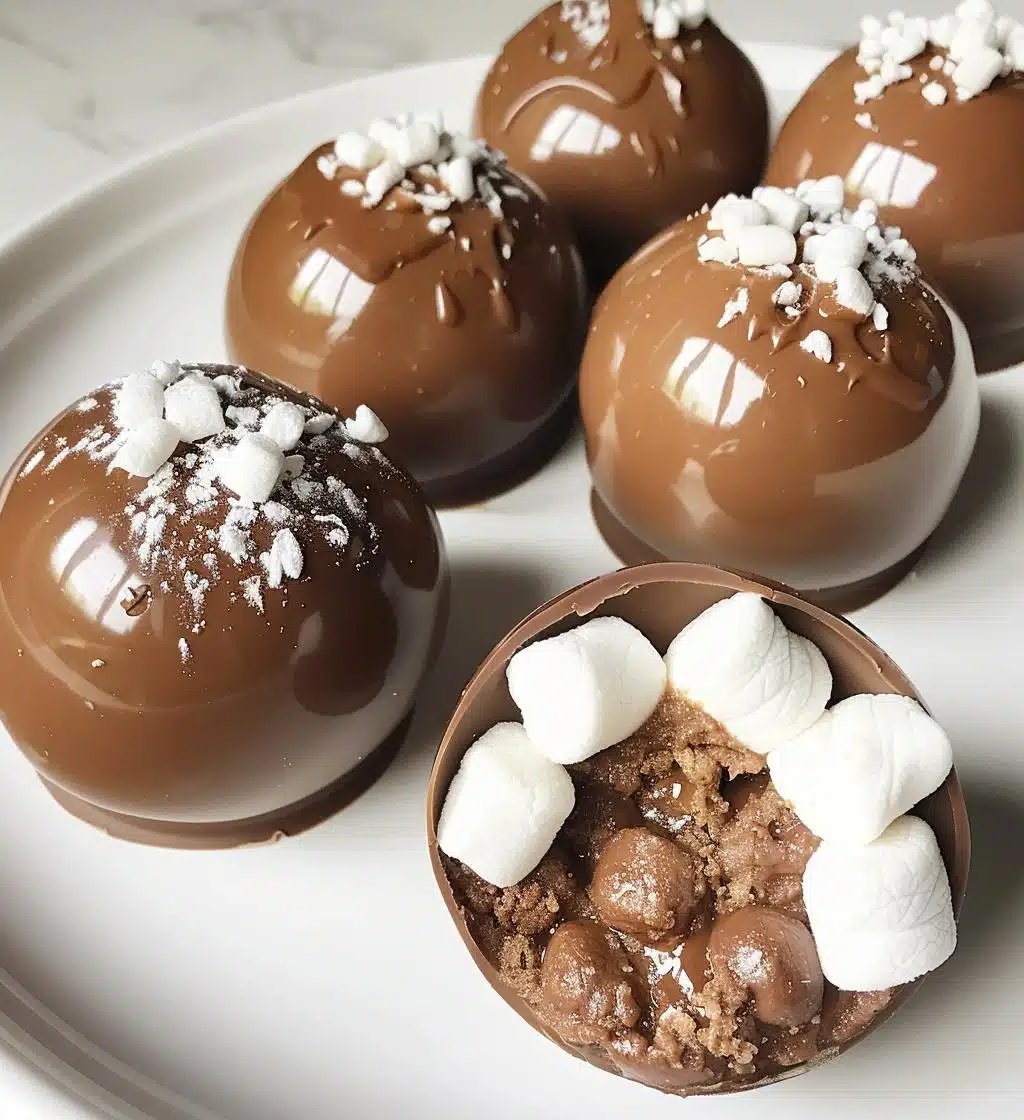
Oh my goodness, have you tried making hot cocoa bombs yet? They’re like little magic spheres of joy that explode into rich, creamy hot chocolate with the simple addition of warm milk! I mean, what’s not to love? These delightful treats are not only a winter staple but also a fun project that you can whip up in no time. Imagine cozying up on a chilly evening, watching the snow fall outside while you indulge in a cup of decadent hot cocoa that’s topped with fluffy marshmallows. It’s the perfect way to add a sprinkle of happiness to your day! Trust me, once you make these, you’ll want to share them with everyone—friends, family, or even that neighbor who always borrows your lawnmower. They’re just that good!
Ingredients for Hot Cocoa Bombs
Here’s what you’ll need to create these irresistible hot cocoa bombs. Each ingredient plays a vital role in crafting that delightful cocoa explosion, so let’s make sure we’re all set!
- 1 cup chocolate chips – These should be melted to form the outer shell. I recommend using high-quality chocolate for the best flavor!
- 1/2 cup cocoa powder – This is the star of the show! Use your favorite cocoa powder to give that rich chocolate flavor.
- 1/2 cup mini marshmallows – Because what’s hot cocoa without marshmallows? They add that fluffy sweetness we all adore!
- 1/4 cup powdered sugar – This sweetens the mix and helps the cocoa blend beautifully with the marshmallows.
- Silicone mold – The key to shaping your bombs! A round mold works best, but feel free to get creative with fun shapes if you have them!
How to Prepare Hot Cocoa Bombs
Alright, let’s dive into the magical world of making hot cocoa bombs! It’s really a straightforward process when you break it down into steps, and I promise you’ll feel like a chocolate wizard by the end of it. So, grab your ingredients and let’s get started!
Step 1: Melt the Chocolate
First things first, we need to melt those chocolate chips! Grab a microwave-safe bowl and add your 1 cup of chocolate chips. Pop it in the microwave and heat it in 30-second intervals, stirring in between. You want it to be smooth and creamy—so don’t rush it! This typically takes about 1 to 2 minutes. Just be careful not to overheat, or it might seize up on you. Trust me, no one wants that chocolate tragedy!
Step 2: Mold the Chocolate
Now that your chocolate is melted and looking all dreamy, it’s time to mold it! Take your silicone mold and fill half of each cavity with the melted chocolate. I like to use a spoon to help spread it around evenly, making sure it covers the sides well. This is where you want a nice thick layer for that perfect shell. Don’t be shy with the chocolate! Once done, you’ll want to chill these in the fridge for about 10 minutes until they’re set. Patience is key here!
Step 3: Set the Chocolate
After the 10 minutes are up, check your molds. The chocolate should be firm to the touch. If it’s still a bit soft, give it a few more minutes in the fridge. Once set, gently pop the chocolate halves out of the mold. Ooh, this is the fun part—just be careful not to break them! If any edges are jagged, you can gently smooth them out with a warm knife.
Step 4: Assemble the Bombs
Alright, now we’re getting to the heart of the matter! Take one of the chocolate halves and fill it with about 1/2 cup of cocoa powder, a generous handful of mini marshmallows, and a sprinkle of powdered sugar. This is where the magic happens! It’s like a cozy hug in a sphere. Once filled, grab a second chocolate half and place it on top, sealing it with a bit of melted chocolate if needed. Press gently to make sure it sticks.
Step 5: Seal the Bombs
To ensure everything stays together, you can take a small amount of the leftover melted chocolate and brush it over the seam where the two halves meet. This helps to create a nice, solid seal. Let them cool completely at room temperature, or pop them back in the fridge for a few minutes if you’re in a hurry. Can you smell the chocolatey goodness already?
Step 6: Store the Hot Cocoa Bombs
Once your cocoa bombs are fully cooled and set, it’s time to store them! Place them in an airtight container to keep them fresh and delicious. They’ll last about a week—if you can resist eating them all before then! I like to keep mine in the fridge, but they can also sit at room temperature. Just remember, they’re best enjoyed with a steaming cup of milk, so get ready to treat yourself!
Why You’ll Love This Recipe
- Quick Preparation: You can whip these up in just 30 minutes! Perfect for when you need a last-minute treat.
- Delicious Taste: The combination of rich chocolate, sweet marshmallows, and creamy cocoa is simply irresistible!
- Fun to Make: It’s a delightful project that’s great for both kids and adults. You’ll have a blast shaping and filling these cocoa bombs!
- Great for Gifting: These make adorable gifts! Package them up in a cute box, and you’ve got the perfect homemade present for friends and family.
Tips for Success
Now that you’re all set to create your hot cocoa bombs, here are some of my top tips to ensure they turn out perfectly every time. Trust me, following these little nuggets of wisdom can take your cocoa bombs from good to absolutely unforgettable!
- Use High-Quality Chocolate: I can’t stress this enough! The better the chocolate, the better your bombs will taste. Go for chocolate that has a high cocoa content—your taste buds will thank you!
- Add Flavor Extracts: Want to switch things up a bit? Try adding a splash of vanilla, peppermint, or even almond extract to the melted chocolate for a delightful twist. It’s like a party in your mouth!
- Be Generous with the Filling: When you’re adding cocoa powder and marshmallows, don’t hold back! The more you pack in, the more delicious the explosion will be when you add hot milk.
- Check the Mold Quality: Make sure your silicone mold is flexible and of good quality. This will help you pop out those chocolate halves easily without any breakage. A little investment goes a long way!
- Experiment with Shapes: Have fun with your molds! You can use heart shapes for Valentine’s Day, snowmen for the winter season, or even festive shapes for the holidays. The cuter, the better!
- Store Properly: Keep your hot cocoa bombs in an airtight container away from heat and moisture. This will help maintain their quality and prevent any melting or sticking together.
With these tips in your back pocket, you’re all set to impress everyone with your amazing hot cocoa bombs! Happy cooking!
Nutritional Information
Now, let’s chat about the nutritional side of these delightful hot cocoa bombs! While I believe that treats like these are all about indulgence and joy, it’s always good to know what you’re enjoying. Here’s a quick rundown of the estimated nutritional values per hot cocoa bomb:
- Calories: 120
- Sugar: 15g
- Fat: 7g
- Saturated Fat: 4g
- Unsaturated Fat: 2g
- Trans Fat: 0g
- Carbohydrates: 16g
- Fiber: 1g
- Protein: 1g
- Cholesterol: 5mg
- Sodium: 10mg
Keep in mind that these values are estimates and can vary based on the specific ingredients you use. So, whether you’re savoring one cozy evening or sharing with friends, you can enjoy your hot cocoa bombs without worry! Just remember, a little treat now and then is what makes life sweeter!
FAQ About Hot Cocoa Bombs
If you’re diving into the world of hot cocoa bombs, you might have a few questions. Don’t worry, I’ve got you covered! Here are some of the most common inquiries I get, along with my answers to help you along the way.
Can I use different types of chocolate?
Absolutely! One of the best parts about hot cocoa bombs is the versatility of chocolate. You can use milk chocolate for a sweeter, creamier taste, dark chocolate for that rich, bold flavor, or even white chocolate if you’re feeling adventurous! Each type will give your bombs a unique twist, so don’t hesitate to experiment with your favorites. You can even mix them together—how fun would that be?
How do I make them more fun?
Oh, there are so many ways to jazz up your hot cocoa bombs! First off, consider playing around with the shapes of your molds. Heart-shaped molds for Valentine’s Day, snowflakes for winter, or even fun holiday shapes can make your bombs extra special! You can also add different flavor extracts—like peppermint or hazelnut—to the chocolate for a flavor explosion. Want to get fancy? Try drizzling some melted chocolate on top or adding sprinkles for a festive touch. The possibilities are endless!
How long do they last?
When stored properly, your hot cocoa bombs can last about a week, which is plenty of time to enjoy them! Just keep them in an airtight container, away from heat and moisture to maintain their quality. If you’re like me and can’t resist, I bet they won’t last long at all! If you want to make them ahead of time, you can always freeze them for up to a month. Just remember to let them thaw in the fridge before you indulge. Enjoy every delightful sip!
Serving Suggestions
Alright, you’ve made these gorgeous hot cocoa bombs, and now it’s time to serve them up! The best part about these little delights is how versatile they are. Here are some of my favorite ways to enjoy them:
- Classic Hot Milk: This is the tried-and-true method! Just heat up a cup of milk (dairy or non-dairy, your choice) until it’s steaming but not boiling. Drop in your hot cocoa bomb and watch the magic happen! It’s like a mini show right in your mug. Stir it all together, and you’re in for a cozy treat!
- Top it Off: Once your cocoa is mixed, don’t forget to add some whipped cream, a sprinkle of cocoa powder, or even a drizzle of chocolate syrup on top for that extra touch of indulgence. Wow, right?
- Gourmet Treat: Serve your hot cocoa bombs as a dessert at a gathering! Place them on a cute platter and let everyone drop their own bomb into a mug of hot milk. It makes for a fun experience that everyone will love!
- Pair with Cookies: Enjoy your hot cocoa bombs alongside some freshly baked cookies. Chocolate chip, snickerdoodles, or even peppermint cookies make excellent companions. It’s a sweet duo that’s hard to resist!
- Gift Them Up: If you’re feeling generous, package a few of your hot cocoa bombs in a festive box or jar, and gift them to friends or family. Include a note with serving suggestions for that personal touch!
Whichever way you choose to enjoy your hot cocoa bombs, I promise they’ll bring a smile to your face and warmth to your heart. Happy sipping!
For more delicious recipes, check out our blog for inspiration!
Print
Hot cocoa bombs: 5 Blissful Ways to Indulge in Joy
- Total Time: 30 minutes
- Yield: 12 hot cocoa bombs 1x
- Diet: Vegetarian
Description
Delicious chocolate spheres filled with cocoa and marshmallows.
Ingredients
- 1 cup chocolate chips
- 1/2 cup cocoa powder
- 1/2 cup mini marshmallows
- 1/4 cup powdered sugar
- Silicone mold
Instructions
- Melt the chocolate chips in a microwave-safe bowl.
- Fill half of the silicone mold with melted chocolate.
- Chill the mold for 10 minutes until set.
- Remove the chocolate halves from the mold.
- Fill one half with cocoa powder, marshmallows, and powdered sugar.
- Seal with the other half of the chocolate.
- Let them cool completely.
- Store in an airtight container.
Notes
- Use high-quality chocolate for better taste.
- Add flavor extracts for variety.
- Use different molds for fun shapes.
- Prep Time: 20 minutes
- Cook Time: 10 minutes
- Category: Dessert
- Method: No-bake
- Cuisine: American
Nutrition
- Serving Size: 1 bomb
- Calories: 120
- Sugar: 15g
- Sodium: 10mg
- Fat: 7g
- Saturated Fat: 4g
- Unsaturated Fat: 2g
- Trans Fat: 0g
- Carbohydrates: 16g
- Fiber: 1g
- Protein: 1g
- Cholesterol: 5mg
Keywords: hot cocoa bombs, chocolate, dessert, winter treat, homemade