

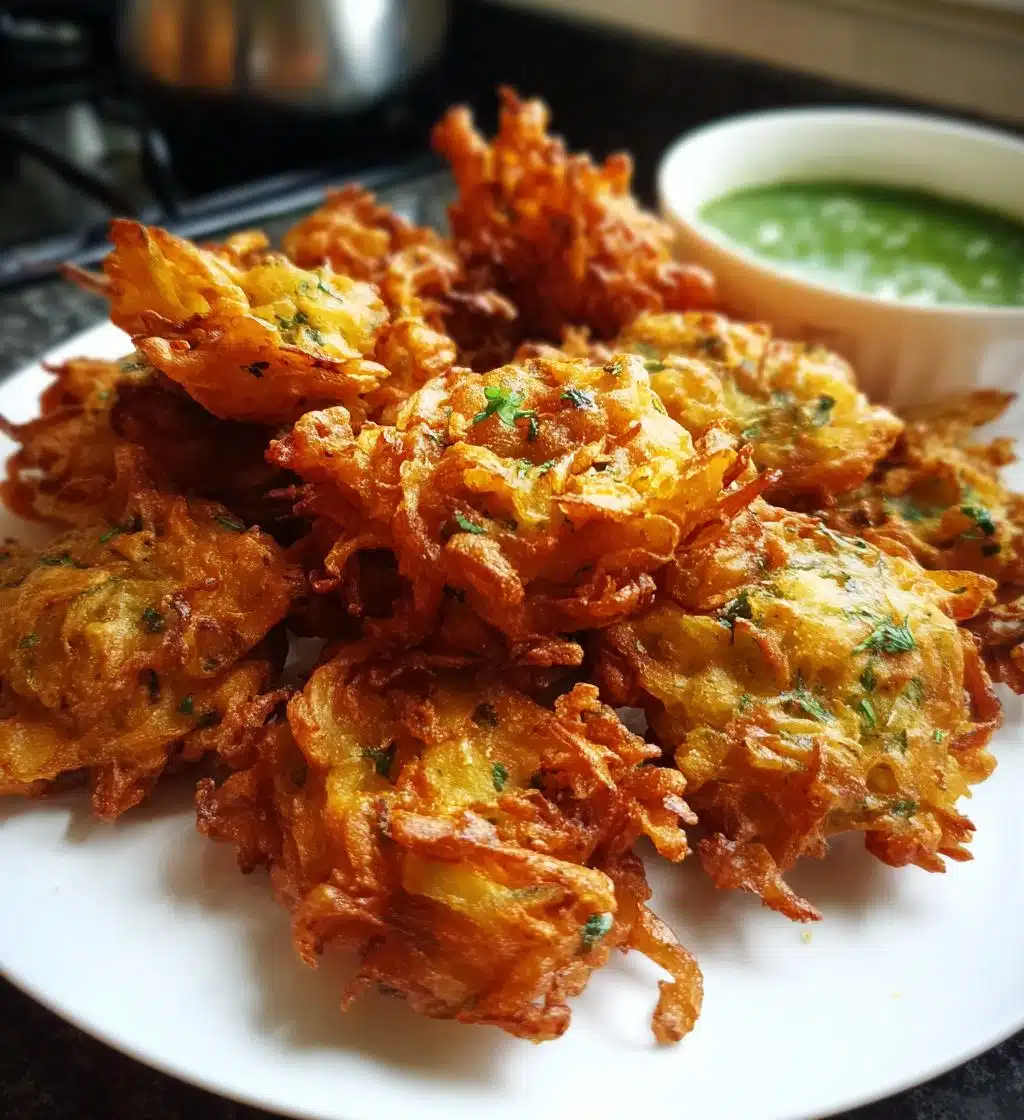
Oh, let me tell you about my love affair with onion bhaji! I remember the first time I tried these little golden delights at a cozy Indian restaurant down the street. The aroma wafting through the air was just irresistible! As soon as I took that first bite, I was hooked—the crispy exterior gave way to sweet, tender onions, perfectly spiced with a hint of warmth. It’s no wonder onion bhaji is such a beloved snack in Indian cuisine. They’re not just a treat for the taste buds; they’re perfect for any occasion, whether you’re hosting friends or just craving something crispy and delicious. Trust me, once you make these at home, you’ll find it hard to stop munching on them!
Ingredients
Gather these simple ingredients to whip up your very own onion bhaji! I promise, they’re easy to find and make all the difference in creating that perfect crispy treat.
- 2 large onions, thinly sliced
- 1 cup chickpea flour
- 1 teaspoon cumin seeds
- 1 teaspoon turmeric powder
- 1 teaspoon chili powder
- Salt to taste
- Water as needed (to make a thick batter)
- Oil for frying
Make sure your onions are sliced nice and thin; this helps them cook evenly and blend beautifully with the spices. The chickpea flour is what gives the bhaji that delightful crunch, so don’t skimp on it! You’re going to love how these ingredients come together to create a snack that’s bursting with flavor!
How to Prepare Onion Bhaji
Making onion bhaji is simpler than you might think, and I’m here to walk you through every step! Let’s get those crispy snacks going!
Mixing the Ingredients
First things first, grab a large mixing bowl and add your chickpea flour, cumin seeds, turmeric powder, chili powder, and a sprinkle of salt. Now, here’s a little secret: you want to mix these dry ingredients well before adding the onions. This way, every bite of your bhaji will be packed with flavor! Once they’re nicely combined, toss in the thinly sliced onions. Give them a good mix, ensuring the onions are coated with the flour and spices—this is where the magic happens! Now, slowly add water, a little at a time, until you’ve created a thick batter that clings to the onions. Don’t worry if it gets a bit messy; that’s part of the fun!
Frying the Onion Bhaji
Now, let’s get to the frying part! In a deep pan, pour in enough oil to submerge the bhaji. Heat that oil over medium heat—you’ll know it’s ready when a small drop of batter sizzles on contact. Careful, we don’t want any splatters! Using a spoon, drop spoonfuls of the onion mixture into the hot oil, making sure not to crowd the pan. Fry them in batches if needed. You’ll want to cook these golden nuggets for about 4-5 minutes. Keep an eye on them; the goal is a beautiful golden brown! Once they’re crispy, use a slotted spoon to lift them out and let them drain on paper towels. Just wait until you smell that amazing aroma; it’s seriously irresistible!
Nutritional Information
Let’s talk numbers! While I’m all about enjoying delicious food, it’s good to have a rough idea of what you’re munching on. Here’s an estimated nutritional breakdown for one serving of onion bhaji:
- Calories: 150
- Fat: 8g
- Saturated Fat: 1g
- Unsaturated Fat: 7g
- Trans Fat: 0g
- Cholesterol: 0mg
- Sodium: 200mg
- Carbohydrates: 18g
- Fiber: 3g
- Sugar: 2g
- Protein: 5g
Keep in mind, these figures are just estimates and can vary based on the specific ingredients and cooking methods you use. If you want to make them a bit healthier, feel free to adjust the oil or spices. But honestly, a little indulgence now and then is part of what makes life delicious, right?
Why You’ll Love This Recipe
Onion bhaji isn’t just a snack; it’s an experience! Here are a few reasons why you’ll fall head over heels for this recipe:
- Quick Preparation: You can whip these up in about 30 minutes, making them perfect for unexpected guests or a late-night craving!
- Delicious Flavor: The combination of spices and sweet onions creates a mouthwatering treat that’s hard to resist.
- Vegetarian-Friendly: This snack is 100% vegetarian, so everyone can enjoy it without any worries!
- Perfectly Crispy: With the chickpea flour coating, you’ll achieve that satisfying crunch in every bite.
- Customizable: Feel free to adjust the spices or add veggies to make it your own—creativity is always welcome in the kitchen!
- Great for Sharing: Serve them at parties or gatherings, and watch your friends and family fall in love with these crispy delights!
Seriously, once you try making onion bhaji at home, you’ll understand why they’re such a beloved snack. They’re not just tasty; they’re also a journey into the heart of Indian cuisine!
Tips for Success
To make sure your onion bhaji turns out perfectly every time, I’ve got a few handy tips to keep in mind. Trust me, these little tricks make a world of difference!
- Get the Oil Just Right: Before you start frying, make sure your oil is hot enough. If it’s not sizzling when you drop in a bit of batter, wait a little longer. If the oil is too cool, your bhaji will absorb more oil and become greasy instead of crispy—no one wants that!
- Adjust the Spices: Don’t be afraid to tweak the spices to suit your taste! If you like it spicy, add a bit more chili powder. For a milder version, cut back on the chili or add a pinch of sugar to balance the flavors. Remember, cooking is all about personal preference!
- Mix Well: When combining the chickpea flour and spices, make sure you mix thoroughly before adding the onions. This ensures every bite is packed with flavor. I like to use my hands to really get in there and mix it all up—just be sure to wash them afterward!
- Don’t Overcrowd the Pan: It’s tempting to fry a lot at once, but giving each bhaji some space in the oil helps them crisp up beautifully. If your pan is too crowded, they’ll steam instead of fry, and that’s a no-go!
- Keep an Eye on Cooking Time: Fry each batch for about 4-5 minutes, but keep an eye on them! Every stove is different, and you want that golden-brown color. If they’re browning too quickly, lower the heat a bit.
- Drain Well: After frying, let the bhaji rest on paper towels for a minute or two to soak up excess oil. This step is key to keeping them crispy for longer!
With these tips, you’ll be well on your way to mastering the art of onion bhaji. They’re not just a snack; they’re a celebration of flavor and texture that you’ll want to share with everyone!
Variations
One of the best things about onion bhaji is how versatile it can be! Once you get the basic recipe down, feel free to get creative and mix things up. Here are some fun variations to consider:
- Vegetable Bhaji: Why not toss in some grated carrots, chopped spinach, or even finely diced potatoes? Adding veggies not only boosts the nutrition but also adds a delightful twist to the flavor and texture!
- Spiced-Up Bhaji: If you love bold flavors, try adding some garam masala or coriander powder to the mix. A pinch of asafoetida (hing) can also elevate the taste and add a unique aroma!
- Herb-Infused: Fresh herbs like cilantro or mint can bring a fresh burst of flavor. Just chop them finely and mix them in for a fragrant twist that brightens up the bhaji!
- Cheesy Delight: For a rich and indulgent version, mix in some crumbled paneer or shredded cheese. Just imagine that gooey goodness in every bite—yum!
- Chickpea Twist: Instead of using just chickpea flour, you can try blending in some regular flour or even lentil flour for a different texture and taste.
- Spicy Kick: If you’re feeling adventurous, add some chopped green chilies or a splash of hot sauce to the batter for an extra kick that’ll set your taste buds dancing!
Remember, cooking is all about experimenting and finding what you love! Don’t hesitate to try out these variations or even come up with your own. Before you know it, you’ll have a whole repertoire of onion bhaji recipes that’ll impress everyone at your next gathering!
Storage & Reheating Instructions
Okay, so you’ve made a batch of these irresistible onion bhaji, and now you want to know how to keep them fresh for later—great thinking! Here’s how to store your leftovers properly so they stay delicious and crispy.
First off, let the bhaji cool completely after frying. This is crucial! If you store them while they’re still warm, they can trap moisture and turn soggy, which is a total bummer. Once they’re cooled, place them in an airtight container. I like to add a paper towel at the bottom to absorb any excess moisture—just a little trick to help keep them crisp!
You can store your onion bhaji in the refrigerator for up to 2 days. If you think you won’t finish them in that time, consider freezing them instead. Just make sure they’re in a single layer on a baking sheet first, freeze until solid, then transfer them to a freezer-safe bag or container. They should keep well for up to a month. Wow, right?
Now, when it’s time to enjoy your bhaji again, you’ll want to reheat them properly to restore that lovely crunch. The best way? Preheat your oven to 375°F (190°C) and place the bhaji on a baking sheet lined with parchment paper. Heat them for about 10-15 minutes, flipping them halfway to ensure even crisping. You could also reheat them in an air fryer for about 5-7 minutes at the same temperature—this method works wonders! Just be sure not to microwave them, as that will leave you with sad, soggy bhaji.
With these storage and reheating tips, you’ll always have crispy onion bhaji ready to munch on whenever the craving strikes!
FAQ Section
What’s the best way to serve onion bhaji?
Honestly, onion bhaji shines when paired with a tangy chutney or sauce! I love serving them with mint chutney or tamarind sauce; the flavors complement the crispy bhaji so well. You can also serve them alongside yogurt for a refreshing dip. Trust me, your guests will be asking for more!
Can I make onion bhaji in advance?
Yes, you can! While they’re best enjoyed fresh, you can prepare the batter ahead of time and keep it in the fridge for a couple of hours. Just give it a good stir before frying. If you have leftovers, follow my storage tips to keep them crispy for later!
What kind of oil is best for frying onion bhaji?
I recommend using vegetable oil or canola oil for frying because they have a high smoke point and neutral flavor. This way, you’ll get that perfect crispy texture without any overpowering taste. Just make sure to heat the oil properly before adding the bhaji!
Are onion bhaji gluten-free?
Yes! Since the main ingredient is chickpea flour, onion bhaji is naturally gluten-free, making it a great snack for those with gluten sensitivities. Just be cautious of any additional ingredients you use, like sauces or chutneys, which may contain gluten.
How long do cooked onion bhaji last?
When stored properly in an airtight container, cooked onion bhaji can last in the fridge for up to 2 days. If you want them to last longer, freezing is a fantastic option. Just remember to reheat them in the oven or air fryer to bring back that crispy goodness!
Can I bake onion bhaji instead of frying?
While traditional onion bhaji is deep-fried for that crispy texture, you can certainly bake them! Preheat your oven to 400°F (200°C), place the bhaji on a baking sheet lined with parchment paper, and brush them lightly with oil. Bake for about 20-25 minutes, flipping halfway through. They won’t be quite the same, but they’ll still be delicious!

Onion Bhaji: 5 Irresistible Ways to Savor This Crispy Snack
- Total Time: 30 minutes
- Yield: 4 servings 1x
- Diet: Vegetarian
Description
Onion bhaji is a popular Indian snack made from thinly sliced onions and chickpea flour, deep-fried until crispy.
Ingredients
- 2 large onions, thinly sliced
- 1 cup chickpea flour
- 1 teaspoon cumin seeds
- 1 teaspoon turmeric powder
- 1 teaspoon chili powder
- Salt to taste
- Water as needed
- Oil for frying
Instructions
- In a bowl, mix chickpea flour, cumin seeds, turmeric powder, chili powder, and salt.
- Add sliced onions and mix well.
- Gradually add water to form a thick batter.
- Heat oil in a deep pan over medium heat.
- Drop spoonfuls of the mixture into the hot oil.
- Fry until golden brown and crispy, about 4-5 minutes.
- Remove and drain on paper towels.
Notes
- Serve hot with chutney or sauce.
- Adjust spices according to taste.
- Ensure oil is hot enough before frying.
- Prep Time: 15 minutes
- Cook Time: 15 minutes
- Category: Snack
- Method: Deep frying
- Cuisine: Indian
Nutrition
- Serving Size: 1 serving
- Calories: 150
- Sugar: 2g
- Sodium: 200mg
- Fat: 8g
- Saturated Fat: 1g
- Unsaturated Fat: 7g
- Trans Fat: 0g
- Carbohydrates: 18g
- Fiber: 3g
- Protein: 5g
- Cholesterol: 0mg
Keywords: onion bhaji, Indian snack, crispy bhaji