
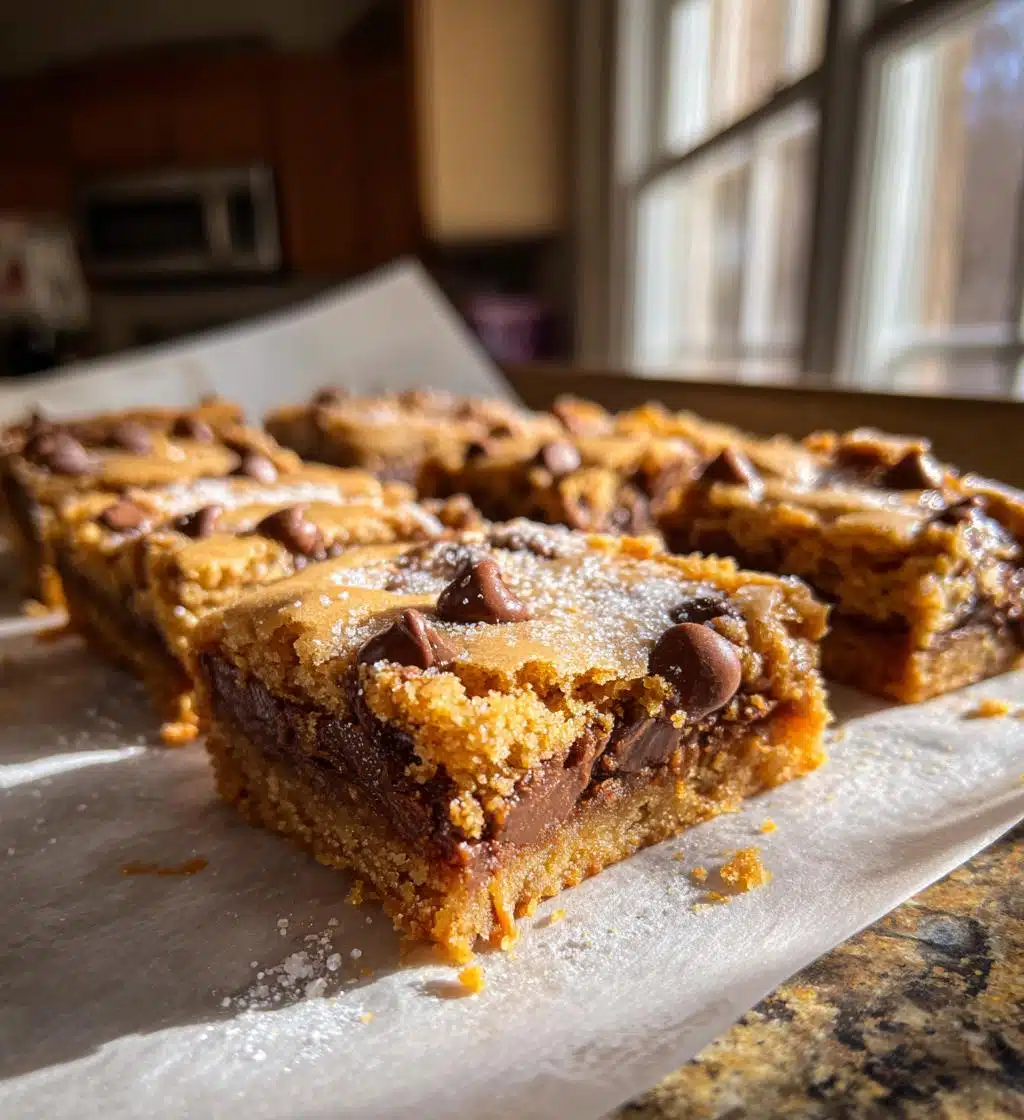
Oh, let me tell you about these peanut butter lunch lady cookie bars! They’re like a hug from my childhood—warm, gooey, and oh-so-delicious. Growing up, I remember the sweet aroma wafting through the school cafeteria as these treats were served up on those classic metal trays. Every bite is packed with nostalgia, instantly transporting me back to carefree days filled with laughter and lunchroom chatter. Seriously, there’s something magical about the combination of peanut butter and chocolate that just feels like home. Trust me, you’ll want to whip these up for an after-school snack, a picnic, or just because you deserve a little treat today! They’re super easy to make and the perfect way to share a little love with friends and family. So, grab your apron and let’s dive into the delightful world of these cookie bars!

Why You’ll Love This Recipe
- Quick and Easy: These cookie bars come together in just 15 minutes of prep time! No complicated steps here—just simple mixing and baking.
- Flavor Explosion: The combination of rich peanut butter and melty chocolate chips creates a flavor that’s both comforting and indulgent. You’ll be coming back for seconds, trust me!
- Nostalgic Vibes: They remind me of my school days, where every bite takes me back to those carefree lunchroom moments. It’s like reliving a sweet memory with every delicious bar!
- Satisfying Treat: These bars are thick, chewy, and oh-so-satisfying. Perfect for an afternoon pick-me-up or a late-night snack while binge-watching your favorite show.
- Customizable: Feel free to switch things up with nuts or different chocolate types—there’s really no wrong way to enjoy these bars!
Ingredients for Peanut Butter Lunch Lady Cookie Bars
Let’s gather our ingredients! You’ll want to have everything measured and ready to go, so the mixing process flows smoothly. Here’s what you need:
- 1 cup peanut butter: I like to use creamy peanut butter for a smooth texture, but crunchy works too if you love those little bites of peanuts!
- 1 cup granulated sugar: This adds just the right amount of sweetness to balance out the rich peanut butter.
- 1 cup brown sugar: I prefer using packed brown sugar for that lovely caramel flavor it brings to the party.
- 2 large eggs: Make sure they’re at room temperature for the best mixing results.
- 1 teaspoon vanilla extract: This is my secret weapon for a warm, aromatic flavor that complements the peanut butter beautifully.
- 2 cups all-purpose flour: This is the base of our bars, giving them that delicious chewy texture.
- 1 teaspoon baking soda: This helps our bars rise just a bit, giving them a nice lift.
- 1/2 teaspoon salt: Don’t skip this! It enhances all the flavors, making every bite pop!
- 1 cup chocolate chips: I usually go for semi-sweet, but feel free to use milk or dark chocolate chips based on your personal preference!
And there you have it! With these ingredients, you’re well on your way to creating some seriously scrumptious peanut butter lunch lady cookie bars. Now, let’s move on to the fun part—preparing them!
How to Prepare Peanut Butter Lunch Lady Cookie Bars
Preheat Your Oven
First things first, you’ll want to preheat your oven to 350°F (175°C). This step is super important because it ensures your cookie bars bake evenly and achieve that perfect golden-brown color. So, go ahead and set that oven while you gather your ingredients—trust me, you don’t want to skip this part!
Mixing the Wet Ingredients
In a large mixing bowl, combine the creamy peanut butter, granulated sugar, and brown sugar. I like to use a sturdy spatula or a hand mixer to get everything nice and smooth. Once it’s all combined, crack in those two large eggs and pour in the vanilla extract. Mix it all together until you have a luscious, creamy consistency that looks irresistible. You want it to be well-blended, so don’t rush this step!
Combining the Dry Ingredients
Now, grab another bowl and whisk together the all-purpose flour, baking soda, and salt. This is where the magic happens, as whisking helps to evenly distribute the baking soda and salt throughout the flour. You really want to make sure there are no lumps! Once it’s all nicely combined, you’re ready to bring the wet and dry ingredients together.
Merging Wet and Dry Ingredients
Slowly add your dry mixture to the bowl with the wet ingredients. I usually do this in three parts, mixing gently after each addition. This is key! You don’t want to overmix it, or your bars might end up a bit tough instead of chewy. Just stir until you see no more dry flour—trust me, that’s all it takes!
Adding Chocolate Chips
Time to fold in those glorious chocolate chips! Gently scoop them into the batter and use a spatula to fold them in. Be careful not to overwork the dough here, as we want those chocolate chips to stay intact and provide delightful little pockets of melty goodness throughout your bars.
Baking the Bars
Now it’s time to transfer your batter into a greased 9×13 inch baking pan. Spread it out evenly, making sure it reaches the corners. Pop it in your preheated oven and bake for about 25-30 minutes. You’ll know they’re done when the edges are golden and a toothpick inserted in the center comes out with just a few moist crumbs. Oh, the smell wafting through your kitchen will be heavenly!
Cooling and Cutting
Once they’re baked to perfection, remove the pan from the oven and let the bars cool in the pan for at least 10-15 minutes. This step is super important because it allows them to set properly and makes cutting them into bars so much easier. If you try to cut them too soon, they might crumble! Once they’re cool enough to handle, transfer them to a wire rack to cool completely before slicing into those delightful bars. Trust me, the wait will be worth it!
Tips for Success
Alright, let’s make sure you nail these peanut butter lunch lady cookie bars every single time! Here are my top tips for success:
- Watch Your Baking Time: Ovens can vary quite a bit, so keep an eye on your bars as they bake. If you like them a bit chewier, you might want to pull them out closer to the 25-minute mark. Just remember, they’ll continue to cook a bit after you take them out, so don’t overdo it!
- Use Parchment Paper: Lining your baking pan with parchment paper can make it super easy to lift the bars out once they’re cool. Just leave a bit of an overhang, and you can pull them right out without a fuss—easy slicing ahead!
- Cool Completely: I know it’s tempting to dive in right away, but allowing these bars to cool completely will help them set up nicely. If you cut them too soon, they might end up crumbly instead of those perfect squares you’re dreaming of!
- Storage Secrets: Store any leftovers (if there are any!) in an airtight container at room temperature for about 3-4 days. You can also refrigerate them for a longer shelf life. Just make sure they’re wrapped well so they stay soft and chewy!
- Freeze for Later: Want to save some for a rainy day? These bars freeze beautifully! Just wrap them individually in plastic wrap, then place them in a freezer-safe bag. They’ll keep for up to 2 months, and when you’re ready to enjoy, just thaw at room temperature!
With these tips, you’ll be well on your way to creating the most delectable, nostalgic peanut butter lunch lady cookie bars that everyone will love! Happy baking!
Variations of Peanut Butter Lunch Lady Cookie Bars
Now, let’s talk about how you can make these peanut butter lunch lady cookie bars your own! There are so many fun ways to customize this recipe, and I’m excited to share some of my favorite variations with you:
- Nutty Delight: Add in some chopped nuts like walnuts or pecans for a crunchy texture. Just fold in about 1 cup with the chocolate chips for an extra layer of flavor!
- White Chocolate Heaven: Swap out the semi-sweet chocolate chips for white chocolate chips for a sweeter twist. The creamy flavor pairs wonderfully with the peanut butter!
- Peanut Butter Swirl: For an extra punch of peanut butter goodness, reserve a few tablespoons of peanut butter, melt it, and swirl it into the batter right before baking. It creates beautiful marbling and an even richer flavor!
- Oatmeal Crunch: Mix in some oats (about 1 cup) for a chewy texture. Just reduce the flour by half a cup to keep the bars from getting too dense.
- Choco-Peanut Butter Chip Combo: Use a mix of chocolate chips—half milk chocolate and half dark chocolate—for a more complex flavor profile. You can’t go wrong with chocolate, right?
- Minty Fresh: If you’re a mint lover, try adding mint chocolate chips instead of regular chocolate chips for a refreshing twist. It gives a fun, festive vibe, especially around the holidays!
Feel free to get creative and mix and match these ideas! The best part about these cookie bars is that they’re so versatile, you can make them just how you like them. Enjoy experimenting with these variations, and let your taste buds lead the way!
Nutritional Information for Peanut Butter Lunch Lady Cookie Bars
Alright, let’s talk numbers! Each peanut butter lunch lady cookie bar is not only a delicious treat but also brings some nutritional value to the table. Here’s the typical nutritional info based on a single bar—just keep in mind, these values are estimates and can vary based on specific ingredients and portion sizes:
- Serving Size: 1 bar
- Calories: 220
- Sugar: 18g
- Sodium: 150mg
- Fat: 10g
- Saturated Fat: 3g
- Unsaturated Fat: 5g
- Trans Fat: 0g
- Carbohydrates: 30g
- Fiber: 1g
- Protein: 4g
- Cholesterol: 30mg
These bars certainly pack a punch with their yummy flavors, and they can be a great treat to enjoy in moderation. Whether you’re indulging after a long day or sharing them with friends, you can feel good about savoring every bite!
FAQ About Peanut Butter Lunch Lady Cookie Bars
Can I use natural peanut butter in this recipe?
Yes, you can! Just keep in mind that natural peanut butter may have a different consistency, so you might want to stir it well before measuring. The bars will still turn out delicious!
How do I know when my cookie bars are done baking?
You’ll know they’re done when the edges are golden brown and a toothpick inserted in the center comes out with a few moist crumbs. They might look a little undercooked in the center, but they’ll set as they cool!
Can I make these bars gluten-free?
Absolutely! Just substitute the all-purpose flour with a gluten-free flour blend, and you’re good to go. They’ll still taste amazing!
What’s the best way to store leftovers?
Store any leftover cookie bars in an airtight container at room temperature for about 3-4 days. You can also refrigerate them for a longer shelf life. Just remember to keep them well-wrapped to maintain that soft, chewy texture!
Can I freeze these cookie bars?
Yes! These bars freeze beautifully. Wrap them individually in plastic wrap and place them in a freezer-safe bag. They’ll stay fresh for up to 2 months. Just thaw them at room temperature when you’re ready to enjoy!
Is it okay to add more chocolate chips?
Definitely! If you’re a chocolate lover, feel free to add more chocolate chips for an extra indulgent treat. Just keep an eye on the consistency of the batter; you don’t want it to get too thick!
Can I substitute the chocolate chips with something else?
For sure! You can swap the chocolate chips for nuts, dried fruit, or even butterscotch chips if you’re feeling adventurous. The possibilities are endless, so get creative!
Peanut Butter Lunch Lady Cookie Bars: 5 Comforting Delights
- Total Time: 45 minutes
- Yield: 24 bars 1x
- Diet: Vegetarian
Description
Delicious peanut butter cookie bars inspired by lunchroom favorites.
Ingredients
- 1 cup peanut butter
- 1 cup sugar
- 1 cup brown sugar
- 2 large eggs
- 1 teaspoon vanilla extract
- 2 cups all-purpose flour
- 1 teaspoon baking soda
- 1/2 teaspoon salt
- 1 cup chocolate chips
Instructions
- Preheat oven to 350°F (175°C).
- In a large bowl, mix peanut butter, sugar, and brown sugar until smooth.
- Add eggs and vanilla; mix well.
- In another bowl, whisk flour, baking soda, and salt.
- Gradually add dry ingredients to wet mixture. Stir until combined.
- Fold in chocolate chips.
- Spread batter in a greased 9×13 inch baking pan.
- Bake for 25-30 minutes.
- Allow to cool before cutting into bars.
Notes
- Store leftovers in an airtight container.
- Can substitute chocolate chips with nuts if desired.
- For chewier bars, do not overbake.
- Prep Time: 15 minutes
- Cook Time: 30 minutes
- Category: Dessert
- Method: Baking
- Cuisine: American
Nutrition
- Serving Size: 1 bar
- Calories: 220
- Sugar: 18g
- Sodium: 150mg
- Fat: 10g
- Saturated Fat: 3g
- Unsaturated Fat: 5g
- Trans Fat: 0g
- Carbohydrates: 30g
- Fiber: 1g
- Protein: 4g
- Cholesterol: 30mg
Keywords: peanut butter lunch lady cookie bars