
Oh my goodness, let me tell you about my absolute favorite holiday tradition: making peppermint candy! Every winter, my kitchen fills with the sweet, minty aroma that instantly brings back memories of cozy family gatherings and festive cheer. There’s just something so magical about creating these little treasures, especially when you see the delight on everyone’s faces as they pop a piece into their mouths. Trust me, making peppermint candy is easier than you might think, and it’s a wonderful way to spread holiday joy. With just a few simple ingredients and a bit of time, you can whip up a batch that rivals anything you’d find at a candy shop. So, grab your apron, and let’s dive into this delightful recipe!
Ingredients for Peppermint Candy
Gathering the right ingredients is the first step to making your peppermint candy a smashing success! Here’s what you’ll need:
- 1 cup granulated sugar: This is the base of your candy, giving it that sweet, satisfying crunch. Make sure to use regular granulated sugar—no substitutions here!
- 1/3 cup water: Just enough to help dissolve the sugar and create that perfect syrup. It’s the magic ingredient that brings everything together.
- 1/2 teaspoon peppermint extract: This is where the flavor comes alive! Use pure peppermint extract for the best taste. A little goes a long way, so don’t overdo it!
- Red food coloring: This is totally optional, but it adds a festive touch to your candy. You can adjust the amount to your liking—just a drop or two will do the trick!
Make sure you have everything ready to go before you start cooking. The process is quick, and having your ingredients prepped will make it all smoother and more enjoyable!
How to Prepare Peppermint Candy
Now, let’s get into the fun part—making the peppermint candy! It’s such a straightforward process, but timing and temperatures are key to getting that perfect texture. Let’s roll up our sleeves and get started!
Step-by-Step Instructions
- Start by combining 1 cup of granulated sugar and 1/3 cup of water in a medium saucepan. Stir gently to mix them together.
- Place the saucepan over medium heat and watch closely as the sugar dissolves. This could take a few minutes, so stir occasionally to help it along.
- Once the sugar has dissolved, increase the heat and bring the mixture to a boil. You want to cook it until it reaches a temperature of 300°F (hard crack stage). You can use a candy thermometer for accuracy. It’s super important not to walk away during this stage!
- As soon as it hits 300°F, immediately remove the saucepan from the heat. Carefully stir in 1/2 teaspoon of peppermint extract. The aroma will be incredible, and trust me, you’ll want to take a moment to breathe it in!
- Next, divide the hot mixture into two separate bowls. Color one half with a few drops of red food coloring and stir until you achieve your desired shade. The contrast is so festive!
- Now, pour both mixtures onto a greased surface or a parchment-lined baking sheet. Be careful, it’s hot! You can use a spatula to spread it out a bit if needed.
- Let the candy cool for about 10 minutes, just until it’s cool enough to handle but still pliable. This is the fun part—you’ll be pulling and shaping it into those classic candy shapes!
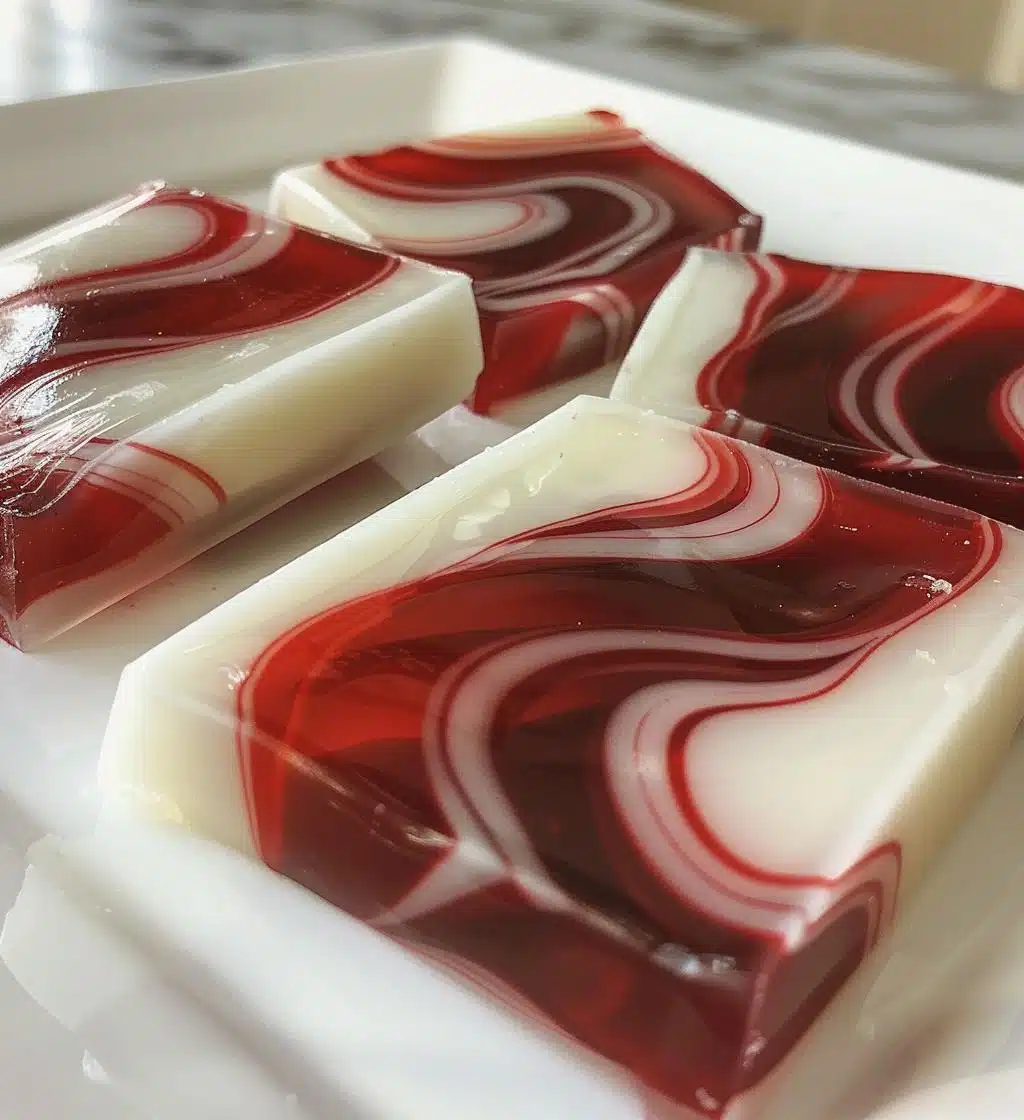
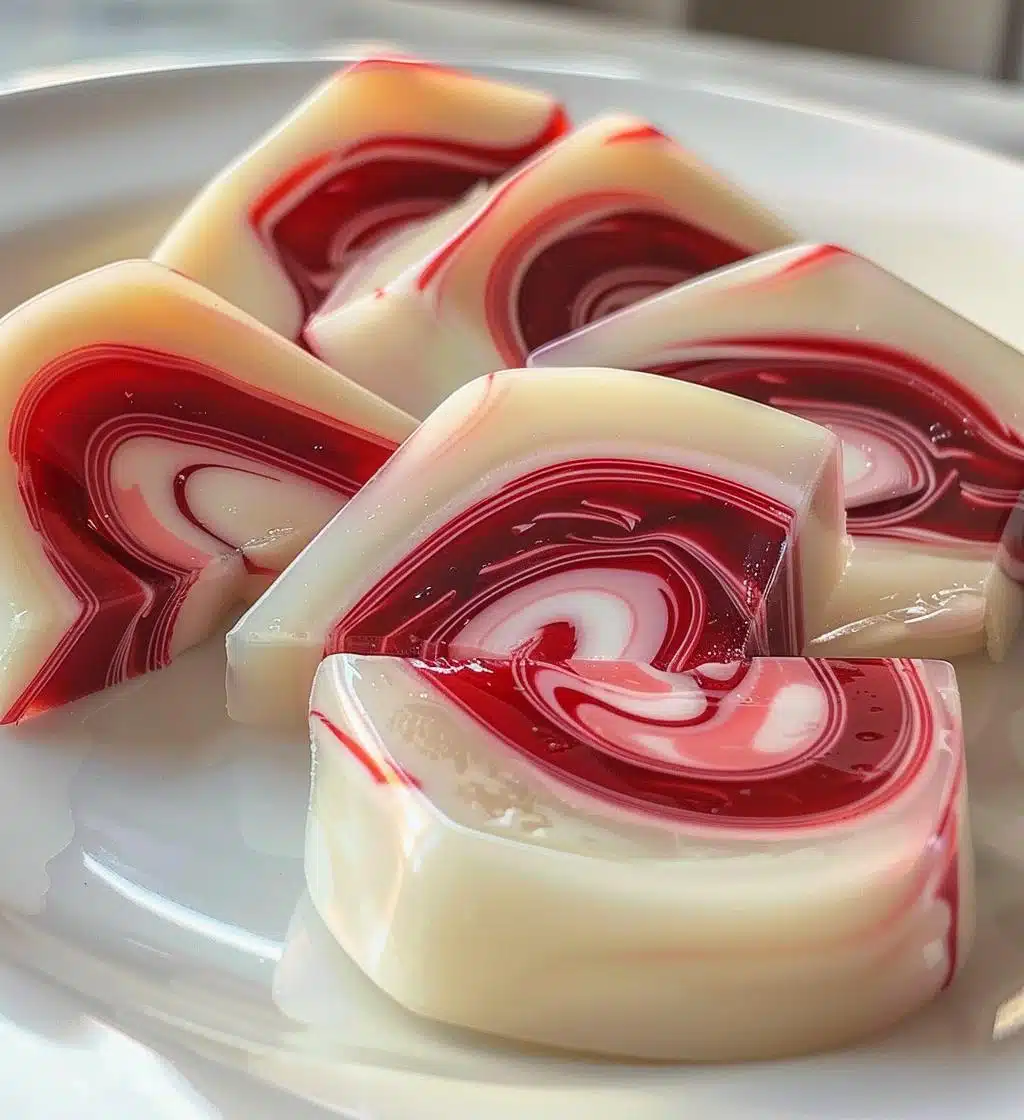
- Once it’s cool enough, start pulling and twisting the candy to create those beautiful swirls. Shape them into sticks, or whatever your heart desires. The texture should be glossy and just the right amount of chewy!
And voilà! You’ve just made your very own peppermint candy. Isn’t that just delightful? I can almost taste the minty goodness already!
Why You’ll Love This Recipe
Oh, where do I even begin? There are so many reasons to love making peppermint candy! First off, it’s incredibly quick to whip up. Seriously, from gathering your ingredients to enjoying that first delicious bite, you’re looking at just about 25 minutes! Perfect for when you have a sweet craving or want to impress guests at a holiday gathering.
And let’s talk about flavor! The refreshing minty taste is so invigorating, it’s like a winter wonderland in your mouth. Plus, you can adjust the peppermint extract to suit your taste buds—want it super minty? Go for it! Prefer a lighter touch? Just dial it back a bit. It’s all about making it your own.
But what I love most about this recipe is the potential for customization. You can mix in different flavors like vanilla or even add a hint of chocolate if you’re feeling adventurous! And the colors? Oh, the colors! You can make stripes, swirls, or even layer different shades for a stunning effect. It’s not just candy—it’s edible art!
So, whether you’re making these sweet treats for yourself, gifting them to friends, or adding them to your holiday dessert table, you’re guaranteed to create something that brings smiles and festive cheer. What’s not to love?
Tips for Success
Alright, let’s make sure your peppermint candy turns out perfectly every time! Here are some pro tips that I’ve picked up along the way, and trust me, they make a world of difference.
- Use a reliable candy thermometer: This is a must! Candy-making is all about precision, and a good thermometer will help you achieve that crucial 300°F hard crack stage. Without it, you risk ending up with either gooey candy or a rock-hard disaster.
- Don’t rush the cooling process: Patience is key here! Letting the candy cool enough before you start pulling and shaping is vital. If it’s too hot, you might burn your hands, and if it’s too cool, it’ll be difficult to shape. Aim for that sweet spot where it’s still warm but manageable.
- Grease your surface well: Trust me, you don’t want your beautiful candy sticking to the counter! Use a light coating of oil or cooking spray on your work surface before pouring the mixture. This will make cleanup a breeze and keep your candy intact.
- Be careful with food coloring: A little goes a long way! Start with just a drop or two of red food coloring, and mix thoroughly to see the shade before adding more. You can always darken it, but lightening it is a whole different story!
- Work quickly but carefully: Once you pour the candy onto your surface, you’ll want to work quickly to shape it while it’s still pliable. However, don’t rush and risk burning yourself—just be mindful of the temperature and adjust your speed accordingly.
- Experiment with flavors: If you’re feeling adventurous, don’t hesitate to swap out the peppermint extract for another flavor! Vanilla, almond, or even citrus extracts can give your candy a unique twist. Just remember to keep the ratios similar to maintain that perfect consistency.
By following these tips, you’ll be well on your way to making the most delightful peppermint candy. It’s all about enjoying the process and having fun in the kitchen, so don’t stress! You’ve got this!
Variations of Peppermint Candy
If you’re like me and love to get creative in the kitchen, you’ll be thrilled to know that there are so many fun variations you can try with your peppermint candy! Here are a few ideas to inspire your sweet tooth:
- Chocolate Peppermint Candy: Add a touch of melted chocolate to your peppermint mixture for a delicious chocolate mint combo! You could even drizzle some melted chocolate over the finished candy for an elegant touch.
- Colorful Swirls: Instead of just red, why not mix in other colors? Use green for a classic holiday look, or get adventurous with blues and purples for a unique twist. Layering different colors can create a beautiful marbled effect!
- Fruit-Flavored Candy: Swap out the peppermint extract for other flavors like cherry, orange, or lemon. These fruity versions are perfect for summer treats or any occasion where you want something a little different. Just remember to adjust the amount based on the strength of the extract!
- Spicy Peppermint: For a little heat, consider adding a pinch of cayenne pepper or cinnamon to your mixture. The combination of sweet and spicy can be a surprising delight!
- Layered Candy: Pour one color of your candy mixture, let it set slightly, and then pour another color on top. This creates a lovely layered effect that’s as stunning to look at as it is delicious to eat!
- Nutty Additions: Fold in some finely chopped nuts like almonds or pecans into your candy mixture before pouring it onto the surface. It adds a delightful crunch and a nutty flavor that pairs beautifully with the sweetness.
These variations are just the tip of the iceberg! The possibilities are endless, and I encourage you to experiment and find your own favorite twists on this classic recipe. Just remember, have fun and enjoy the journey of making your peppermint candy uniquely yours!
Nutritional Information
Okay, let’s talk about the nutritional side of our homemade peppermint candy! While I always say it’s best to enjoy treats in moderation, it’s nice to know what you’re indulging in, right? Here are the typical nutritional values for one piece of peppermint candy:
- Calories: 50
- Sugar: 12g
- Carbohydrates: 13g
- Sodium: 0mg
- Fat: 0g
- Saturated Fat: 0g
- Trans Fat: 0g
- Protein: 0g
- Cholesterol: 0mg
- Fiber: 0g
Please keep in mind that these values are estimates and can vary based on the specific ingredients you choose to use. It’s always a good idea to enjoy your peppermint candy as a little treat here and there, especially during the holiday season. Happy munching!
FAQ Section
Got questions about making peppermint candy? Don’t worry, I’ve got you covered! Here are some of the most common queries I hear, along with my answers to help you on your sweet adventure.
Can I use a different flavor instead of peppermint?
Absolutely! While peppermint is a classic choice, you can experiment with other flavors like vanilla, almond, or even fruit extracts for a fun twist. Just keep the ratios similar to ensure your candy turns out great!
What should I do if my candy doesn’t harden?
If your peppermint candy isn’t hardening, it could be that it didn’t reach the right temperature. Make sure to use a candy thermometer to achieve that critical 300°F. If you’ve missed it, you might need to reheat it gently and try again.
How long does homemade peppermint candy last?
When stored in an airtight container, your peppermint candy can last for several weeks! Just make sure to keep it in a cool, dry place to maintain its delightful texture.
Can I make this candy in advance for the holidays?
Yes, definitely! Peppermint candy makes a fantastic make-ahead treat. You can prepare it a week or two in advance, and it’ll be just as delicious when you’re ready to enjoy it or share it with friends and family!
What’s the best way to cut or break the candy after it cools?
Once your peppermint candy has cooled and hardened, you can break it into pieces by gently tapping it with a hammer or rolling pin (put it between parchment paper first to prevent mess). For cleaner cuts, use a sharp knife, but be gentle to avoid cracking!
Storage & Reheating Instructions
Now that you’ve made your delicious peppermint candy, let’s talk about how to keep it fresh and tasty! Proper storage is key to enjoying your sweet treats for as long as possible. Here’s what you need to know:
First off, make sure to store your peppermint candy in an airtight container. This will help keep it from getting sticky or losing that delightful crunch. I like to layer pieces of parchment paper between the layers of candy in the container to prevent them from sticking together. It’s a simple trick that works wonders!
Keep your container in a cool, dry place—a pantry or cupboard is perfect. Avoid leaving it out in humidity, as that can make the candy lose its texture. If you’ve made a big batch and find yourself with lots of leftovers, you can even store them in the fridge, but do note that refrigeration may slightly alter the texture.
As for reheating? Well, peppermint candy is best enjoyed as is, but if you find it has become a little too hard over time, you can try gently warming it in the microwave for just a few seconds (think 5-10 seconds max) to soften it up a bit. Be super cautious and check it frequently—too much heat will melt away all your hard work!
With these simple storage tips, you’ll be able to savor your homemade peppermint candy for weeks to come. Enjoy every last bite of that minty goodness!
Print
Peppermint Candy Delight: 7 Sweet Steps to Festive Joy
- Total Time: 25 minutes
- Yield: 12 servings 1x
- Diet: Vegetarian
Description
A sweet treat made with peppermint flavor.
Ingredients
- 1 cup granulated sugar
- 1/3 cup water
- 1/2 teaspoon peppermint extract
- Red food coloring
Instructions
- Combine sugar and water in a saucepan.
- Heat over medium until sugar dissolves.
- Bring to a boil and cook until it reaches 300°F.
- Remove from heat and stir in peppermint extract.
- Divide mixture into two bowls; color one with red food coloring.
- Pour both mixtures onto a greased surface.
- Cool slightly, then pull and shape into candy.
Notes
- Store in an airtight container.
- Can substitute other flavors for peppermint.
- Prep Time: 10 minutes
- Cook Time: 15 minutes
- Category: Candy
- Method: Boiling
- Cuisine: American
Nutrition
- Serving Size: 1 piece
- Calories: 50
- Sugar: 12g
- Sodium: 0mg
- Fat: 0g
- Saturated Fat: 0g
- Unsaturated Fat: 0g
- Trans Fat: 0g
- Carbohydrates: 13g
- Fiber: 0g
- Protein: 0g
- Cholesterol: 0mg
Keywords: peppermint candy, homemade candy