

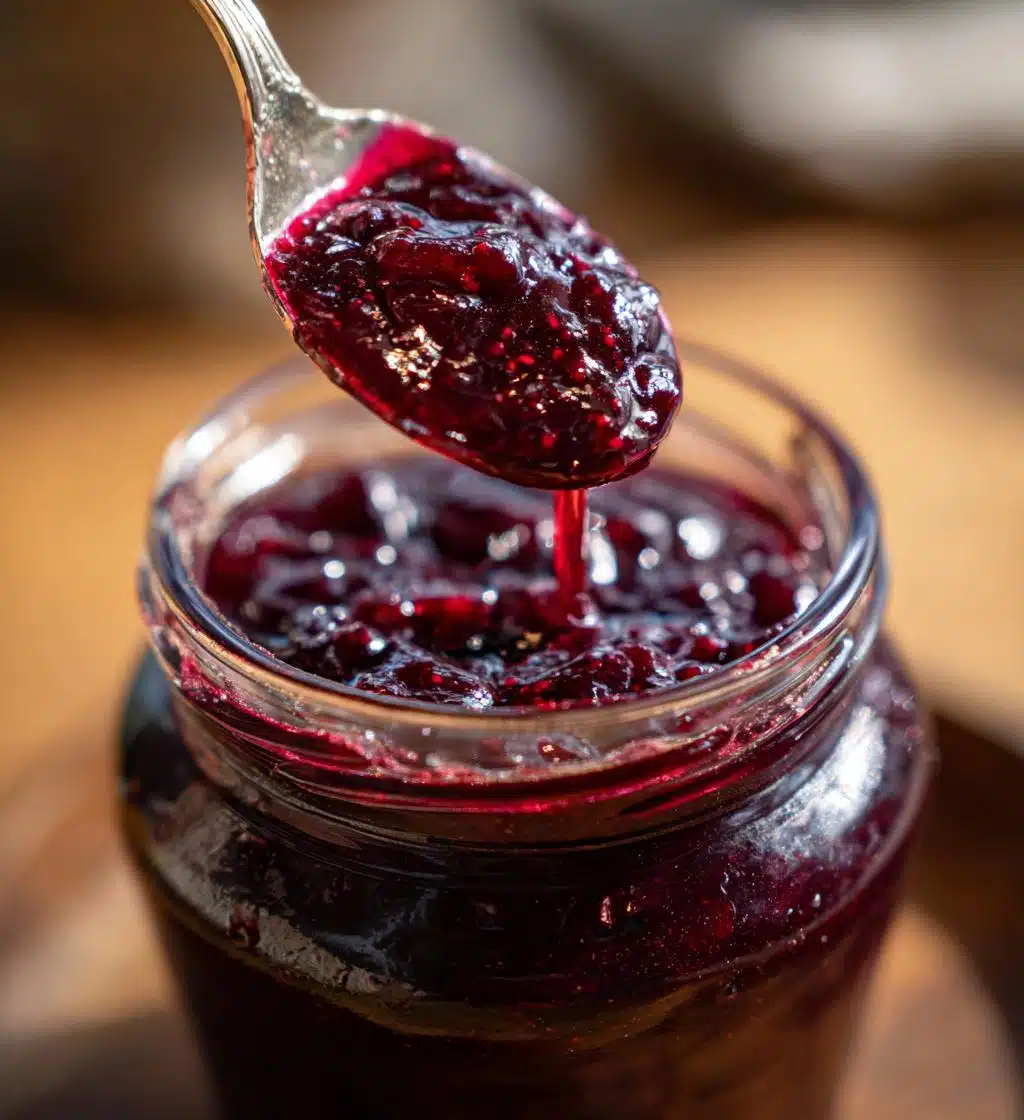
Oh my goodness, let me tell you about making this plum jam recipe! It’s honestly one of the simplest and most satisfying things I whip up in my kitchen. There’s something magical about turning a bunch of fresh, juicy plums into this sweet, luscious spread that just makes my heart sing. I love the way the kitchen smells while the jam is bubbling away on the stove—it’s like a warm hug in the form of food!
Using fresh ingredients is key here. I always make sure to choose plums that are ripe and bursting with flavor. Trust me, you’ll taste the difference! Plus, it’s so rewarding to use fruits that are in season and local whenever possible. You’ll be amazed at how easy it is to create something so delicious that you can enjoy all year round. Whether you spread it on toast, dollop it on yogurt, or use it in your baking, this plum jam is bound to bring a smile to your face. Let’s dive into this jam-making adventure together!
Ingredients List
Here’s everything you’ll need to whip up this delightful plum jam recipe. It’s really straightforward, and I promise you’ll have it all ready in no time!
- 2 pounds fresh plums, pitted and chopped
- 1 cup sugar
- 1 tablespoon lemon juice
- 1/2 teaspoon vanilla extract
Make sure to wash those plums well before chopping! You want them to shine with that ripe, juicy goodness. And don’t be shy with the sugar—it balances the tartness of the plums perfectly! The lemon juice adds a bit of brightness, while the vanilla gives it a lovely depth of flavor. Trust me, you’ll love how these simple ingredients come together to create something so delicious!
How to Prepare Instructions
Alright, let’s get down to the nitty-gritty of making this plum jam recipe! I’m so excited to guide you through each step. Just follow along, and you’ll have delicious jam in no time!
Step 1: Prepare the Plums
First things first, you’ll want to wash those beautiful plums thoroughly. Rinse them under cold water to get rid of any dirt or residue. Once they’re nice and clean, pit and chop them into small pieces. This makes it easier for them to break down while cooking. I like to leave the skin on for that extra flavor and vibrant color, but if you prefer a smoother texture, feel free to peel them!
Step 2: Combine Ingredients
Now, grab a big pot and throw in your chopped plums, sugar, lemon juice, and vanilla extract. Give it a gentle stir to mix everything together. You want the plums to start releasing their juices before we heat things up. It should look a bit syrupy already! This mixture is going to come alive once it hits the heat!
Step 3: Cook the Mixture
Alright, now it’s time to cook! Place the pot over medium heat and bring it to a boil. Keep a close eye on it and stir constantly—this is super important so that nothing sticks to the bottom and burns. You’ll see the mixture bubbling and frothing, which is just a sign that it’s starting to transform into jam magic!
Step 4: Simmer the Jam
Once it’s boiling, reduce the heat to low and let it simmer for about 30 minutes. Stir occasionally—trust me, you don’t want your jam to stick! As it simmers, you’ll notice it thickening up and the flavors melding beautifully. This is where the kitchen starts to smell amazing!
Step 5: Test for Thickness
Now, here’s a little trick to test if your jam is ready. Take a spoonful and place it on a chilled plate (I pop my plate in the freezer for a few minutes before!). Let it sit for a moment, then run your finger through it. If it holds its shape and doesn’t immediately run back together, you’re golden! If it’s still too runny, give it a few more minutes on the heat.
Step 6: Jar the Jam
Once you’re thrilled with the thickness, it’s time to jar it up! Carefully pour the hot jam into sterilized jars, filling them almost to the top. Wipe the rims with a clean cloth to remove any drips—this helps ensure a good seal. Then, screw on the lids tightly. Let them cool completely at room temperature before storing them in a cool, dark place. And just like that, you’ve made your very own plum jam!
Nutritional Information Section
Now, let’s talk about the nutritional side of this scrumptious plum jam recipe! While I’m not a nutritionist, I can give you some rough estimates of what you can expect per tablespoon of this delightful jam. It’s always good to know what you’re putting on your toast, right?
- Serving Size: 1 tablespoon
- Calories: 50
- Sugar: 12g
- Sodium: 0mg
- Fat: 0g
- Saturated Fat: 0g
- Unsaturated Fat: 0g
- Trans Fat: 0g
- Carbohydrates: 13g
- Fiber: 0g
- Protein: 0g
- Cholesterol: 0mg
So, there you have it! This jam is a sweet treat that adds a burst of flavor without a lot of fuss. Just remember, these values are estimates and can vary depending on the exact ingredients you use. But hey, enjoying this plum jam is all about pleasure, so don’t stress too much about the numbers—just savor the deliciousness!
Tips for Success
Alright, my fellow jam-making enthusiast, let’s make sure your plum jam recipe turns out absolutely perfect! Here are some of my favorite pro tips that I’ve picked up over the years while stirring up this sweet goodness.
- Choose the Right Plums: Always go for ripe, juicy plums. They should be slightly soft to the touch but not mushy. Trust me, this will make all the difference in flavor!
- Adjust the Sugar: Depending on how sweet your plums are, feel free to adjust the sugar to your taste. If you’re using particularly sweet plums, you might even be able to cut back a bit. Just remember, sugar also helps with the preservation!
- Don’t Skip the Stirring: This is crucial! Stirring constantly while cooking prevents your jam from sticking to the bottom of the pot and burning. It’s worth the extra effort to keep that beautiful flavor intact!
- Testing for Thickness: If you find that your jam is still a bit runny after the cooking time, don’t panic! Just keep simmering and testing. Sometimes it just needs a little more time to thicken up.
- Sterilize Your Jars: Make sure your jars are properly sterilized before pouring in that lovely jam. You can do this by boiling them in water for 10 minutes or running them through the dishwasher. This helps prevent spoilage!
- Cool Completely: Let your jars cool completely at room temperature before sealing. This ensures a good vacuum seal, keeping your jam fresh for longer.
- Label Your Jars: If you’re making several batches or giving them as gifts, don’t forget to label your jars with the date. You’ll love knowing how long they’ve been sitting on the shelf!
With these tips in your back pocket, you’re all set to create some fabulous plum jam. Remember, every batch is a little adventure, so enjoy the process! Happy jamming!
Variations
Oh, let’s spice things up a bit with some fun variations for this plum jam recipe! One of the joys of making jam is that you can really play around with flavors to suit your taste. Here are some ideas that I absolutely love:
- Spiced Plum Jam: Add a pinch of ground cinnamon or nutmeg while cooking for a warm, spiced flavor that’s perfect for fall. Trust me, it’s like wrapping your taste buds in a cozy blanket!
- Plum and Ginger Jam: Toss in some finely grated fresh ginger to add a zingy kick. The combination of sweet plums with spicy ginger is simply divine!
- Berry Plum Jam: Mix in a cup of fresh berries like raspberries or blueberries. The tartness of the berries complements the plums beautifully and adds a pop of color!
- Plum Citrus Jam: Experiment with adding the zest and juice of an orange or a lemon. This will brighten the flavors and give your jam a refreshing twist!
- Chili Plum Jam: For those who like a little heat, add a pinch of crushed red pepper flakes or finely chopped jalapeño. It’s a unique spin that pairs well with cheese boards!
- Vanilla Bean Plum Jam: Instead of vanilla extract, use a whole vanilla bean. Just split it open and scrape the seeds into your pot. The flavor is so much richer and more aromatic!
Feel free to mix and match these ideas or come up with your own combinations! Jam-making is all about creativity, so don’t be afraid to experiment. You might just stumble upon your new favorite flavor! Happy jamming!
Storage & Reheating Instructions
Now that you’ve made this delicious plum jam, let’s talk about how to store it properly so you can enjoy it for weeks to come! I always get excited when I see my jars lined up on the shelf, ready to spread on toast or swirl into yogurt.
First things first, once your jars have cooled completely after sealing, you’ll want to store them in a cool, dark place. A pantry or a cupboard works perfectly! Make sure they’re not exposed to direct sunlight, as this can affect the quality of your jam over time. Properly sealed, your plum jam should last for about a year. However, I bet it won’t last that long—it’s just too good!
If you’ve opened a jar, it’s best to keep it in the refrigerator. Just pop the lid back on tight, and it should be good for about 3 to 4 weeks. You might even find it tastes even better after a day or two in the fridge as the flavors continue to meld!
Now, if you ever find yourself with leftover jam that you want to reheat, no worries! Simply scoop out the amount you need into a small saucepan and warm it over low heat. Stir gently until it’s nice and spreadable again. Just be careful not to boil it, as that can change the texture. If you’re in a hurry, you can also microwave it in short bursts (about 10-15 seconds), stirring in between until it reaches your desired warmth.
So there you go! With these storage and reheating tips, your homemade plum jam will always be ready for a delicious treat whenever you crave it. Enjoy every spoonful!
FAQ Section
Let’s tackle some of the common questions that pop up when making this delightful plum jam recipe! I’ve been there, and I totally get it—sometimes it helps to have a little extra guidance. Here are the answers to some frequently asked questions I’ve gathered over the years:
How long can I store my plum jam?
If you’ve sealed your jars properly and stored them in a cool, dark place, your homemade plum jam can last for about a year. Once opened, however, it’s best to keep it in the fridge, where it should stay fresh for about 3 to 4 weeks. But trust me, it’s so delicious, it’ll likely be gone before then!
Do I need to can my plum jam?
Canning is a great way to preserve your jam for longer, but it’s not absolutely necessary if you’re planning to eat it within a few months. Just make sure your jars are properly sterilized before filling them, and if you choose to can, follow safe canning practices to ensure your jam stays fresh and safe to eat!
Can I use frozen plums for this recipe?
You bet! Frozen plums work just fine in this plum jam recipe. Just make sure to thaw them first and drain any excess liquid before using. It might take a little longer for the jam to cook down, but the flavor will still be fantastic!
What can I substitute for sugar?
If you want to reduce the sugar, you can try using honey or maple syrup, but keep in mind that this can affect the flavor and consistency of your jam. You might also consider using a sugar substitute designed for canning. Just remember to follow the conversion instructions on the package for the best results!
Can I add other fruits to the jam?
Absolutely! Mixing in other fruits like berries or citrus can create fun and unique flavor combinations. Just be mindful that different fruits have different sugar levels and cooking times. It’s all about finding that perfect balance!
How do I know if my jam is set properly?
The chilled plate test I mentioned earlier is a great way to check for thickness. If your jam holds its shape when you run your finger through it, you’re good to go! If it’s still too runny, just give it a bit more time on the heat.
Can I use a slow cooker for this recipe?
Yes, you can! If you prefer a hands-off approach, a slow cooker works well. Just combine your ingredients and cook on low for several hours, stirring occasionally. It’ll take a bit longer, but you’ll get that same delicious flavor!
I hope this FAQ section helps you feel a bit more confident as you embark on your jam-making journey! If you have any other questions, feel free to reach out. Happy jamming!
Print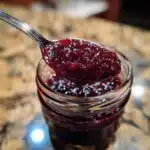
Plum Jam Recipe: 5 Steps to Pure Deliciousness
- Total Time: 45 minutes
- Yield: 4 cups 1x
- Diet: Vegetarian
Description
This plum jam recipe is simple and delicious.
Ingredients
- 2 pounds fresh plums, pitted and chopped
- 1 cup sugar
- 1 tablespoon lemon juice
- 1/2 teaspoon vanilla extract
Instructions
- Wash and prepare the plums.
- Combine plums, sugar, lemon juice, and vanilla in a pot.
- Cook over medium heat until the mixture boils.
- Reduce heat and simmer for 30 minutes, stirring occasionally.
- Test the jam for thickness.
- Pour into sterilized jars and seal.
Notes
- Adjust sugar to taste.
- For a smoother texture, blend the mixture before cooking.
- Store in a cool, dark place.
- Prep Time: 15 minutes
- Cook Time: 30 minutes
- Category: Preserves
- Method: Stovetop
- Cuisine: American
Nutrition
- Serving Size: 1 tablespoon
- Calories: 50
- Sugar: 12g
- Sodium: 0mg
- Fat: 0g
- Saturated Fat: 0g
- Unsaturated Fat: 0g
- Trans Fat: 0g
- Carbohydrates: 13g
- Fiber: 0g
- Protein: 0g
- Cholesterol: 0mg
Keywords: plum jam recipe