

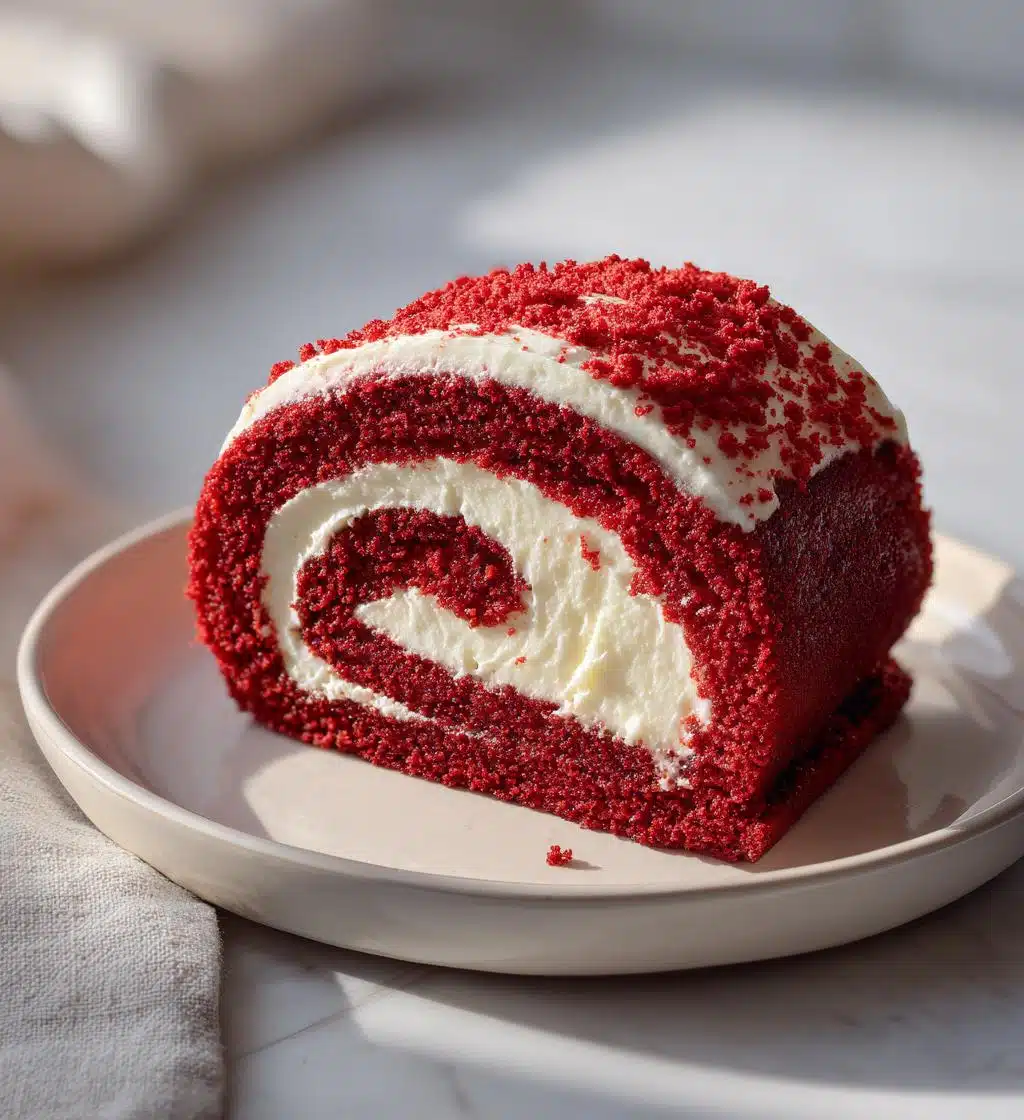
Oh my goodness, if you’ve never tried a red velvet cake roll, you’re in for a real treat! The moment you cut into this stunning dessert, you’re greeted with that beautiful swirl of rich red velvet and creamy filling—it’s just gorgeous! I can’t tell you how many times I’ve made this for birthdays, holidays, and even just a cozy weeknight dessert. It’s like a celebration on a plate! The flavor is so delightful, with that subtle cocoa mingling perfectly with the tangy cream cheese filling. Trust me, once you try making your own red velvet cake roll, it’ll become a go-to for all your festivities. Plus, it’s so impressive to present to family and friends, they’ll think you spent hours crafting this masterpiece! Let’s dive into how to whip up this gorgeous cake roll together!
Ingredients List
Gathering your ingredients for this red velvet cake roll is half the fun! Here’s what you’ll need to create this delicious treat:
- 1 cup all-purpose flour
- 1 cup granulated sugar
- 1/2 cup unsweetened cocoa powder
- 1 teaspoon baking powder
- 1/2 teaspoon baking soda
- 1/2 teaspoon salt
- 3 large eggs
- 1/2 cup vegetable oil
- 1 cup buttermilk (make sure it’s nice and creamy!)
- 2 tablespoons red food coloring (I love the gel kind for that vibrant hue!)
- 1 teaspoon vanilla extract
- 1 cup cream cheese, softened (for that luscious filling)
- 1/4 cup butter, softened (you want it to blend easily into the filling)
- 2 cups powdered sugar (to sweeten up that cream cheese filling)
Make sure you have everything on hand before you start baking—trust me, it makes the process so much smoother! And don’t forget, quality ingredients make all the difference in flavor!
How to Prepare Instructions
Now that you’ve got all your ingredients ready, let’s get baking this stunning red velvet cake roll! Follow these steps for a perfect result:
- First, preheat your oven to 350°F (175°C). This is super important, so don’t skip this step!
- In a large mixing bowl, whisk together the flour, granulated sugar, cocoa powder, baking powder, baking soda, and salt until everything’s well combined.
- In another bowl, mix the eggs, vegetable oil, buttermilk, red food coloring, and vanilla extract. Make sure it’s all blended smoothly—this will give your cake that gorgeous color and flavor!
- Now, pour the wet ingredients into the dry ingredients and mix until just combined—don’t overmix! A few lumps are totally okay.
- Grease a jelly roll pan and pour the batter evenly into it, smoothing out the top.
- Bake in your preheated oven for 15-20 minutes. You’ll know it’s done when a toothpick inserted in the center comes out clean. Keep an eye on it, as ovens can vary!
- Once baked, let the cake cool in the pan for about 10 minutes. Then, carefully roll it up in a clean kitchen towel while it’s still warm. This helps to set the shape!
- While it cools completely, prepare your filling by beating together the softened cream cheese and butter until smooth, then gradually add the powdered sugar until you achieve a fluffy filling.
- After the cake has cooled, gently unroll it, spread the cream cheese filling evenly, and roll it back up. Don’t worry if it cracks a little; it’ll still taste amazing!
- Chill your red velvet cake roll in the fridge for at least 1 hour before slicing. This helps everything set perfectly for those beautiful slices!
And there you have it—a stunning red velvet cake roll ready to impress! Enjoy every delightful bite!
Why You’ll Love This Recipe
You’re going to adore making this red velvet cake roll! Here’s why it’s a must-try:
- Quick Preparation: With just a few simple steps, you can whip up this stunning dessert in no time—perfect for last-minute gatherings!
- Rich Flavor: The combination of cocoa and cream cheese creates a deliciously rich and tangy flavor that’s simply irresistible.
- Impressive Presentation: It looks so fancy when sliced, making it a showstopper for any event or celebration!
- Versatile: You can easily customize the filling or add fun toppings to suit any occasion or taste preference.
- Perfect for Sharing: This cake roll is great for slicing up and sharing with friends and family, spreading joy with every piece!
Trust me, once you make this, it’ll become your go-to dessert for any occasion!
Tips for Success
Ready to ensure your red velvet cake roll turns out perfect? Here are my top tips to help you out:
- Watch the Bake Time: Every oven is different, so keep an eye on your cake as it bakes. It’s better to check a minute or two early to avoid overbaking!
- Use a Clean Towel: When rolling your cake, make sure to use a clean kitchen towel. This prevents sticking and helps maintain that lovely shape.
- Don’t Skip the Chilling: After you’ve filled and rolled the cake, chilling it for at least an hour is crucial! This helps the filling set and makes for easier slicing.
- Practice Gentle Handling: When unrolling and rolling the cake, do it gently. If it cracks a little, don’t sweat it; it’ll still taste amazing!
Follow these tips, and you’ll have a stunning red velvet cake roll that’s sure to impress!
Variations
Once you’ve mastered the classic red velvet cake roll, the fun really begins! There are so many ways to get creative with this delightful dessert. Here are a few ideas to inspire you:
- Chocolate Lovers: Swirl in some chocolate ganache into the cream cheese filling for an extra rich and decadent treat.
- Fruit Twist: Add some fresh raspberries or strawberries into the filling for a fruity burst that complements the red velvet beautifully!
- Nutty Addition: Fold in some chopped nuts like pecans or walnuts into the filling for a delightful crunch.
- Citrus Zing: Mix in some orange zest to the filling for a refreshing citrus flavor that brightens up the dessert.
- Spiced Up: Incorporate a pinch of cinnamon or nutmeg into the cake batter for a warm, spiced flavor that’s cozy and comforting.
Feel free to mix and match these ideas or come up with your own unique twist—this cake roll is a canvas for your creativity!
Storage & Reheating Instructions
Now, let’s talk about how to keep your delicious red velvet cake roll fresh and ready to enjoy later! First off, if you have any leftovers (which is rare, but hey, it happens!), wrap the cake roll tightly in plastic wrap or store it in an airtight container. This helps lock in moisture and flavor, keeping it tasty for up to 3 days in the fridge.
If you want to keep it longer, you can also freeze it! Just slice it into pieces, wrap each slice individually, and pop them in the freezer. They’ll stay good for up to 2 months. When you’re ready to enjoy a slice, simply thaw it overnight in the fridge. No need to reheat—serve it chilled or at room temperature for the best flavor!
Nutritional Information
Let’s talk about the nutritional goodness of this delightful red velvet cake roll! Each slice is estimated to have around 250 calories, which makes it a sweet treat that’s perfect for special occasions without going overboard. Here’s a quick breakdown of the typical values for one slice:
- Calories: 250
- Fat: 10g
- Saturated Fat: 5g
- Unsaturated Fat: 3g
- Trans Fat: 0g
- Carbohydrates: 36g
- Fiber: 1g
- Sugar: 25g
- Protein: 4g
- Cholesterol: 50mg
- Sodium: 150mg
Keep in mind that these values are estimates and can vary depending on the specific ingredients you use. Enjoy this treat in moderation, and savor every delicious bite!
FAQs
Got questions about making your fabulous red velvet cake roll? I’ve got you covered! Here are some common queries that might pop up:
Can I make this cake roll ahead of time?
Absolutely! You can bake the cake and prepare the filling a day in advance. Just roll it up, chill it, and slice it when you’re ready to serve. It actually tastes even better after a day in the fridge!
What can I substitute for buttermilk?
If you don’t have buttermilk on hand, no worries! Just mix 1 cup of regular milk with a tablespoon of vinegar or lemon juice and let it sit for about 5 minutes. Voila—homemade buttermilk!
Why did my cake crack when I rolled it?
Don’t sweat it! A little cracking can happen, especially if it’s not rolled gently enough. Just make sure to roll it while it’s still warm, and it should hold its shape beautifully!
Can I use a different filling?
Of course! Feel free to get creative with fillings. Try a chocolate ganache or a fruity whipped cream for a fun twist!
How should I serve it?
I love serving my red velvet cake roll chilled or at room temperature. It pairs wonderfully with a dollop of whipped cream or fresh berries for an extra special touch!

Red Velvet Cake Roll: 5 Irresistible Reasons to Indulge
- Total Time: 1 hour 50 minutes
- Yield: 8 servings 1x
- Diet: Vegetarian
Description
A delicious red velvet cake rolled with cream cheese filling.
Ingredients
- 1 cup all-purpose flour
- 1 cup granulated sugar
- 1/2 cup unsweetened cocoa powder
- 1 teaspoon baking powder
- 1/2 teaspoon baking soda
- 1/2 teaspoon salt
- 3 large eggs
- 1/2 cup vegetable oil
- 1 cup buttermilk
- 2 tablespoons red food coloring
- 1 teaspoon vanilla extract
- 1 cup cream cheese, softened
- 1/4 cup butter, softened
- 2 cups powdered sugar
Instructions
- Preheat the oven to 350°F (175°C).
- In a bowl, mix flour, sugar, cocoa powder, baking powder, baking soda, and salt.
- In another bowl, combine eggs, oil, buttermilk, food coloring, and vanilla.
- Mix the wet ingredients into the dry ingredients until smooth.
- Pour the batter into a greased jelly roll pan.
- Bake for 15-20 minutes until a toothpick comes out clean.
- Let the cake cool for 10 minutes, then roll it in a clean kitchen towel.
- For the filling, beat cream cheese and butter until smooth, then add powdered sugar.
- Unroll the cooled cake, spread the filling, and roll it back up.
- Chill for at least 1 hour before slicing.
Notes
- Make sure to use a clean towel to avoid sticking.
- Store leftovers in the refrigerator.
- Use gel food coloring for a vibrant color.
- Prep Time: 30 minutes
- Cook Time: 20 minutes
- Category: Dessert
- Method: Baking
- Cuisine: American
Nutrition
- Serving Size: 1 slice
- Calories: 250
- Sugar: 25g
- Sodium: 150mg
- Fat: 10g
- Saturated Fat: 5g
- Unsaturated Fat: 3g
- Trans Fat: 0g
- Carbohydrates: 36g
- Fiber: 1g
- Protein: 4g
- Cholesterol: 50mg
Keywords: red velvet cake roll