
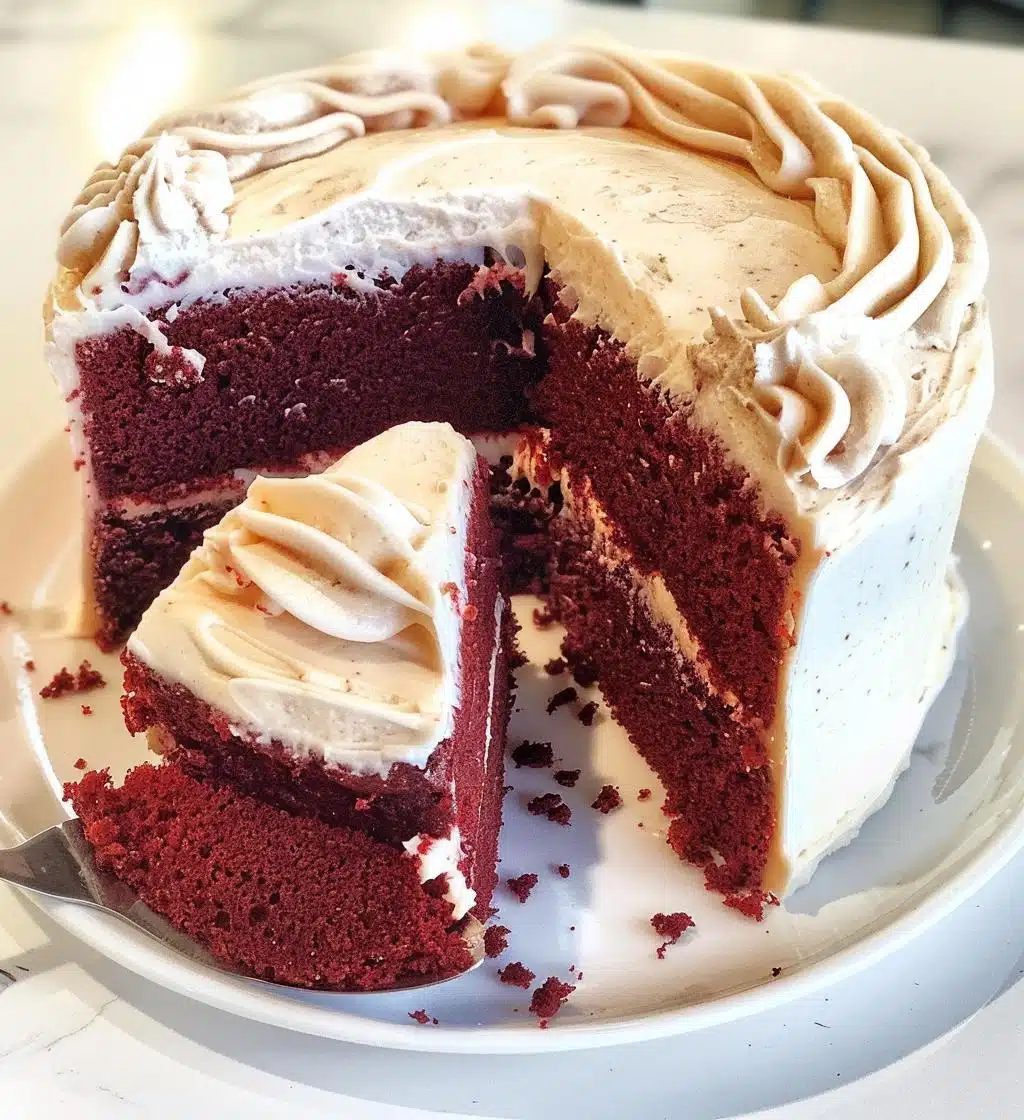
Oh, red velvet cake! Just saying the name brings a smile to my face. This cake isn’t just a dessert; it’s a celebration in itself! With its stunning crimson hue and velvety texture, red velvet cake has a rich history that dates back to the 1800s, often gracing the tables of special occasions and gatherings. I remember the first time I baked one for a friend’s birthday—it was an instant hit! The combination of that tart cream cheese frosting and the moist, flavorful cake is simply irresistible. Trust me, once you dive into a slice of this beauty, you’ll understand why it’s such a beloved favorite. Whether it’s for birthdays, holidays, or just a Tuesday treat, red velvet cake is always a showstopper that brings joy to any gathering!
Ingredients for Red Velvet Cake
Gathering the right ingredients is key to whipping up the most delicious red velvet cake you can imagine! Don’t worry; these are all pretty straightforward and easy to find. Here’s what you’ll need:
- 2 1/2 cups all-purpose flour
- 1 1/2 cups sugar
- 1 teaspoon baking soda
- 1 teaspoon salt
- 1 teaspoon cocoa powder
- 1 1/2 cups vegetable oil
- 1 cup buttermilk, room temperature
- 2 large eggs, room temperature
- 2 tablespoons red food coloring
- 1 teaspoon vanilla extract
- 1 teaspoon white vinegar
Make sure your buttermilk and eggs are at room temperature—it really makes a difference in the texture of the cake! And don’t be shy with the food coloring; it’s what gives this cake its stunning look. Now, let’s get baking!
How to Prepare Red Velvet Cake
Now that you’ve got all your ingredients ready, it’s time to bring this gorgeous red velvet cake to life! Follow these simple steps, and you’ll have a showstopper dessert that impresses everyone. Let’s get started!
Step-by-Step Instructions
- First things first, preheat your oven to 350°F (175°C). This will ensure your cake bakes evenly.
- Grab two 9-inch round cake pans and grease them up with some butter or cooking spray, then dust them lightly with flour. This little step prevents any sticky situations later!
- In a large mixing bowl, whisk together the flour, sugar, baking soda, salt, and cocoa powder until well combined. This is where the magic starts, so mix it up well!
- In another bowl, combine the vegetable oil, buttermilk, eggs, red food coloring, vanilla extract, and white vinegar. Whisk this mixture together until it’s smooth and vibrant. You’ll love that bold color already!
- Now, gradually add the dry ingredients to the wet ingredients. Stir gently until just combined—don’t overmix! You want that batter to be smooth but not overworked. A few lumps are totally okay!
- Once your batter is ready, divide it evenly between the two prepared cake pans. Give them a little tap on the counter to remove any air bubbles. This will help your cakes rise beautifully.
- Pop those pans into the preheated oven and bake for about 25-30 minutes. You’ll know they’re done when a toothpick inserted in the center comes out clean or with just a few moist crumbs.
- After baking, let the cakes cool in their pans for about 10 minutes. This gives them a chance to set. Then, carefully remove them from the pans and let them cool completely on wire racks. Patience is key here!
And there you have it! Following these steps will lead you to a moist, delicious red velvet cake that’s ready to be frosted and devoured. Just wait until you taste that creamy, dreamy frosting on top!
Why You’ll Love This Recipe
If you’re wondering why red velvet cake is such a beloved classic, let me tell you—it’s not just about the looks! This cake wins hearts with its incredible flavor and texture. Here are a few reasons why you’ll absolutely fall in love with this recipe:
- Rich Flavor: The perfect balance of sweetness and a hint of cocoa makes every bite pure bliss.
- Moist Texture: Thanks to the buttermilk and oil, this cake is incredibly moist, making it hard to resist a second slice!
- Easy to Prepare: With straightforward steps and simple ingredients, you’ll feel like a pro baker in no time.
- Impressive Presentation: That vibrant red color paired with luscious cream cheese frosting makes it a showstopper for any occasion.
- Versatile: Perfect for birthdays, anniversaries, or just a sweet treat on a Tuesday—this cake fits any celebration.
- Great for Sharing: It yields 12 generous slices, so there’s plenty to share with friends and family!
Trust me, once you make this red velvet cake, you’ll be adding it to your regular baking rotation. It’s just that good!
Tips for Success with Red Velvet Cake
Want to make sure your red velvet cake turns out absolutely perfect? I’ve got some pro tips that will help you nail it every time! These little nuggets of wisdom can make a world of difference in your baking journey. So, let’s dive in!
- Room Temperature Ingredients: Make sure your buttermilk and eggs are at room temperature before you start mixing. This helps create a smoother batter and ensures even baking. I usually take them out about 30 minutes before I begin.
- Don’t Overmix: When combining the wet and dry ingredients, mix just until everything is incorporated. Overmixing can lead to a denser cake, which we definitely don’t want!
- Measure Your Flour Correctly: Flour can easily be overpacked, resulting in a dry cake. Spoon your flour into the measuring cup and level it off with a knife for accuracy.
- Check for Doneness: Since ovens can vary, I recommend checking your cakes a couple of minutes before the recommended baking time. Use a toothpick—if it comes out clean or with a few moist crumbs, your cake is ready to go!
- Cool Completely: Let your cakes cool completely before frosting. If they’re even slightly warm, the frosting can melt right off, and nobody wants a sad, melted frosting situation!
- Frosting Fun: For a beautiful finish, consider using a crumb coat first. Simply spread a thin layer of cream cheese frosting all over the cake, chill it for about 30 minutes, and then add your final layer of frosting. This keeps any crumbs from showing through!
- Adjusting Color: If you want a deeper red color, feel free to add a bit more food coloring! Just remember to taste-test as you go—too much can alter the flavor slightly.
With these tips in your back pocket, you’re more than ready to bake a show-stopping red velvet cake that will leave everyone wanting more. Happy baking!
Nutritional Information for Red Velvet Cake
Now, I know you’re probably curious about the nutritional side of this scrumptious red velvet cake! Just keep in mind that the nutritional values can vary based on the specific ingredients and brands you use. But here’s a general idea of what you can expect in one slice of this delightful treat:
- Calories: 350
- Fat: 18g
- Saturated Fat: 3g
- Trans Fat: 0g
- Cholesterol: 45mg
- Sodium: 300mg
- Carbohydrates: 45g
- Fiber: 1g
- Sugar: 25g
- Protein: 4g
This cake is definitely a treat, so enjoy every delicious bite! Whether you’re celebrating or just indulging a little, it’s all about balance. Happy baking and savoring!
FAQ About Red Velvet Cake
Got questions about red velvet cake? You’re not alone! It’s such a beloved dessert that many people have their own curiosities. I’ve gathered some of the most common questions I hear, along with my answers, to help you navigate any baking challenges. Let’s dive in!
Can I use regular milk instead of buttermilk?
Absolutely! If you don’t have buttermilk on hand, you can make a quick substitute by adding 1 tablespoon of white vinegar or lemon juice to a cup of milk. Let it sit for about 5 minutes, and voilà—homemade buttermilk!
What can I substitute for vegetable oil?
You can use melted butter for a richer flavor or even applesauce if you’re looking for a healthier option. Just remember, the texture might change slightly with these substitutes, but it’ll still be delicious!
How should I store leftover red velvet cake?
Store any leftovers in an airtight container at room temperature for up to 2 days, or in the fridge for up to a week. Just make sure to keep it covered so it doesn’t dry out. If you’re planning to keep it longer, you can freeze it! Wrap individual slices tightly in plastic wrap and then in foil, and they’ll stay good for up to 2 months.
Can I make this cake ahead of time?
Yes, you can! The cake layers can be baked a day in advance. Just let them cool completely, wrap them in plastic wrap, and store in the fridge. Frost them when you’re ready to serve for the best taste and texture.
What’s the best way to serve red velvet cake?
I love serving it chilled or at room temperature. It pairs beautifully with a scoop of vanilla ice cream or a dollop of whipped cream. And don’t forget a cup of coffee or tea—it’s the perfect combo!
Can I add chocolate chips to the batter?
Of course! Adding chocolate chips can give an extra sweet surprise in every bite. Just fold them in gently before pouring the batter into the pans. Yum!
How can I make my cake more red?
Feel free to adjust the amount of red food coloring to achieve your desired shade. Just remember, a little goes a long way, so add it gradually and taste-test as you mix!
Hopefully, these FAQs answer some of your burning questions about red velvet cake! If you have more queries or need additional tips, don’t hesitate to reach out—I’m here to help you create the perfect cake!
Storage & Reheating Instructions
Now that you’ve indulged in your fabulous red velvet cake, you might be wondering how to store those precious leftovers without losing any of that deliciousness. Don’t worry; I’ve got you covered with some simple storage tips!
First off, if you have any leftover cake, make sure to store it in an airtight container. This keeps it nice and moist. You can keep it at room temperature for up to 2 days, but if you know you won’t finish it that quickly, it’s best to pop it in the fridge. Just be sure to cover it well to prevent it from drying out!
If you want to save it for a longer time, you can freeze your red velvet cake! Just wrap each slice tightly in plastic wrap, then wrap them again in aluminum foil or place them in a freezer-safe bag. This will protect the cake from freezer burn. It should stay good for up to 2 months.
When you’re ready to enjoy those frozen slices, simply transfer them to the fridge to thaw overnight. If you’re in a hurry, you can also let them sit at room temperature for a couple of hours. Just avoid reheating it in the microwave, as that can dry it out. Instead, if you prefer a warm slice, pop it in a preheated oven at 350°F (175°C) for about 10 minutes. This way, you’ll keep that moist texture intact while warming it up just perfectly!
With these storage and reheating tips, your red velvet cake will remain just as scrumptious as the day you baked it. Enjoy every last bite!
Serving Suggestions for Red Velvet Cake
Now that you’ve made this stunning red velvet cake, let’s talk about how to take your dessert experience to the next level! The beauty of red velvet cake is that it pairs wonderfully with a variety of flavors and accompaniments, making every slice even more delightful. Here are some of my favorite serving suggestions:
- Classic Cream Cheese Frosting: You can’t go wrong with the traditional cream cheese frosting that complements the cake perfectly. Its tanginess balances the sweetness beautifully!
- Fresh Berries: Top each slice with a handful of fresh raspberries or strawberries for a burst of freshness. The tartness of the berries contrasts wonderfully with the rich cake.
- Vanilla Ice Cream: There’s something magical about warm cake paired with a scoop of creamy vanilla ice cream. The cold and warm together? Pure bliss!
- Whipped Cream: A dollop of freshly whipped cream adds a light and airy touch that enhances the overall indulgence. You can even flavor it with a hint of vanilla or a sprinkle of cocoa powder for an extra kick!
- Chocolate Sauce: Drizzling a bit of warm chocolate sauce over your slice can elevate the chocolate notes in the cake. Talk about decadence!
- Coffee or Tea: Pair your cake with a nice cup of coffee or your favorite tea. The warmth and richness of the drink bring out the flavors of the cake in the most delightful way.
- Caramel Sauce: A drizzle of caramel sauce adds a sweet and buttery touch that complements the cake’s rich flavor beautifully. It’s a must-try!
So, whether you’re serving this red velvet cake at a celebration or enjoying it on a cozy night in, these suggestions will enhance the experience and leave everyone asking for seconds. Enjoy every scrumptious bite!
Print
Red velvet cake: 7 Secrets to Unforgettable Indulgence
- Total Time: 1 hour
- Yield: 12 servings 1x
- Diet: Vegetarian
Description
A rich and moist red velvet cake with cream cheese frosting.
Ingredients
- 2 1/2 cups all-purpose flour
- 1 1/2 cups sugar
- 1 teaspoon baking soda
- 1 teaspoon salt
- 1 teaspoon cocoa powder
- 1 1/2 cups vegetable oil
- 1 cup buttermilk, room temperature
- 2 large eggs, room temperature
- 2 tablespoons red food coloring
- 1 teaspoon vanilla extract
- 1 teaspoon white vinegar
Instructions
- Preheat the oven to 350°F (175°C).
- Grease and flour two 9-inch round cake pans.
- In a bowl, mix flour, sugar, baking soda, salt, and cocoa powder.
- In another bowl, combine oil, buttermilk, eggs, food coloring, vanilla, and vinegar.
- Gradually add dry ingredients to wet ingredients and mix until smooth.
- Divide batter between pans and bake for 25-30 minutes.
- Let cakes cool in pans for 10 minutes, then remove and cool completely on wire racks.
- Frost with cream cheese frosting once cooled.
Notes
- Store leftovers in an airtight container.
- For a richer flavor, use cake flour.
- Adjust food coloring for desired redness.
- Prep Time: 30 minutes
- Cook Time: 30 minutes
- Category: Dessert
- Method: Baking
- Cuisine: American
Nutrition
- Serving Size: 1 slice
- Calories: 350
- Sugar: 25g
- Sodium: 300mg
- Fat: 18g
- Saturated Fat: 3g
- Unsaturated Fat: 15g
- Trans Fat: 0g
- Carbohydrates: 45g
- Fiber: 1g
- Protein: 4g
- Cholesterol: 45mg
Keywords: red velvet cake, dessert, cream cheese frosting