
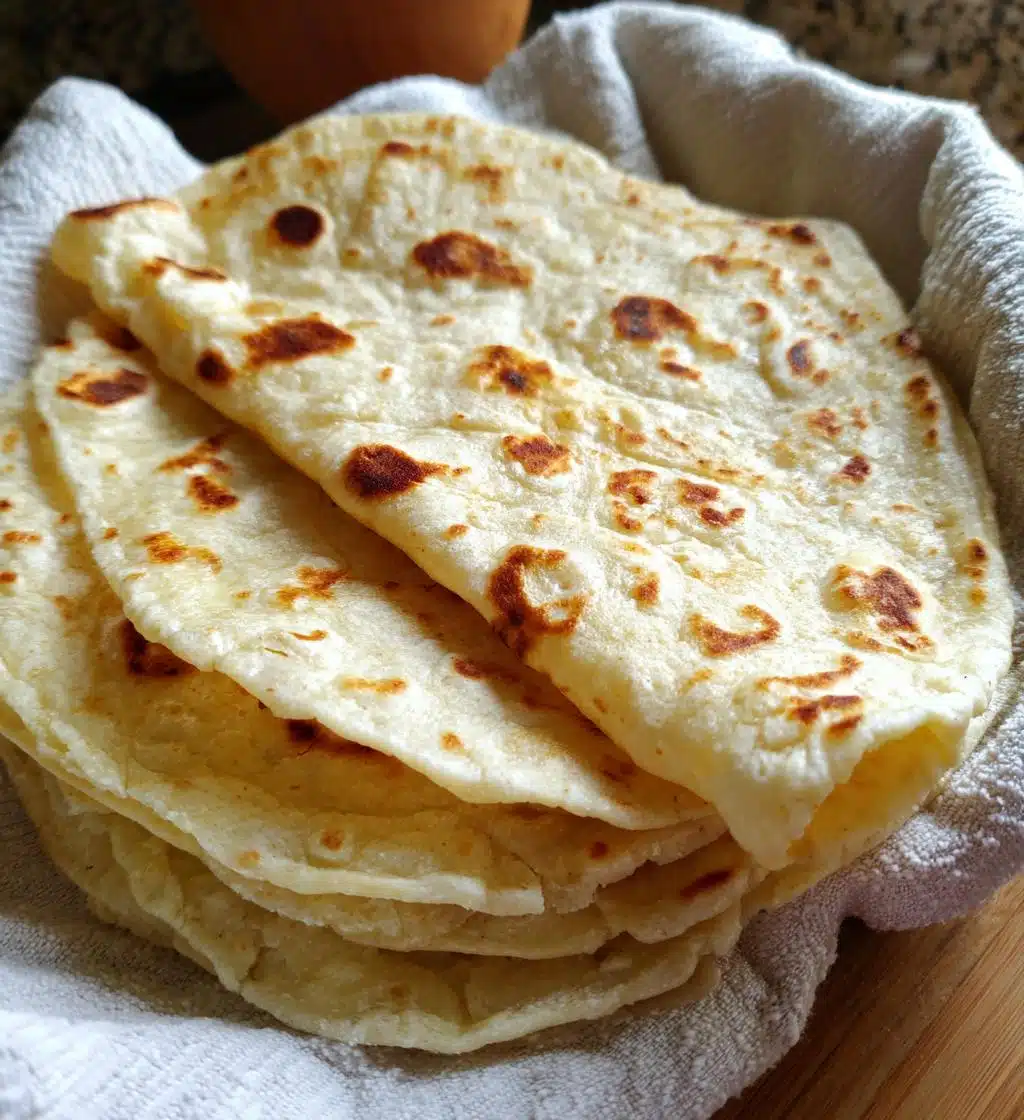
Oh my goodness, let me tell you about the magic of rice tortillas! These gluten-free flatbreads are not just a fantastic alternative for those avoiding wheat; they’re incredibly versatile too! I remember the first time I made them—my kitchen was a delightful mess, but the aroma of warm tortillas sizzling on the skillet was absolutely irresistible. They’re perfect for wraps, tacos, or even just slathered with some homemade guacamole. Seriously, once you try them, you’ll be hooked!
The best part? They come together in no time at all! With just a few simple ingredients, you can whip up a batch of these delightful tortillas in about 25 minutes. And trust me, nothing beats the satisfaction of rolling your own tortillas and then filling them with your favorite tasty goodies. So, let’s dive into the world of rice tortillas—I promise you won’t regret it!
Ingredients List
- 2 cups rice flour
- 1/2 teaspoon salt
- 1 cup warm water
- 1 tablespoon olive oil
How to Prepare Rice Tortillas
Making rice tortillas is a fun and rewarding process! I love how simple it is to create these delicious gluten-free flatbreads right in your own kitchen. Just follow these steps, and you’ll be savoring warm tortillas in no time!
Mixing the Dough
Start by grabbing a large mixing bowl. In it, combine the 2 cups of rice flour with 1/2 teaspoon of salt. Give it a good stir to evenly distribute the salt—trust me, it makes a difference! Next, pour in 1 cup of warm water and 1 tablespoon of olive oil. I like to use warm water because it helps the dough come together more easily. Now, mix it all together until it forms a shaggy dough. You don’t need to worry about it being perfectly smooth just yet!
Kneading the Dough
Once the dough is combined, it’s time to knead! Dust your countertop with a little rice flour to prevent sticking, then transfer the dough onto the surface. Knead it gently for about 5 minutes—this is where the magic happens! Kneading helps develop the texture, making your tortillas soft and pliable. You want the dough to feel smooth and elastic, so don’t rush through this step. If it’s sticky, sprinkle a bit more rice flour as needed!
Shaping the Tortillas
Now that your dough is nice and smooth, it’s time to shape those tortillas! Divide the dough into small balls, about the size of a golf ball. I usually get about 10 balls from this recipe. Roll each ball between your palms to make them nice and round, then flatten them out into tortilla shapes, aiming for about 1/8 inch thick. If you have a rolling pin, go for it! If not, you can use your hands—just be gentle so they don’t tear!
Cooking the Tortillas
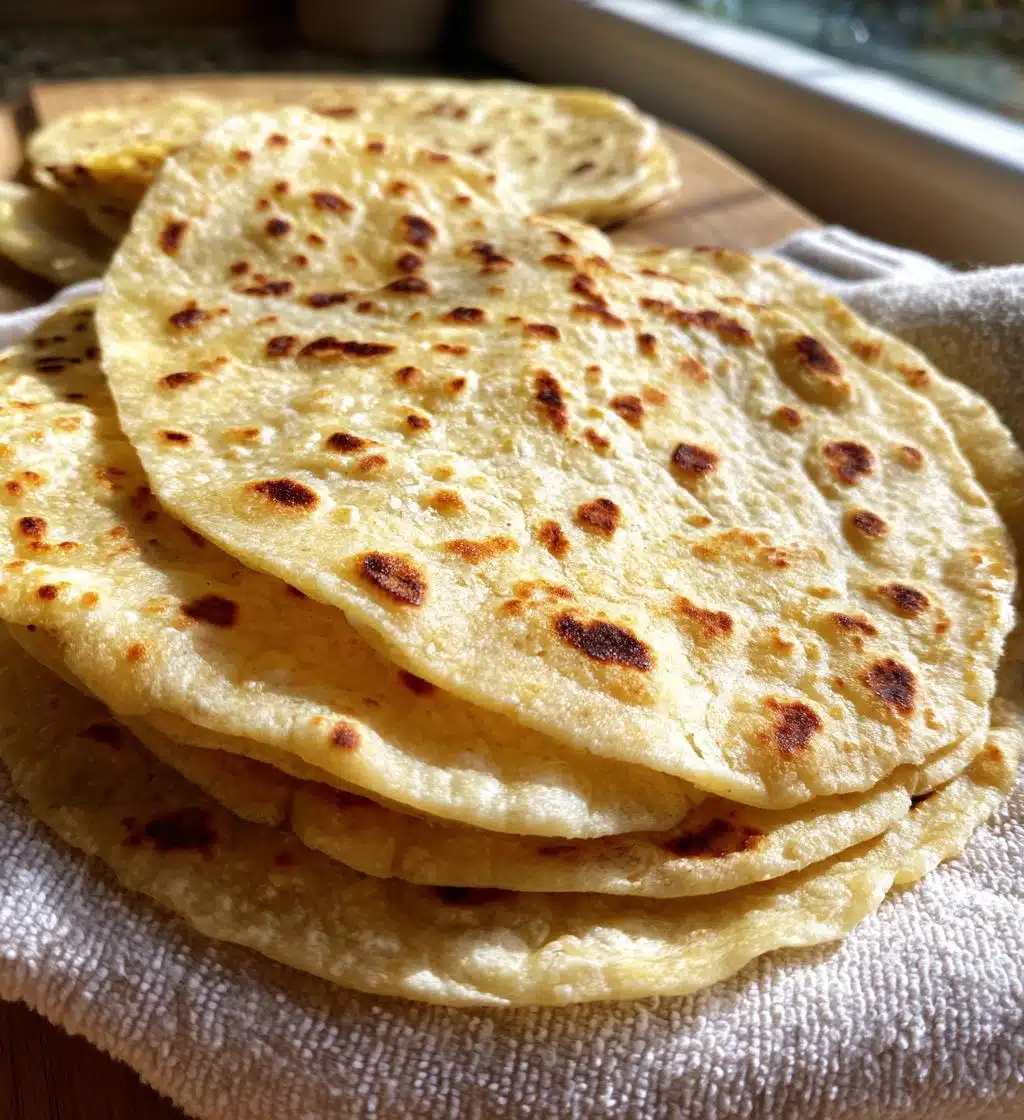
Heat a skillet over medium-high heat—this part is crucial! You want it hot enough to cook the tortillas quickly without burning them. Once it’s sizzling, place a tortilla in the pan and cook for about 1-2 minutes on each side. You’ll know they’re ready to flip when you see little bubbles forming and the edges start to lift. Just keep an eye on them, because they can go from perfect to overcooked in a flash! Repeat this for each tortilla, and soon you’ll have a beautiful stack of warm rice tortillas ready to enjoy!
Nutritional Information
Let’s talk numbers! These rice tortillas are not only delicious but also pack a decent nutritional punch. Here’s the estimated breakdown per serving (that’s one tortilla, by the way):
- Calories: 120
- Fat: 3g
- Saturated Fat: 0.5g
- Unsaturated Fat: 2g
- Trans Fat: 0g
- Carbohydrates: 22g
- Fiber: 1g
- Protein: 2g
- Sugar: 0g
- Sodium: 200mg
- Cholesterol: 0mg
Keep in mind, these values are estimates, so they might vary slightly based on how you make them and any additional fillings you add. But overall, they’re a wholesome choice that fits perfectly into a gluten-free lifestyle! Enjoy knowing that you’re treating yourself right with each bite!
Why You’ll Love This Recipe
- Gluten-free goodness that everyone can enjoy!
- Super easy to make—perfect for cooks of all skill levels!
- Incredibly versatile; use them for wraps, tacos, or even as a side for your favorite dishes.
- Quick preparation time—whip up a batch in just about 25 minutes!
- Customizable—feel free to experiment with flavors and ingredients!
- Freshly made tortillas taste way better than store-bought—trust me!
Tips for Success
Alright, let’s talk about some pro tips that’ll help you nail those rice tortillas every single time! Trust me, these little pointers can make a world of difference!
- Check the Dough Consistency: The dough should be smooth and pliable, not too sticky or dry. If it feels too crumbly, add a touch more warm water, a tablespoon at a time. If it’s too sticky, sprinkle in a bit more rice flour. You want it just right for easy shaping!
- Don’t Skimp on the Kneading: This step is key! Kneading for about 5 minutes helps develop that lovely texture. It’s like giving your tortillas a little love. If you’re in a hurry, just remember that a little extra kneading goes a long way in making them soft!
- Heat is Everything: Make sure your skillet is nice and hot before adding your tortillas! A medium-high heat ensures they cook quickly, giving you those beautiful brown spots without drying them out. You’ll want to adjust the heat as necessary, but don’t let it get too cool—no one likes a sad, floppy tortilla!
- Keep Them Warm: As you cook each tortilla, stack them on a plate and cover them with a clean kitchen towel to keep them warm and soft. This also helps retain moisture, so they don’t dry out!
- Experiment with Thickness: If you prefer thicker tortillas, feel free to roll them out a bit more. Just keep in mind that you’ll need to adjust cooking time slightly—thicker ones may need an extra minute on each side.
- Practice Makes Perfect: Don’t worry if your first few tortillas aren’t perfect! Each one is a step toward tortilla mastery. The more you make, the better you’ll get at shaping and cooking them!
With these tips in your back pocket, you’ll be well on your way to making the best rice tortillas ever. So roll up those sleeves and get ready to impress yourself (and anyone lucky enough to share in your creations) with your newfound skills!
Variations
Now, let’s get a little creative with those rice tortillas! One of the things I absolutely love about this recipe is how easily you can customize them. With just a few simple tweaks, you can take your tortillas from classic to extraordinary. Here are some fun variations to spark your imagination:
- Herbed Tortillas: Add a tablespoon of your favorite dried herbs, like oregano or basil, right into the dough. It gives a lovely aroma and flavor that pairs perfectly with savory fillings!
- Spicy Kick: Mix in some chili powder or cayenne pepper for a little heat. Just be careful not to go overboard unless you’re a heat enthusiast—it’s all about finding that perfect balance!
- Garlic Infusion: For a delicious twist, add minced garlic or garlic powder to the dough. The flavor is amazing, and it really elevates the taste of your tortillas.
- Sweet Treat: If you’re in the mood for something sweet, consider adding a tablespoon of sugar and a pinch of cinnamon. These sweet tortillas are perfect for dessert wraps filled with fresh fruit or yogurt!
- Vegetable Goodness: Blend in finely grated veggies like zucchini or carrots for a nutrition boost. Just make sure to squeeze out any excess moisture so your dough doesn’t get too wet!
- Cheesy Delight: Incorporate some grated cheese into the dough for cheesy tortillas that’ll take your wraps to the next level. Think of all the cheesy goodness you can add to your tacos!
Feel free to experiment with these ideas or come up with your own! The possibilities are endless, and it’s a great way to add your personal touch to each batch. I can’t wait to hear what delicious combinations you come up with!
Storage & Reheating Instructions
So, you’ve made a delicious batch of rice tortillas, and now you’re wondering how to store them? No worries! Keeping your tortillas fresh is super easy. Just stack the leftover tortillas in an airtight container or wrap them tightly in plastic wrap. This helps prevent them from drying out and keeps them soft for your next culinary adventure!
If you’ve got some tortillas left after a feast, they can be stored in the refrigerator for about 3-4 days. Just make sure they’re sealed up tight! Now, if you want to keep them for a bit longer, you can freeze them! Just layer a piece of parchment paper between each tortilla before wrapping them up to prevent sticking. They’ll be good in the freezer for up to 2 months!
When you’re ready to enjoy those stored tortillas, reheating is key to keeping that wonderful soft texture. For refrigerated tortillas, simply warm them up on a hot skillet over medium heat for about 30 seconds to 1 minute on each side. This will bring back their lovely warmth and pliability. If you’re reheating frozen tortillas, let them thaw in the fridge overnight, then follow the same skillet method.
Alternatively, you can pop them in the microwave! Just cover them with a damp paper towel and heat for about 15-20 seconds for each tortilla. This helps keep them moist, but be careful not to overdo it, or they might get a little tough.
With these simple storage and reheating tips, you can enjoy your rice tortillas just like they were freshly made. Happy eating!
FAQ Section
Got questions about rice tortillas? No problem! I’ve gathered some of the most common ones I hear, along with my answers to help you out. Let’s dive in!
Can I use brown rice flour instead of white?
Absolutely! Brown rice flour will work just fine, but the tortillas might have a slightly nuttier flavor and a different texture. It’s a great option if you’re looking to add some extra nutrients!
How do I store leftover tortillas?
After cooking, let them cool completely before stacking them in an airtight container or wrapping them in plastic wrap. They’ll stay fresh in the fridge for about 3-4 days. Just make sure they’re sealed up tight!
Can I freeze the tortillas?
You sure can! Just layer some parchment paper between each tortilla before wrapping them tightly. They can be frozen for up to 2 months. When you’re ready to enjoy them, let them thaw in the fridge overnight, then warm them up on the skillet!
What if my dough is too sticky?
No worries! If your dough feels sticky, just sprinkle in a little extra rice flour, a tablespoon at a time, until it reaches a smooth and pliable texture. It’s all about finding that sweet spot!
How thick should I roll out the tortillas?
I recommend aiming for about 1/8 inch thick. This thickness allows them to cook evenly without being too flimsy. But if you like them thicker, go for it! Just adjust the cooking time a bit for thicker tortillas.
Can I make these tortillas in advance?
Yes, you can! You can prepare the dough ahead of time, shape the tortillas, and then store them in the fridge for a day or two before cooking. Just make sure to cover them well to prevent drying out!
What are some good fillings for rice tortillas?
Oh, the possibilities are endless! Fill them with grilled veggies, chicken, beans, or even a fresh salad. You can also use them for breakfast wraps with eggs and cheese or sweet fillings like fruits and yogurt for a dessert option!
If you have any other questions, don’t hesitate to ask! Making rice tortillas is all about experimenting and having fun in the kitchen, so enjoy the process and the delicious results!
Print
Rice Tortillas: 5 Simple Steps to Deliciousness
- Total Time: 25 minutes
- Yield: 10 tortillas 1x
- Diet: Gluten Free
Description
Rice tortillas are gluten-free flatbreads made from rice flour. They are perfect for wraps and tacos.
Ingredients
- 2 cups rice flour
- 1/2 teaspoon salt
- 1 cup warm water
- 1 tablespoon olive oil
Instructions
- In a bowl, mix rice flour and salt.
- Add warm water and olive oil.
- Knead the dough until smooth.
- Divide dough into small balls.
- Flatten each ball into a tortilla shape.
- Cook on a hot skillet for 1-2 minutes on each side.
Notes
- Store tortillas in an airtight container.
- Use fresh ingredients for best taste.
- Prep Time: 15 minutes
- Cook Time: 10 minutes
- Category: Bread
- Method: Stovetop
- Cuisine: Mexican
Nutrition
- Serving Size: 1 tortilla
- Calories: 120
- Sugar: 0g
- Sodium: 200mg
- Fat: 3g
- Saturated Fat: 0.5g
- Unsaturated Fat: 2g
- Trans Fat: 0g
- Carbohydrates: 22g
- Fiber: 1g
- Protein: 2g
- Cholesterol: 0mg
Keywords: rice tortillas, gluten-free tortillas, flatbreads