
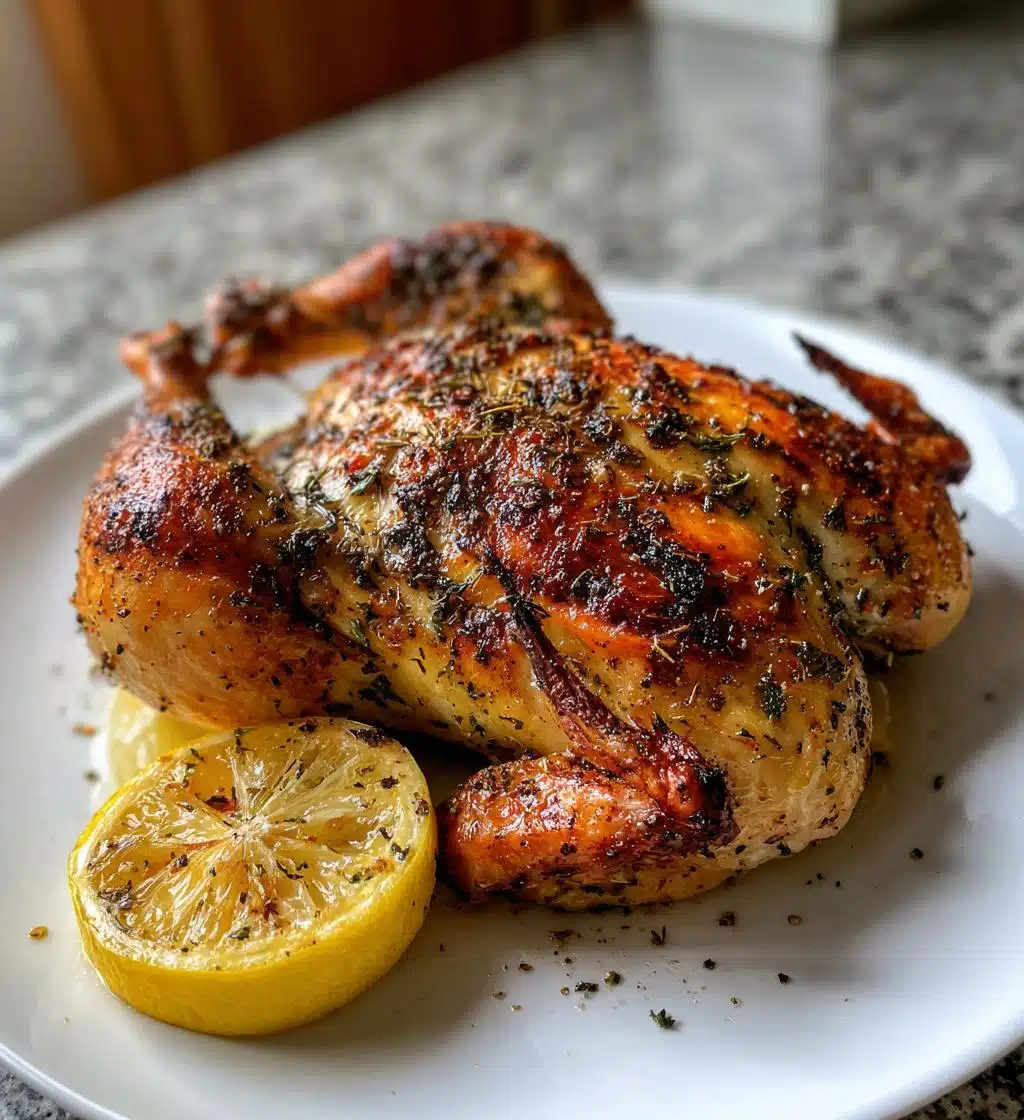
If you’re looking to impress at your next dinner gathering or simply want a delicious meal without the fuss, let me introduce you to my favorite spatchcock chicken recipe! This method is not just simple but incredibly rewarding, giving you tender, juicy chicken with perfectly crispy skin in a fraction of the time. Trust me, once you try this technique, you’ll wonder why you didn’t do it sooner!
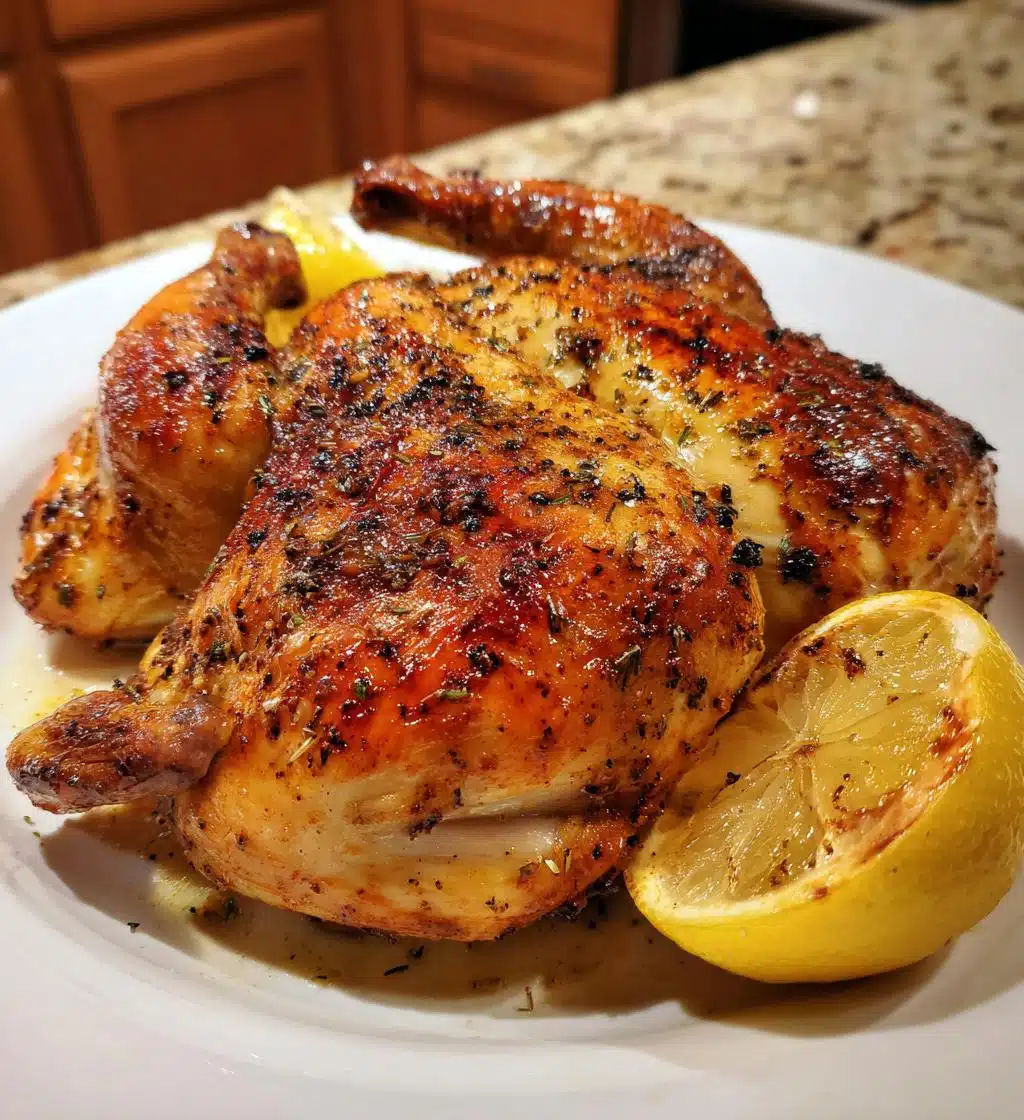
Spatchcocking, or butterflying, a chicken might sound fancy, but it’s really a straightforward process that opens up the chicken for even cooking and maximum flavor. Plus, it’s such a fun way to show off your cooking skills! You’ll love how the olive oil and seasonings seep into every crevice, creating a deliciously seasoned bird that’s sure to be a hit with family and friends. And the best part? It takes just about an hour from start to finish! So, roll up your sleeves, and let’s dive into this delightful spatchcock chicken recipe that’s bound to become a staple in your kitchen!
Ingredients List
Gathering the right ingredients is key to making this spatchcock chicken recipe a success! Here’s what you’ll need:
- 1 whole chicken (3-4 pounds): Look for a fresh, high-quality chicken for the best flavor and texture.
- 2 tablespoons olive oil: This will help crisp up the skin and keep the meat moist.
- 1 tablespoon salt: Essential for enhancing the flavor of the chicken.
- 1 teaspoon black pepper: Adds a touch of heat and depth to the seasoning.
- 1 teaspoon garlic powder: For that irresistible savory flavor!
- 1 teaspoon paprika: This gives the chicken a lovely color and a mild sweetness.
- 1 lemon, juiced: Fresh lemon juice brightens the dish and adds a zesty kick.
Make sure to measure everything out before you start—this makes the process go smoothly and ensures you don’t forget anything. Happy cooking!
How to Prepare the Spatchcock Chicken Recipe
Alright, let’s get down to business! Preparing your spatchcock chicken is not only straightforward but also a bit of a culinary adventure. Follow these steps, and you’ll be well on your way to a deliciously roasted chicken that’ll wow everyone at the dinner table!
Prepping the Chicken
First things first, safety is key! Make sure you have a clean workspace, and have your kitchen shears ready. Place the whole chicken breast side down on a sturdy cutting board. You’ll want to cut along both sides of the backbone—this is where those kitchen shears come in handy! Just press down firmly and cut through the rib bones. Don’t worry if it feels a bit tough; just keep going! Once the backbone is removed, flip the chicken over so the breast side is facing up. Now, press down firmly on the breastbone with both hands to flatten the chicken. You might hear a satisfying crack—that’s a good sign! This helps the chicken cook evenly.
Seasoning the Chicken
Now comes the fun part—seasoning! Grab a small bowl and mix together the olive oil, salt, pepper, garlic powder, and paprika. Rub this mixture all over the chicken, making sure to get under the skin as much as possible. I like to use my hands for this—it gets a bit messy, but trust me, the flavors will be so worth it! Don’t forget to squeeze that fresh lemon juice all over the chicken, too. This adds a bright, zesty flavor that pairs beautifully with the spices. Once you’ve seasoned it thoroughly, let it sit for a few minutes to absorb all those wonderful flavors.
Cooking Instructions
Preheat your oven to 450°F (230°C). This high temperature is what will give you that perfectly crispy skin! While the oven is heating up, line a baking sheet with aluminum foil or parchment paper for easy cleanup. Place your seasoned chicken on the baking sheet, skin side up. Now, pop it into the oven and let it bake for 45-50 minutes. You’ll know it’s done when the internal temperature reaches 165°F (75°C) at the thickest part of the thigh. A meat thermometer is your best friend here! Once it’s cooked, remove the chicken from the oven and let it rest for about 10 minutes before carving. This resting time allows the juices to redistribute, leaving you with a tender and juicy chicken. Oh, the aroma filling your kitchen is just divine!
Why You’ll Love This Recipe
- Quick Preparation: With just a few simple steps, you can have this delicious spatchcock chicken ready in about an hour!
- Even Cooking: Flattening the chicken ensures it cooks evenly, giving you juicy meat and crispy skin all at once.
- Flavorful Seasoning: The combination of olive oil, spices, and fresh lemon juice seeps into every bite, making it incredibly tasty.
- Impressive Presentation: Spatchcocking not only looks great but also makes carving easier, so you can serve it up beautifully.
- Versatile Pairings: This chicken goes perfectly with a variety of sides, from roasted vegetables to creamy mashed potatoes.
- Healthy and Wholesome: Packed with protein and simple ingredients, it’s a nutritious meal that the whole family will love.
Nutritional Information Section
When it comes to enjoying a delicious meal, knowing the nutritional breakdown can be really helpful! Here’s the estimated nutritional information for my spatchcock chicken recipe, based on a serving size of 1/4 chicken:
- Calories: 400
- Fat: 22g
- Saturated Fat: 5g
- Unsaturated Fat: 15g
- Trans Fat: 0g
- Cholesterol: 120mg
- Protein: 45g
- Carbohydrates: 0g
- Fiber: 0g
- Sugar: 0g
- Sodium: 800mg
Keep in mind that these values are estimates and can vary based on the specific ingredients you use. Whether you’re tracking your macros or just curious, this spatchcock chicken recipe is a nutritious choice that delivers on flavor without compromising on health!
Tips for Success
To make sure your spatchcock chicken turns out absolutely perfect every time, I’ve got some tried-and-true tips just for you! Follow these, and you’ll be a spatchcocking pro in no time.
- Marinate for Maximum Flavor: If you have a bit of time, I’d highly recommend marinating your chicken overnight. Just mix your olive oil, spices, and lemon juice together, and let the chicken soak up all those flavors. It makes such a difference!
- Use Sharp Kitchen Shears: A good pair of kitchen shears is essential for spatchcocking. They make cutting through the bones so much easier, and trust me, it’s safer too! If you’re struggling, take your time—there’s no rush here.
- Monitor the Temperature: I can’t stress enough how important it is to use a meat thermometer! Check the chicken’s internal temperature at the thickest part of the thigh, aiming for 165°F (75°C). This ensures that it’s cooked through and juicy!
- Let It Rest: After your chicken is out of the oven, let it rest for at least 10 minutes. This helps the juices redistribute throughout the meat, making each bite melt-in-your-mouth tender.
- Pair with Your Favorites: This spatchcock chicken pairs beautifully with all sorts of sides. Think roasted veggies, creamy mashed potatoes, or even a fresh, crunchy salad. The possibilities are endless!
- Don’t Waste the Juices: When carving, be sure to save any juices that collect on the baking sheet. You can drizzle this over the chicken when serving for an extra punch of flavor!
With these tips in your back pocket, you’ll be ready to impress everyone at your next meal. Happy cooking, and enjoy every delicious bite of your spatchcock chicken!
FAQ Section
What does it mean to spatchcock a chicken?
Spatchcocking a chicken means removing the backbone so you can flatten it out for even cooking. This technique helps the chicken roast faster and ensures crispy skin all around. Plus, it looks pretty impressive on the dinner table!
Can I use a different seasoning for the spatchcock chicken recipe?
Absolutely! While my recipe features garlic powder, paprika, and lemon, you can switch things up based on your taste. Try using herbs like rosemary or thyme, or even a spice blend that you love. Just remember to keep the olive oil and salt to help enhance the flavors.
How do I know when my spatchcock chicken is done?
The best way to check for doneness is to use a meat thermometer. Insert it into the thickest part of the thigh, and it should read 165°F (75°C). If you don’t have a thermometer, the juices should run clear when you pierce the thigh with a knife.
Can I prepare the chicken in advance?
Yes! You can spatchcock the chicken and season it a day ahead. Just keep it covered in the refrigerator until you’re ready to cook. This lets the flavors meld and makes your cooking day a breeze!
What should I serve with spatchcock chicken?
This chicken pairs wonderfully with a variety of sides! I love serving it with roasted vegetables, creamy mashed potatoes, or a fresh salad. You can’t go wrong with some crusty bread to soak up those delicious juices, either!
Storage & Reheating Instructions
Once you’ve enjoyed your delicious spatchcock chicken, proper storage is key to keeping those flavors fresh for later! Here’s how to store and reheat your leftovers safely and deliciously.
To store any leftover chicken, let it cool to room temperature first. Then, wrap the pieces tightly in aluminum foil or place them in an airtight container. This helps keep the chicken moist and prevents it from drying out in the fridge. You can store your spatchcock chicken leftovers in the refrigerator for up to 3 days.
If you want to keep it for longer, consider freezing it! Just wrap the chicken pieces in plastic wrap and then place them in a freezer-safe bag or container. It’ll stay good for about 2-3 months in the freezer. Remember to label it with the date so you know when it was stored!
When you’re ready to enjoy your leftovers, if they’re frozen, let them thaw in the refrigerator overnight. For reheating, I recommend using the oven to keep the chicken from drying out. Preheat your oven to 350°F (175°C). Place the chicken pieces on a baking sheet and cover them with aluminum foil to retain moisture. Reheat for about 20-25 minutes, or until warmed through. If you like, you can remove the foil for the last few minutes to crisp up the skin again. Just make sure the internal temperature reaches 165°F (75°C) for safe eating!
And there you have it! With these simple storage and reheating tips, you can savor every last bite of your spatchcock chicken, making it just as delicious the second time around.
Print
Comforting Spatchcock Chicken Recipe for Joyful Meals
- Total Time: 1 hour 5 minutes
- Yield: 4 servings 1x
- Diet: Gluten Free
Description
A simple and delicious spatchcock chicken recipe for your next meal.
Ingredients
- 1 whole chicken (3–4 pounds)
- 2 tablespoons olive oil
- 1 tablespoon salt
- 1 teaspoon black pepper
- 1 teaspoon garlic powder
- 1 teaspoon paprika
- 1 lemon, juiced
Instructions
- Preheat your oven to 450°F (230°C).
- Place the chicken breast side down on a cutting board.
- Using kitchen shears, cut along both sides of the backbone and remove it.
- Flip the chicken over and press down on the breast to flatten it.
- Rub olive oil, salt, pepper, garlic powder, and paprika all over the chicken.
- Squeeze lemon juice over the chicken.
- Place the chicken on a baking sheet, skin side up.
- Bake for 45-50 minutes or until the internal temperature reaches 165°F (75°C).
- Let it rest for 10 minutes before carving.
Notes
- For extra flavor, marinate the chicken overnight.
- Pair with your favorite side dishes.
- Store leftovers in the refrigerator for up to 3 days.
- Prep Time: 15 minutes
- Cook Time: 50 minutes
- Category: Main Course
- Method: Roasting
- Cuisine: American
Nutrition
- Serving Size: 1/4 chicken
- Calories: 400
- Sugar: 0g
- Sodium: 800mg
- Fat: 22g
- Saturated Fat: 5g
- Unsaturated Fat: 15g
- Trans Fat: 0g
- Carbohydrates: 0g
- Fiber: 0g
- Protein: 45g
- Cholesterol: 120mg
Keywords: spatchcock chicken recipe