

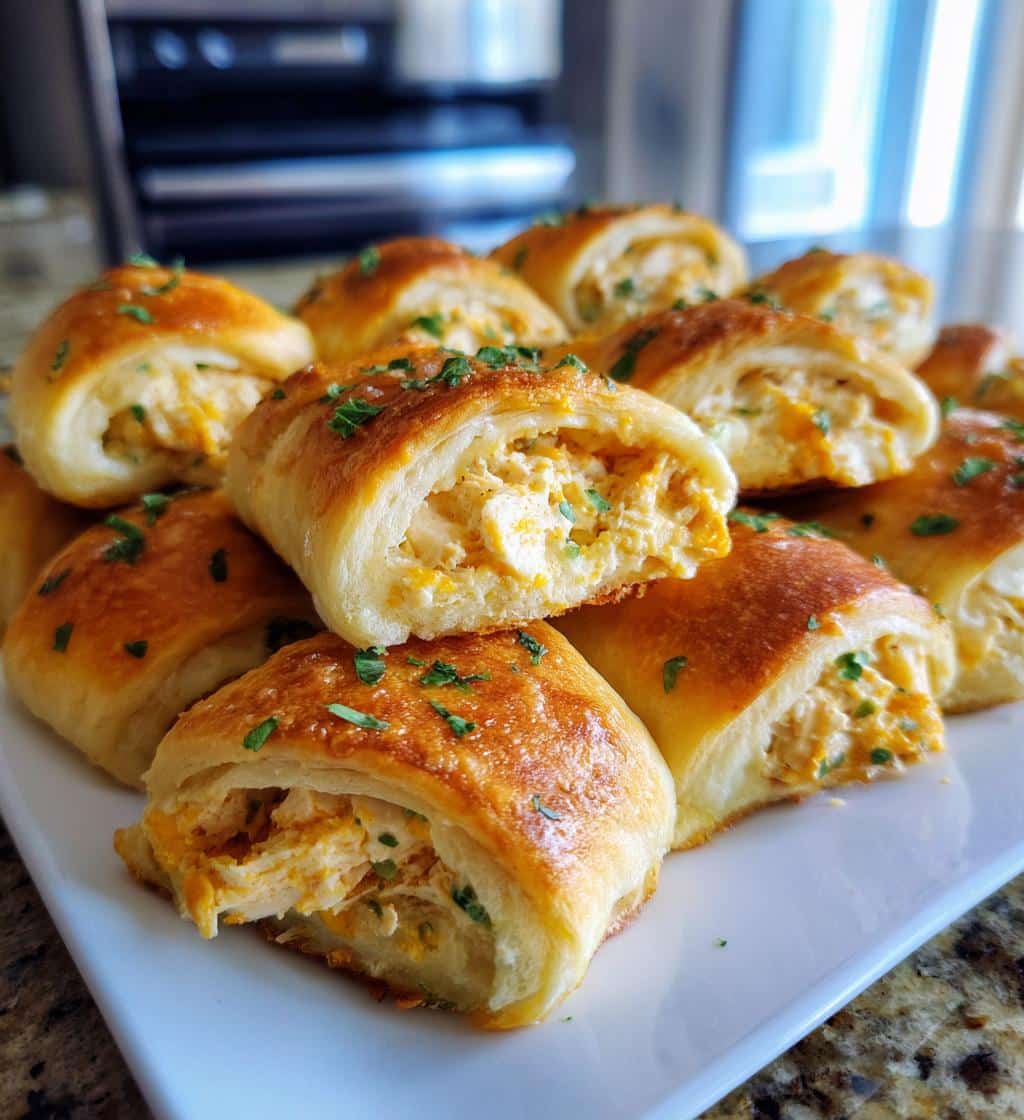
Oh my goodness, let me tell you about these Cheesy Chicken Crescent Rolls! They are an absolute game-changer when it comes to quick appetizers. I can’t even count how many times I’ve made them for parties or family gatherings, and they always disappear in a flash! There’s something so comforting about that warm, flaky crescent dough hugging a creamy, cheesy chicken filling. Trust me, the moment you pull them out of the oven, the smell alone will have everyone flocking to the kitchen. Plus, they’re super easy to whip up, making them perfect for unexpected guests or a cozy night in. You’ll want to keep this recipe handy, because once you try them, you’ll be craving these delightful bites again and again!
Ingredients List
Gathering your ingredients is the first step to making these delicious Cheesy Chicken Crescent Rolls! Here’s what you’ll need:
- 1 can of crescent roll dough (make sure it’s fresh and easy to unroll!)
- 2 cups cooked chicken, shredded (leftover rotisserie chicken works like a charm!)
- 1 cup cream cheese, softened (this will make the filling super creamy!)
- 1 cup shredded cheddar cheese (the sharper, the better for flavor!)
- 1/2 cup ranch dressing (this adds a tasty zesty kick)
- 1/4 teaspoon garlic powder (for that wonderful aroma!)
- 1/4 teaspoon onion powder (a little extra flavor boost)
- 1 tablespoon fresh parsley, chopped (for a pop of color and freshness)
Make sure to have everything ready before you start, as it’ll make the assembly process so much smoother and quicker!
How to Prepare Cheesy Chicken Crescent Rolls
Alright, let’s get into the nitty-gritty of making these scrumptious Cheesy Chicken Crescent Rolls! Follow these steps, and you’ll have a batch of warm, cheesy goodness ready in no time.
Step 1: Preheat the Oven
First things first, you’ll want to preheat your oven to 375°F (190°C). This is super important because a hot oven ensures that your rolls bake evenly and get that lovely golden brown color we all crave. Trust me, this is where the magic begins!
Step 2: Mix the Filling
Now, grab a mixing bowl and toss in your shredded chicken, softened cream cheese, shredded cheddar cheese, ranch dressing, garlic powder, onion powder, and chopped parsley. Mix it all together until it’s creamy and well combined. I like to use a spatula to make sure everything is blended nicely—but don’t be afraid to get in there with a fork if you need to! The goal is to create a filling that’s bursting with flavor.
Step 3: Prepare the Crescent Dough
Next up, let’s get that crescent roll dough ready! Carefully unroll the can of dough on a clean surface and separate it into triangles. Lay them out flat so that they’re easy to fill. Just be gentle with them; we want to keep that flaky texture intact!
Step 4: Assemble the Rolls
Now comes the fun part—assembling the rolls! Take a spoonful of your delicious chicken filling and place it on the wide end of each triangle. Don’t be shy; you want enough filling to make them scrumptious! Then, starting from the wide end, roll the triangle up towards the point, tucking the filling in as you go. Make sure they’re snug, but not too tight, so they bake up beautifully.
Step 5: Bake the Rolls
Once you’ve got all your rolls assembled, it’s time to get them in the oven! Place them on a baking sheet lined with parchment paper (this makes clean-up a breeze!). Bake for about 12-15 minutes or until they’re golden brown and the cheese is melty. Just keep an eye on them because you want that perfect crispy finish!
Step 6: Serve and Enjoy
After pulling them from the oven, let the rolls cool for just a few minutes before digging in. This is the hardest part, I know! But trust me, letting them cool slightly helps the flavors settle and makes them easier to handle. Serve them warm, and watch everyone devour these cheesy delights!
Why You’ll Love This Recipe
- Quick to make—ready in just 30 minutes!
- Super easy with minimal prep work (perfect for busy days).
- Bursting with flavor from the creamy filling and zesty ranch.
- Perfect for gatherings, parties, or just a cozy family night.
- Kids and adults alike can’t resist these cheesy bites!
- Versatile—feel free to add your favorite spices or herbs!
- Leftovers (if you have any) are just as delicious the next day!
Tips for Success
To make sure your Cheesy Chicken Crescent Rolls turn out absolutely perfect, here are some of my favorite tips and tricks:
- Use Rotisserie Chicken: For a super quick prep, grab a rotisserie chicken from the store. It shreds easily and saves you a ton of time!
- Experiment with Spices: Don’t hesitate to tweak the flavors! Add in some smoked paprika, cayenne for a kick, or even some Italian herbs to mix things up.
- Keep Your Cream Cheese Soft: Make sure your cream cheese is softened before mixing. It’ll blend much better and create that dreamy, creamy filling.
- Don’t Overfill: While it’s tempting to pile on the filling, less is more when it comes to rolling them up. Too much filling can cause them to burst open while baking.
- Use Parchment Paper: Always line your baking sheet with parchment paper. It prevents sticking and helps with cleanup, so you can focus on enjoying your delicious rolls!
- Check for Doneness: Keep an eye on your rolls as they bake. You want them golden brown with a hint of crispness—this is key for that perfect texture!
- Make Ahead: You can prepare these rolls in advance and store them in the fridge before baking. Just pop them in the oven when you’re ready to serve!
With these tips, you’ll be a pro at whipping up these cheesy delights in no time. Happy cooking!
Serving Suggestions
Now that you’ve got a batch of Cheesy Chicken Crescent Rolls ready to go, let’s talk about how to make your meal even more delightful! These rolls are fantastic on their own, but pairing them with the right sides can elevate your dining experience. Here are some of my favorite serving suggestions:
- Fresh Salad: A crisp garden salad with a light vinaigrette is a perfect contrast to the richness of the rolls. The freshness will balance out the cheesy goodness!
- Veggie Platter: Serve with a colorful assortment of fresh veggies and your favorite dip—think ranch or hummus. It adds a crunchy element and makes for a fun, interactive meal!
- Soup: Pair these rolls with a warm bowl of creamy tomato soup or a hearty chicken noodle soup. The rolls are perfect for dipping!
- Fruit Salad: A refreshing fruit salad provides a sweet touch to your meal. The natural sweetness of fruits like berries and melons complements the savory rolls beautifully.
- Pickles and Olives: A small side of pickles or olives adds a briny kick that contrasts nicely with the creamy filling, making every bite exciting!
- Chips: A side of crunchy tortilla chips or potato chips can offer that satisfying crunch alongside the softness of the rolls. Serve with salsa or guacamole for extra flavor!
- Dipping Sauces: Consider offering additional dips like barbecue sauce, buffalo sauce, or a spicy aioli for a fun twist. It’s always nice to have options!
These suggestions will not only complement your Cheesy Chicken Crescent Rolls but also create a fun and delicious meal that everyone will enjoy. Happy serving!
Storage & Reheating Instructions
If you happen to have any leftovers of these delicious Cheesy Chicken Crescent Rolls (which is a big if, let’s be honest!), storing them properly is key to keeping that delightful flavor and texture intact. Here’s how I do it:
- Storing Leftovers: Once the rolls have cooled completely, place them in an airtight container. This keeps them fresh and prevents them from drying out. They’ll stay good in the fridge for up to 3 days—if they last that long!
- Freezing for Later: Want to enjoy these cheesy delights later? You can freeze them before or after baking! If freezing before baking, simply wrap each roll tightly in plastic wrap and place them in a freezer-safe bag. When you’re ready to bake, just pop them straight from the freezer into the oven—they might need a few extra minutes of baking time.
When it comes to reheating, I recommend using the oven for the best results:
- Reheating in the Oven: Preheat your oven to 350°F (175°C) and place the rolls on a baking sheet. Cover them loosely with aluminum foil to prevent over-browning. Heat for about 10-15 minutes, or until warmed through. This method ensures they stay nice and crispy!
- Microwave Option: If you’re in a hurry, you can also microwave them for about 30-60 seconds. Just be careful, as microwaving can make them a bit soggy. If you go this route, I’d suggest microwaving them on a paper towel to absorb some moisture.
With these storage and reheating tips, you can enjoy your Cheesy Chicken Crescent Rolls any time you please! Happy munching!
Nutritional Information
Here’s the estimated nutritional breakdown for each Cheesy Chicken Crescent Roll. Keep in mind that these values can vary based on specific brands and ingredients, but this will give you a good idea of what you’re enjoying:
- Serving Size: 1 roll
- Calories: 220
- Fat: 12g
- Saturated Fat: 6g
- Unsaturated Fat: 4g
- Trans Fat: 0g
- Cholesterol: 30mg
- Sodium: 500mg
- Carbohydrates: 20g
- Fiber: 1g
- Sugar: 1g
- Protein: 10g
These rolls are not just delicious; they also pack a decent amount of protein to keep you satisfied. Enjoy them as a tasty appetizer without feeling guilty!
FAQ Section
Can I use frozen chicken for the filling?
Absolutely! You can use frozen cooked chicken as long as you thaw it first. Just make sure it’s shredded for easy mixing!
Can I make these rolls ahead of time?
Yes, you can! Prepare the rolls and place them in the fridge before baking. Just bake them when you’re ready to serve. They’re perfect for making in advance!
What if I don’t have ranch dressing?
No worries! If you don’t have ranch dressing, you can substitute it with Greek yogurt mixed with a bit of garlic powder and herbs for a similar flavor.
How do I store leftovers?
Store any leftover Cheesy Chicken Crescent Rolls in an airtight container in the fridge for up to 3 days. Just reheat them in the oven for the best texture!
Can I freeze these rolls?
Yes! You can freeze them either before or after baking. Just wrap them tightly and store them in a freezer-safe bag. Bake straight from the freezer, but add a few extra minutes to the cooking time.
What dipping sauces go well with these rolls?
These rolls are fantastic with a variety of dipping sauces! Try them with barbecue sauce, ranch dressing, or a spicy aioli for an extra kick!
Can I add vegetables to the filling?
Definitely! Feel free to mix in some finely chopped bell peppers, spinach, or even corn to the filling for added flavor and nutrition.

Cheesy Chicken Crescent Rolls: 5 Delicious Reasons to Try
- Total Time: 30 minutes
- Yield: 8 rolls 1x
- Diet: Gluten Free
Description
Delicious cheesy chicken wrapped in crescent rolls.
Ingredients
- 1 can crescent roll dough
- 2 cups cooked chicken, shredded
- 1 cup cream cheese, softened
- 1 cup shredded cheddar cheese
- 1/2 cup ranch dressing
- 1/4 teaspoon garlic powder
- 1/4 teaspoon onion powder
- 1 tablespoon fresh parsley, chopped
Instructions
- Preheat your oven to 375°F (190°C).
- In a bowl, mix shredded chicken, cream cheese, cheddar cheese, ranch dressing, garlic powder, onion powder, and parsley.
- Unroll the crescent roll dough and separate it into triangles.
- Place a spoonful of the chicken mixture on the wide end of each triangle.
- Roll up each triangle, starting from the wide end to the point.
- Place the rolls on a baking sheet lined with parchment paper.
- Bake for 12-15 minutes or until golden brown.
- Remove from oven and let cool slightly before serving.
Notes
- Use leftover rotisserie chicken for quicker preparation.
- Feel free to add more spices to taste.
- These rolls can be made ahead and frozen before baking.
- Prep Time: 15 minutes
- Cook Time: 15 minutes
- Category: Appetizer
- Method: Baking
- Cuisine: American
Nutrition
- Serving Size: 1 roll
- Calories: 220
- Sugar: 1g
- Sodium: 500mg
- Fat: 12g
- Saturated Fat: 6g
- Unsaturated Fat: 4g
- Trans Fat: 0g
- Carbohydrates: 20g
- Fiber: 1g
- Protein: 10g
- Cholesterol: 30mg
Keywords: Cheesy Chicken Crescent Rolls