
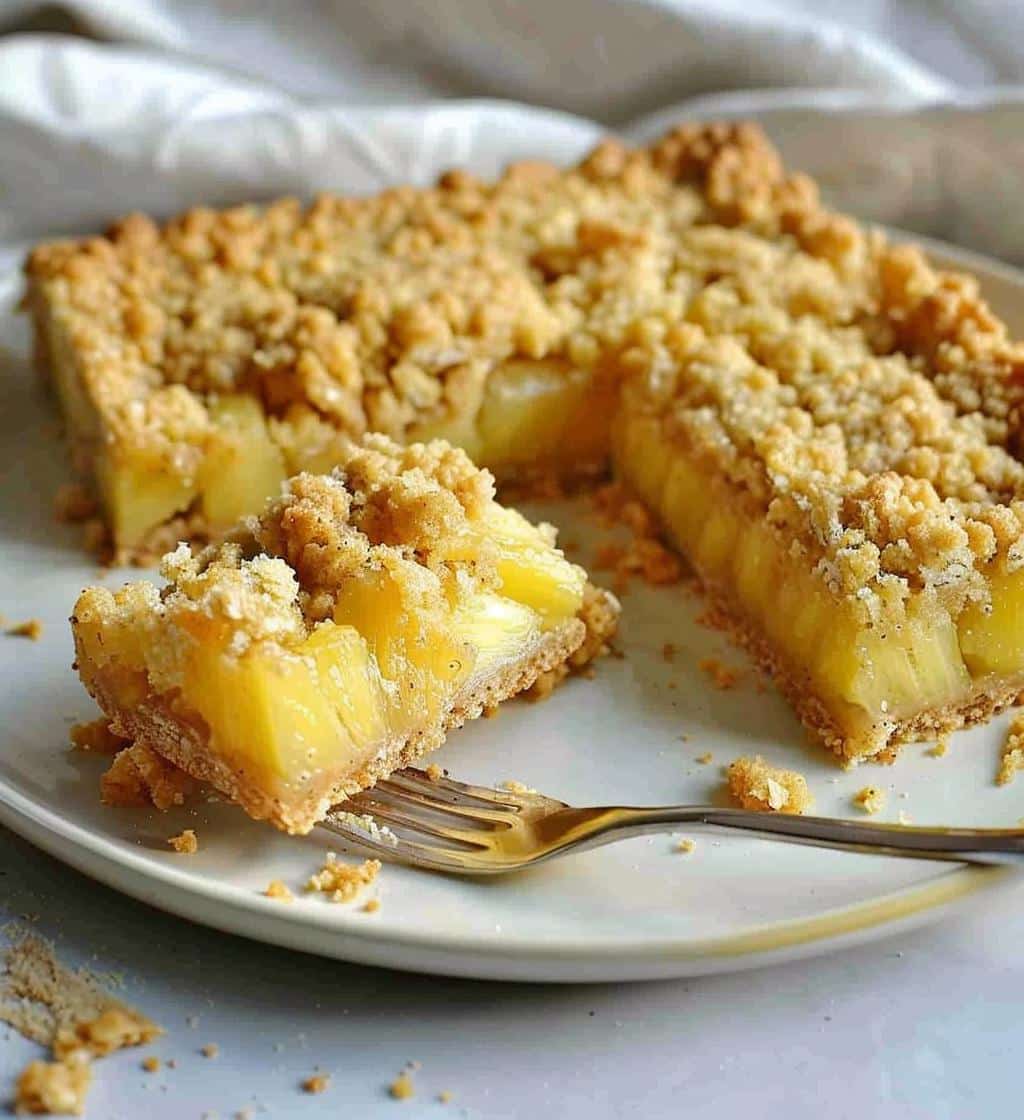
There’s something truly magical about baking, isn’t there? The way the warm, buttery aroma fills your kitchen, making it feel like a cozy haven. And when it comes to Pineapple Crumble Bars, oh boy, you’re in for a treat! These bars are a delightful blend of sweet and tangy flavors, with the crushed pineapple creating a juicy, luscious filling that perfectly contrasts with the crumbly, buttery topping. Trust me, once you take a bite, you’ll be hooked! They’re not just a dessert; they’re a slice of sunshine in bar form! Perfect for gatherings or just a little indulgence on a quiet afternoon, these Pineapple Crumble Bars are a must-try. So, let’s dive into how to whip up this deliciousness!
Ingredients for Pineapple Crumble Bars
Gathering your ingredients is the first step in making these delightful Pineapple Crumble Bars! Here’s what you’ll need:
- 1 cup all-purpose flour – This is the base for your crumble, so make sure it’s fresh!
- 1/2 cup unsalted butter, softened – Use room temperature butter for easy mixing; trust me, it makes a difference!
- 1/2 cup brown sugar – This adds a lovely caramel flavor to the crumble.
- 1/2 cup rolled oats – They give the topping a wonderful texture and chewiness.
- 1 can (20 oz) crushed pineapple, drained – Make sure to drain it well to avoid a soggy crust!
- 1/4 cup granulated sugar – This balances out the tartness of the pineapple.
- 1 tbsp cornstarch – Helps to thicken the pineapple filling just right!
- 1 tsp vanilla extract – A splash of vanilla enhances all those sweet flavors.
Having everything prepped and measured makes the process so much smoother, so take a moment to get organized before you start mixing!
How to Prepare Pineapple Crumble Bars
Alright, let’s get down to the fun part—preparing these Pineapple Crumble Bars! Follow these simple steps, and you’ll have a delicious treat ready in no time. Just remember, timing is key, so let’s do this!
- Preheat your oven to 350°F (175°C). This is super important, so don’t skip it! A hot oven ensures that your bars bake evenly and get that perfect golden top.
- In a large bowl, mix together the flour, softened butter, and brown sugar until it becomes crumbly. You can use your hands or a pastry cutter for this—whichever you prefer! Make sure everything is well combined.
- Add the rolled oats to the mixture and stir until it’s evenly distributed. This adds that delightful texture we love!
- Press half of this mixture firmly into a greased baking pan. You want a nice, even layer here—this will be your crust!
- In another bowl, combine the drained crushed pineapple with granulated sugar, cornstarch, and vanilla extract. Mix well until everything is combined. This fruity filling is going to be so good!
- Spread the pineapple mixture evenly over the crust. Don’t be shy; make sure it covers the whole surface!
- Now, top it off with the remaining crumble mixture. Just sprinkle it over the pineapple filling, making sure to cover it all. This is where the magic happens!
- Bake in the preheated oven for about 30-35 minutes. You’re looking for a lovely golden color on top. Your kitchen will smell amazing during this time!
- Once done, let it cool in the pan for at least 10-15 minutes before cutting into bars. Trust me, this cooling time helps the bars firm up, making them easier to slice.
And there you have it! Just follow these steps, and you’ll be on your way to enjoying some delightful Pineapple Crumble Bars. Can you smell that deliciousness already? Yum!
Why You’ll Love This Recipe
Let me tell you, making Pineapple Crumble Bars is one of the best decisions you can make! Here are just a few reasons why you’ll absolutely adore this recipe:
- Easy Preparation: With simple ingredients and straightforward steps, you won’t need to be a baking pro to whip these up!
- Delicious Flavor: The combination of sweet pineapple and buttery crumble is a match made in dessert heaven. Each bite is bursting with flavor!
- Perfect for Gatherings: These bars are a crowd-pleaser! Whether it’s a family gathering or a potluck, they won’t last long on the table.
- Make-Ahead Friendly: They store well in the fridge, so you can make them in advance and enjoy them later. Perfect for busy weeks!
- Customizable: Feel free to tweak the ingredients or add your favorite mix-ins like nuts or coconut for an extra twist!
- Comfort Food: There’s something so comforting about a warm, crumbly dessert that feels like a hug in every bite!
Honestly, these Pineapple Crumble Bars check all the boxes for a delightful treat that’s sure to bring smiles all around. What’s not to love?
Tips for Success with Pineapple Crumble Bars
To make sure your Pineapple Crumble Bars turn out perfectly every time, I’ve got some tried-and-true tips that will elevate your baking game. Trust me, these little nuggets of wisdom can make all the difference!
- Use Fresh Ingredients: Always opt for fresh, high-quality ingredients. For the best flavor, use real butter and organic sugar if possible. They’ll truly enhance the taste of your crumble!
- Don’t Skip the Draining: Make sure you drain the crushed pineapple well! Excess moisture can make your crust soggy, and we definitely don’t want that. Press it gently in a sieve if needed.
- Don’t Overmix: When you’re mixing your crumble, be careful not to overwork it. You want it to be crumbly, not a dough. Mix just until combined for the best texture!
- Check for Doneness: Keep an eye on your bars while they’re baking! Ovens can vary, so start checking around the 30-minute mark. You want a beautiful golden color on top.
- Cooling is Key: Let your bars cool completely in the pan before slicing. This helps them firm up and makes them much easier to cut without falling apart.
- Experiment with Spices: If you’re feeling adventurous, sprinkle in some cinnamon or nutmeg to the crumble mixture. It adds a lovely warmth that complements the pineapple beautifully!
- Make it Yours: Feel free to add in some chopped nuts or coconut for extra crunch and flavor. It’s a great way to personalize your bars and make them unique!
By following these tips, you’ll be well on your way to creating Pineapple Crumble Bars that are not just good, but absolutely unforgettable. Happy baking!
Variations on Pineapple Crumble Bars
One of the best things about Pineapple Crumble Bars is how versatile they are! You can easily make this recipe your own by tweaking a few ingredients or adding some delightful extras. Here are some fun variations to consider:
- Add Nuts: For a delicious crunch, try folding in some chopped walnuts or pecans into the crumble mixture. They add a lovely texture and nutty flavor that pairs beautifully with the pineapple!
- Mix in Coconut: Flaked coconut is another fantastic addition! Just toss in about 1/4 cup of unsweetened coconut flakes into the crumble for a tropical twist that complements the pineapple perfectly.
- Use Different Fruits: Don’t be afraid to get creative with your fruit! You could mix in some diced mango, peaches, or even berries for a fruity medley. Just be sure to adjust the sweetness accordingly if the fruits are particularly tart.
- Incorporate Spices: Spice things up a bit by adding a teaspoon of cinnamon or ginger to the crumble mixture. It brings a warm, cozy flavor that enhances the overall taste of the bars.
- Try a Different Base: If you want to switch it up, consider using almond flour or oat flour instead of all-purpose flour for a gluten-free option. Just keep an eye on the texture as it might differ slightly!
- Drizzle with Chocolate: For a decadent touch, melt some dark or white chocolate and drizzle it over the cooled bars before serving. It adds a lovely sweetness and richness that elevates the dessert!
These variations allow you to tailor your Pineapple Crumble Bars to your taste and make them perfect for any occasion. So go ahead, experiment a little, and make these bars truly yours!
Storage & Reheating Instructions
Now that you’ve made your delicious Pineapple Crumble Bars, you’ll want to make sure they stay fresh and tasty! Here’s how to store them properly so you can enjoy every last bite.
First things first, let the bars cool completely in the pan. This is super important! Once they’re cool, you can transfer them to an airtight container. If you’re stacking them, I recommend placing a piece of parchment paper between layers to prevent sticking. These bars will stay fresh in the fridge for about 5 days, but trust me, they probably won’t last that long once you start sharing!
If you want to keep them longer, you can freeze your Pineapple Crumble Bars! Just wrap each bar tightly in plastic wrap and then place them in a freezer-safe bag or container. They’ll be good for up to 2 months. When you’re ready to enjoy them, just take out what you need and let them thaw in the fridge overnight. No need to reheat unless you prefer them warm!
If you do want that warm, gooey goodness, you can pop them in the microwave for about 10-15 seconds or warm them in a preheated oven at 350°F (175°C) for about 5-10 minutes. Just keep an eye on them so they don’t get too warm! This little step brings back that delightful, just-baked taste that you’ll love.
So, whether you’re savoring them straight from the fridge or warming them up for a cozy treat, you’re all set to enjoy your Pineapple Crumble Bars any time! Yum!
Nutritional Information for Pineapple Crumble Bars
Understanding the nutritional value of your delicious Pineapple Crumble Bars can definitely help when you’re enjoying them. Here’s the typical nutritional breakdown per serving (1 bar):
- Calories: 180
- Fat: 8g
- Saturated Fat: 5g
- Unsaturated Fat: 3g
- Trans Fat: 0g
- Carbohydrates: 25g
- Sugar: 10g
- Fiber: 1g
- Protein: 2g
- Cholesterol: 20mg
- Sodium: 50mg
Keep in mind that these values are estimates and can vary based on the specific ingredients you use. But this gives you a good idea of what to expect! Enjoy your treats, and remember, everything in moderation!
FAQ about Pineapple Crumble Bars
I’ve gotten a few questions over the years about these delightful Pineapple Crumble Bars, and I’m here to help! Here are some common inquiries you might have:
Can I make these bars gluten-free?
Absolutely! Just substitute the all-purpose flour with a gluten-free flour blend. It works beautifully, and you won’t miss a beat in flavor or texture!
Can I use fresh pineapple instead of canned?
Sure thing! Just make sure to finely chop it and remove excess moisture. You might want to add a little extra sugar if it’s not as sweet as the canned variety.
How can I make these bars vegan?
No problem! Substitute the butter with a plant-based butter and use a flax egg (1 tablespoon ground flaxseed mixed with 3 tablespoons water) in place of the egg. They’ll still be delicious!
Can I prepare the filling ahead of time?
Yes! You can mix the filling and refrigerate it for up to a day before baking. Just give it a good stir before spreading it over the crust.
What’s the best way to serve these bars?
I love serving them chilled, but if you’re feeling indulgent, a scoop of vanilla ice cream on top is absolutely heavenly! You can also drizzle some caramel sauce for an extra treat.
Can I double the recipe?
Of course! Just make sure you use a larger baking dish. You might need to adjust the baking time slightly, so keep an eye on them as they bake.
How should I store any leftovers?
Store your leftover Pineapple Crumble Bars in an airtight container in the fridge for up to 5 days. If you freeze them, just remember to wrap them well to prevent freezer burn!
Got more questions? I’m always here to help you on your baking journey! Enjoy those Pineapple Crumble Bars and make them your own!
Final Thoughts
So there you have it—your very own recipe for Pineapple Crumble Bars! I can’t tell you how excited I am for you to try this out. Baking these bars is not just about the delicious outcome; it’s about the joy you’ll feel while creating them. I’d love to hear your stories and experiences as you whip up this tropical treat! What variations did you try? Did you add your own twist? Or maybe you shared them with friends and family? It’s always a delight to hear how my recipes come to life in your kitchens.
Don’t forget to share your thoughts and feedback! I’m here for all your baking adventures, so feel free to drop a comment, share a photo, or just say hi. Happy baking, and enjoy every bite of your Pineapple Crumble Bars—you deserve it!
Print
Pineapple Crumble Bars: 5 Steps to Pure Bliss
- Total Time: 50 minutes
- Yield: 12 bars 1x
- Diet: Vegetarian
Description
Delicious pineapple crumble bars with a buttery crust and sweet topping.
Ingredients
- 1 cup all-purpose flour
- 1/2 cup unsalted butter, softened
- 1/2 cup brown sugar
- 1/2 cup rolled oats
- 1 can (20 oz) crushed pineapple, drained
- 1/4 cup granulated sugar
- 1 tbsp cornstarch
- 1 tsp vanilla extract
Instructions
- Preheat oven to 350°F (175°C).
- In a bowl, mix flour, butter, and brown sugar until crumbly.
- Add oats and mix well.
- Press half of the mixture into a greased baking pan.
- In another bowl, combine pineapple, granulated sugar, cornstarch, and vanilla.
- Spread pineapple mixture over the crust.
- Top with remaining crumble mixture.
- Bake for 30-35 minutes until golden.
- Let cool before cutting into bars.
Notes
- Store in an airtight container.
- Best served chilled.
- Add nuts for extra crunch.
- Prep Time: 15 minutes
- Cook Time: 35 minutes
- Category: Dessert
- Method: Baking
- Cuisine: American
Nutrition
- Serving Size: 1 bar
- Calories: 180
- Sugar: 10g
- Sodium: 50mg
- Fat: 8g
- Saturated Fat: 5g
- Unsaturated Fat: 3g
- Trans Fat: 0g
- Carbohydrates: 25g
- Fiber: 1g
- Protein: 2g
- Cholesterol: 20mg
Keywords: Pineapple Crumble Bars, dessert, baking