
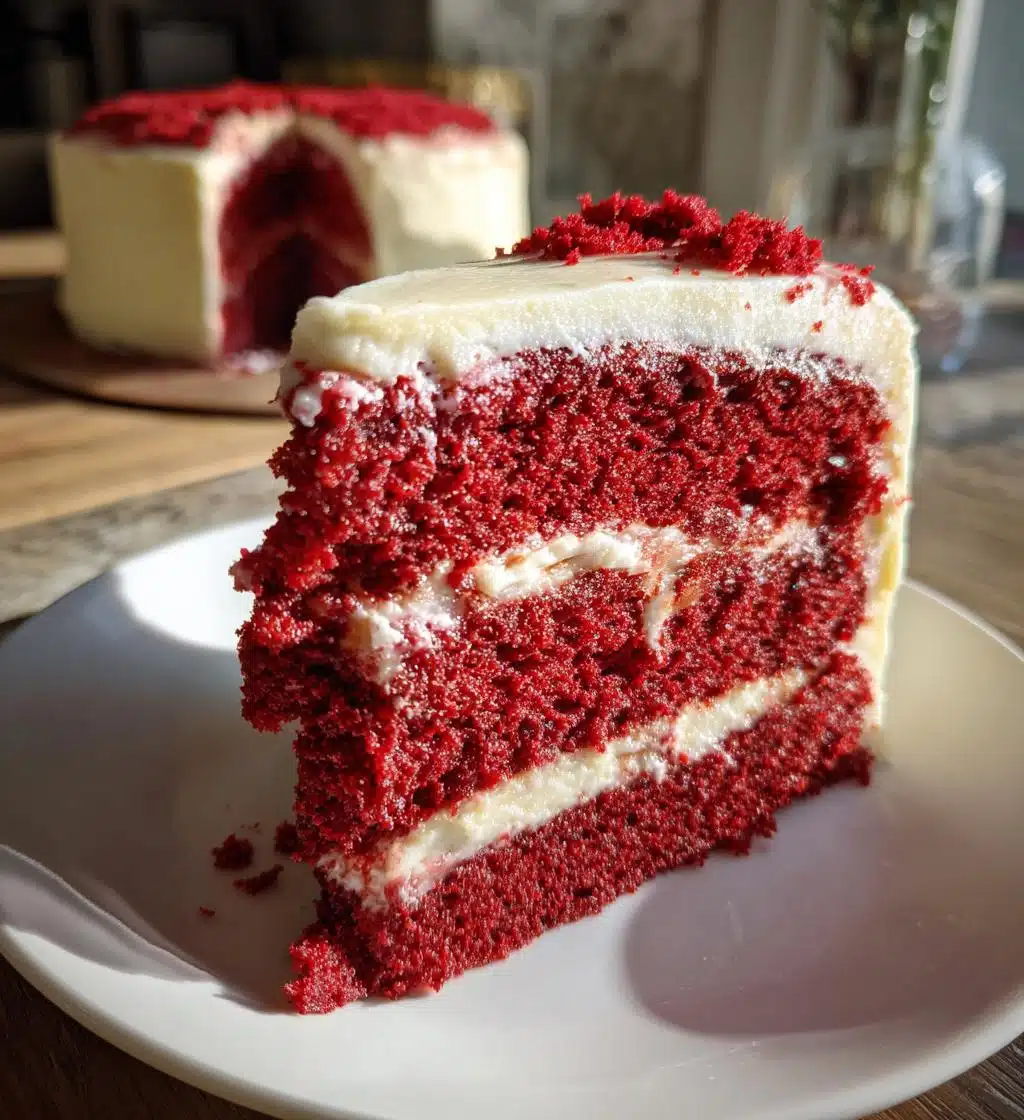
Christmas is such a magical time of year, isn’t it? The twinkling lights, the joyful carols, and the smell of freshly baked goodies wafting through the house—it all just fills my heart with warmth. And speaking of baked goodies, let me tell you about my absolute favorite holiday dessert: the *Red Velvet Layer Cake for Christmas*. Trust me, this cake isn’t just a feast for the eyes with its vibrant red layers; it’s a moist, decadent treat that’s bursting with flavor and perfect for any festive gathering.
Every year, I look forward to making this cake for my family and friends. It’s become somewhat of a tradition in my house! I can still remember the first time I baked it; I was so nervous but excited to share it with everyone. When I pulled it out of the oven, the rich aroma filled the kitchen, and I just knew I had created something special. Watching everyone’s faces light up as they took their first bite was priceless! Since then, it’s been a staple at our holiday celebrations.
This cake is not only a showstopper on the dessert table, but it also brings people together. There’s something comforting about sharing a slice of this indulgent cake, topped with a creamy frosting that just melts in your mouth. So, if you’re looking for a way to elevate your Christmas festivities, this *Red Velvet Layer Cake for Christmas* is definitely the way to go. Let’s get baking and create some sweet memories together!
Ingredients List
Gathering the right ingredients is the first step to making this fabulous *Red Velvet Layer Cake for Christmas*. You’ll want everything fresh and at room temperature for the best results. Here’s what you’ll need:
- 2 1/2 cups all-purpose flour
- 1 1/2 cups granulated sugar
- 1 teaspoon baking soda
- 1 teaspoon salt
- 1 teaspoon cocoa powder
- 1 1/2 cups vegetable oil
- 1 cup buttermilk, room temperature
- 2 large eggs, room temperature
- 2 tablespoons red food coloring
- 1 teaspoon vanilla extract
- 1 teaspoon white vinegar
- 8 oz cream cheese, softened
- 1/2 cup unsalted butter, softened
- 4 cups powdered sugar
- 1 teaspoon vanilla extract (for frosting)
Make sure to check your pantry for these ingredients before you start! Having everything ready to go makes the baking process so much smoother and more enjoyable. Happy baking!
How to Prepare the Red Velvet Layer Cake for Christmas
Now that we’ve gathered our ingredients, it’s time to roll up our sleeves and dive into the fun part: baking this beautiful *Red Velvet Layer Cake for Christmas*! Follow these steps carefully, and you’ll be well on your way to creating a festive masterpiece that will dazzle your guests.
Preheat and Prepare
First things first, let’s preheat that oven to 350°F (175°C). This step is crucial for ensuring our cake bakes evenly and rises beautifully. While the oven warms up, grab your three 9-inch round cake pans and grease them generously with butter or cooking spray, then dust them with flour. This way, your cakes will slide right out when they’re done baking. Trust me, the last thing we want is a cake that sticks to the pan!
Mixing the Dry Ingredients
In a large mixing bowl, combine the 2 1/2 cups of all-purpose flour, 1 1/2 cups of granulated sugar, 1 teaspoon of baking soda, 1 teaspoon of salt, and 1 teaspoon of cocoa powder. Give it a good whisk to make sure everything is well mixed. This step is super important because it helps to prevent any clumps and ensures an even texture throughout your cake. You want those beautiful red layers to be as smooth as possible!
Combining Wet Ingredients
Now, let’s move on to the wet ingredients! In another bowl, whisk together the 1 1/2 cups of vegetable oil, 1 cup of buttermilk (make sure it’s at room temperature for the best results!), the 2 large eggs (also at room temperature), 2 tablespoons of red food coloring, 1 teaspoon of vanilla extract, and 1 teaspoon of white vinegar. Mixing these ingredients together really brings out the vibrant color of the cake, and the vinegar helps to activate the baking soda. It’s like a little chemistry experiment in your kitchen!
Merging Wet and Dry Ingredients
Once your wet ingredients are beautifully combined, pour them into the bowl with the dry ingredients. Gently mix everything together until it’s just combined. Be careful not to overmix! The goal here is to achieve a smooth batter without any lumps, but we want to keep it light and airy. Remember, we’re aiming for a tender cake, not a dense one!
Baking the Cakes
Now it’s time to divide the luscious batter evenly among the prepared pans. I usually use a kitchen scale to make sure they’re perfectly equal, but you can also eyeball it if you prefer. Pop them in the preheated oven and bake for 25-30 minutes. To check for doneness, insert a toothpick into the center of the cakes; if it comes out clean or with just a few moist crumbs, they’re ready to come out! Keep an eye on them as they bake; you don’t want to overbake, or they’ll dry out.
Cooling the Cakes
Once baked, let the cakes cool in the pans for about 10 minutes. This helps them firm up a bit and makes it easier to remove them. After that, carefully transfer the cakes to wire racks to cool completely. Cooling is *so* important; if you frost them while they’re still warm, the frosting will melt and slide right off. No one wants a sad, melted cake!
Making the Frosting
While the cakes are cooling, let’s whip up that dreamy frosting! In a mixing bowl, beat together the 8 oz of softened cream cheese and 1/2 cup of softened unsalted butter until it’s super smooth and creamy. Gradually add in the 4 cups of powdered sugar and 1 teaspoon of vanilla extract, mixing until the frosting is light and fluffy. You want a spreadable consistency—think clouds of sweetness! If it’s too thick, just add a splash of milk until it’s perfect.
Assembling the Cake
Now comes the fun part: assembling your gorgeous cake! Place one layer on a serving plate and spread a generous amount of frosting on top. Repeat this with the second layer, then place the last layer on top. Don’t be shy with the frosting—let it cascade down the sides for that show-stopping effect! For a festive touch, you can decorate with holiday-themed sprinkles or even some fresh berries. This cake is a celebration in itself, and the presentation should reflect that!
Tips for Success
Making the *Red Velvet Layer Cake for Christmas* is a delightful experience, but here are some tried-and-true tips to ensure your cake turns out perfectly every time!
- Room Temperature Ingredients: Always use room temperature ingredients, especially the eggs and buttermilk. This helps create a smoother batter and ensures the cake rises beautifully.
- Measure Accurately: Baking is a science! Make sure to measure your flour correctly—spoon it into the measuring cup and level it off with a knife. Too much flour can lead to a dense cake.
- Don’t Overmix: When combining your wet and dry ingredients, mix until just combined. Overmixing can lead to a tough cake, and nobody wants that!
- Check for Doneness: Every oven is different! Start checking your cakes a few minutes before the suggested baking time. Use that toothpick test; it’s a reliable way to tell if they’re ready.
- Cooling is Key: Let your cakes cool completely before frosting. If you rush this step, you risk melting your frosting and ruining that beautiful presentation!
- Frosting Consistency: If your frosting is too thick, add a splash of milk or cream to achieve a spreadable consistency. If it’s too thin, just add more powdered sugar until it’s perfect!
- Decorate Delightfully: Get creative with your decorations! Fresh berries, edible glitter, or even crushed candy canes add a festive touch that makes your cake even more special.
- Practice Patience: If it’s your first time making this cake, don’t stress! Baking is all about practice, so enjoy the process and have fun with it.
With these tips in your back pocket, you’re all set to create a stunning *Red Velvet Layer Cake for Christmas* that will impress everyone at your holiday gathering. Happy baking!
Frequently Asked Questions
Can I make this cake ahead of time?
Absolutely! The *Red Velvet Layer Cake for Christmas* is perfect for making ahead of time. You can bake the layers a day or two in advance. Just make sure to let them cool completely, then wrap each layer tightly in plastic wrap and store them in the refrigerator. When you’re ready to serve, you can frost the cake and let it come to room temperature for the best flavor and texture. Trust me, it saves a lot of stress on the big day!
What can I substitute for buttermilk?
If you don’t have buttermilk on hand, don’t worry! You can easily make a substitute by mixing 1 cup of milk with 1 tablespoon of vinegar or lemon juice. Let it sit for about 5-10 minutes until it curdles slightly. Alternatively, you can use plain yogurt or sour cream thinned with a little milk to achieve a similar consistency. Just keep in mind that using yogurt or sour cream may give the cake a slightly different flavor, but it’s still delicious!
How can I store leftovers?
To keep your *Red Velvet Layer Cake for Christmas* fresh, store any leftovers in an airtight container in the refrigerator. It should stay good for up to 5 days. If you want to keep it for longer, you can freeze individual slices! Just wrap them tightly in plastic wrap and then place them in a freezer-safe bag. Thaw in the fridge overnight when you’re ready to enjoy a slice of that holiday cheer again!
Nutritional Information
Now, let’s talk about the nutritional side of this delightful *Red Velvet Layer Cake for Christmas*! While this cake is undeniably a treat, it’s good to know what you’re indulging in. Here’s an estimate of the nutritional values per slice, based on a total yield of 12 servings:
- Calories: 450
- Sugar: 40g
- Sodium: 300mg
- Fat: 20g
- Saturated Fat: 10g
- Unsaturated Fat: 8g
- Trans Fat: 0g
- Carbohydrates: 60g
- Fiber: 1g
- Protein: 5g
- Cholesterol: 60mg
Keep in mind that these values are estimates and can vary based on the specific ingredients you use. If you decide to make adjustments, like using a different frosting or adding extra decorations, the nutritional information will change. But hey, it’s all about balance, right? Enjoy every delicious bite of your festive creation, and don’t forget to share with loved ones!
Why You’ll Love This Recipe
This *Red Velvet Layer Cake for Christmas* isn’t just any dessert; it’s a celebration on a plate! Here are a few reasons why you’ll absolutely adore making this festive delight:
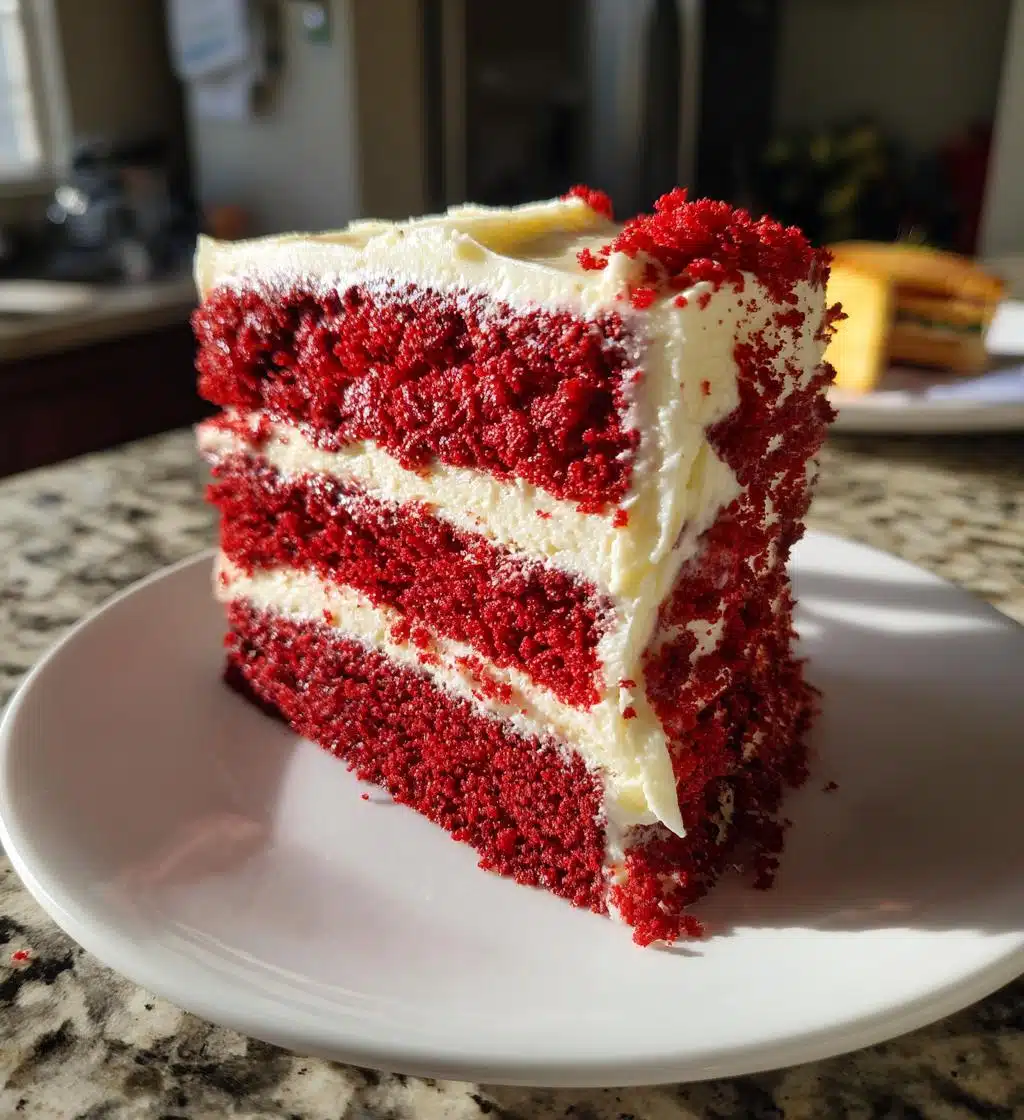
- Stunning Presentation: The vibrant red layers with creamy frosting make for a jaw-dropping centerpiece at any holiday gathering.
- Decadent Flavor: Every bite is a perfect balance of sweetness and a hint of cocoa, making it irresistibly delicious.
- Moist and Tender: The combination of buttermilk and oil ensures a cake that’s super moist and soft, melting in your mouth!
- Fun to Decorate: You can let your creativity shine with festive decorations, from sprinkles to fresh berries—making it a fun project!
- Perfect for Sharing: This cake serves a crowd, making it ideal for holiday parties, family gatherings, or just because you want to spread some cheer!
- A Classic with a Twist: It’s a beloved classic that brings nostalgia while adding a colorful twist to your holiday dessert lineup.
- Easy to Follow: The straightforward instructions make it a great choice for both beginner and experienced bakers alike.
With all these fantastic reasons, it’s clear why this *Red Velvet Layer Cake for Christmas* will become a cherished tradition in your home, just like it has in mine! Happy baking!
Serving Suggestions
Now that you’ve created this stunning *Red Velvet Layer Cake for Christmas*, it’s time to think about how to make your dessert table even more festive! Here are some delightful serving suggestions that pair beautifully with your cake and will surely impress your guests:
- Classic Vanilla Ice Cream: A scoop of creamy vanilla ice cream on the side adds a delightful contrast to the rich flavors of the cake. The cold creaminess perfectly complements the moist layers!
- Whipped Cream: Light and airy whipped cream can be dolloped on top of each slice. It adds a touch of elegance and balances the sweetness of the frosting.
- Fresh Berries: Serve with a mix of raspberries, strawberries, or blueberries. Their tartness provides a refreshing burst of flavor that cuts through the richness of the cake.
- Chocolate Ganache: Drizzle some warm chocolate ganache over the top for an extra layer of indulgence. The combination of chocolate and red velvet is simply heavenly!
- Festive Hot Cocoa: During the colder months, serving slices of cake alongside a steaming cup of rich hot cocoa, topped with marshmallows, creates a cozy and inviting dessert experience.
- Eggnog: For a classic holiday touch, pair your cake with a glass of creamy eggnog. The spices in the eggnog enhance the festive flavors of the cake beautifully!
- Christmas Cookies: Set out a platter of assorted Christmas cookies for guests to enjoy alongside the cake. The variety will make your dessert spread even more inviting!
With these serving suggestions, you’ll create a complete festive experience that will leave your guests raving about your holiday spread. Enjoy every moment of your celebration, and don’t forget to savor that delicious cake!
Share Your Experience
I’d love to hear about your adventures in making the *Red Velvet Layer Cake for Christmas*! Did you try any fun twists or decorations? Maybe you had a delightful surprise when it came out of the oven? Whatever your story, sharing our experiences can inspire and help others who are diving into this delicious recipe.
So, don’t be shy! Leave a comment below and share your thoughts, tips, or any questions you might have. I’m here to help you every step of the way, and I can’t wait to see how your cake turns out. Let’s spread the holiday cheer together—your baking journey is just as important as the cake itself!
Red Velvet Layer Cake for Christmas: 7 Reasons to Love It
- Total Time: 1 hour
- Yield: 12 servings 1x
- Diet: Vegetarian
Description
A festive red velvet layer cake perfect for Christmas celebrations.
Ingredients
- 2 1/2 cups all-purpose flour
- 1 1/2 cups granulated sugar
- 1 teaspoon baking soda
- 1 teaspoon salt
- 1 teaspoon cocoa powder
- 1 1/2 cups vegetable oil
- 1 cup buttermilk, room temperature
- 2 large eggs, room temperature
- 2 tablespoons red food coloring
- 1 teaspoon vanilla extract
- 1 teaspoon white vinegar
- 8 oz cream cheese, softened
- 1/2 cup unsalted butter, softened
- 4 cups powdered sugar
- 1 teaspoon vanilla extract (for frosting)
Instructions
- Preheat your oven to 350°F (175°C).
- Grease and flour three 9-inch round cake pans.
- In a large bowl, mix flour, sugar, baking soda, salt, and cocoa powder.
- In another bowl, combine oil, buttermilk, eggs, food coloring, vanilla, and vinegar.
- Mix wet ingredients into dry ingredients until well combined.
- Divide the batter evenly among the prepared pans.
- Bake for 25-30 minutes or until a toothpick comes out clean.
- Let cakes cool in pans for 10 minutes, then transfer to wire racks to cool completely.
- For frosting, beat cream cheese and butter until smooth.
- Gradually add powdered sugar and vanilla, mixing until fluffy.
- Frost the cooled cakes and stack them on top of each other.
Notes
- Ensure all ingredients are at room temperature.
- Store the cake in the refrigerator if not serving immediately.
- Decorate with holiday-themed sprinkles for a festive touch.
- Prep Time: 30 minutes
- Cook Time: 30 minutes
- Category: Dessert
- Method: Baking
- Cuisine: American
Nutrition
- Serving Size: 1 slice
- Calories: 450
- Sugar: 40g
- Sodium: 300mg
- Fat: 20g
- Saturated Fat: 10g
- Unsaturated Fat: 8g
- Trans Fat: 0g
- Carbohydrates: 60g
- Fiber: 1g
- Protein: 5g
- Cholesterol: 60mg
Keywords: Red Velvet Layer Cake, Christmas Cake, Holiday Dessert