
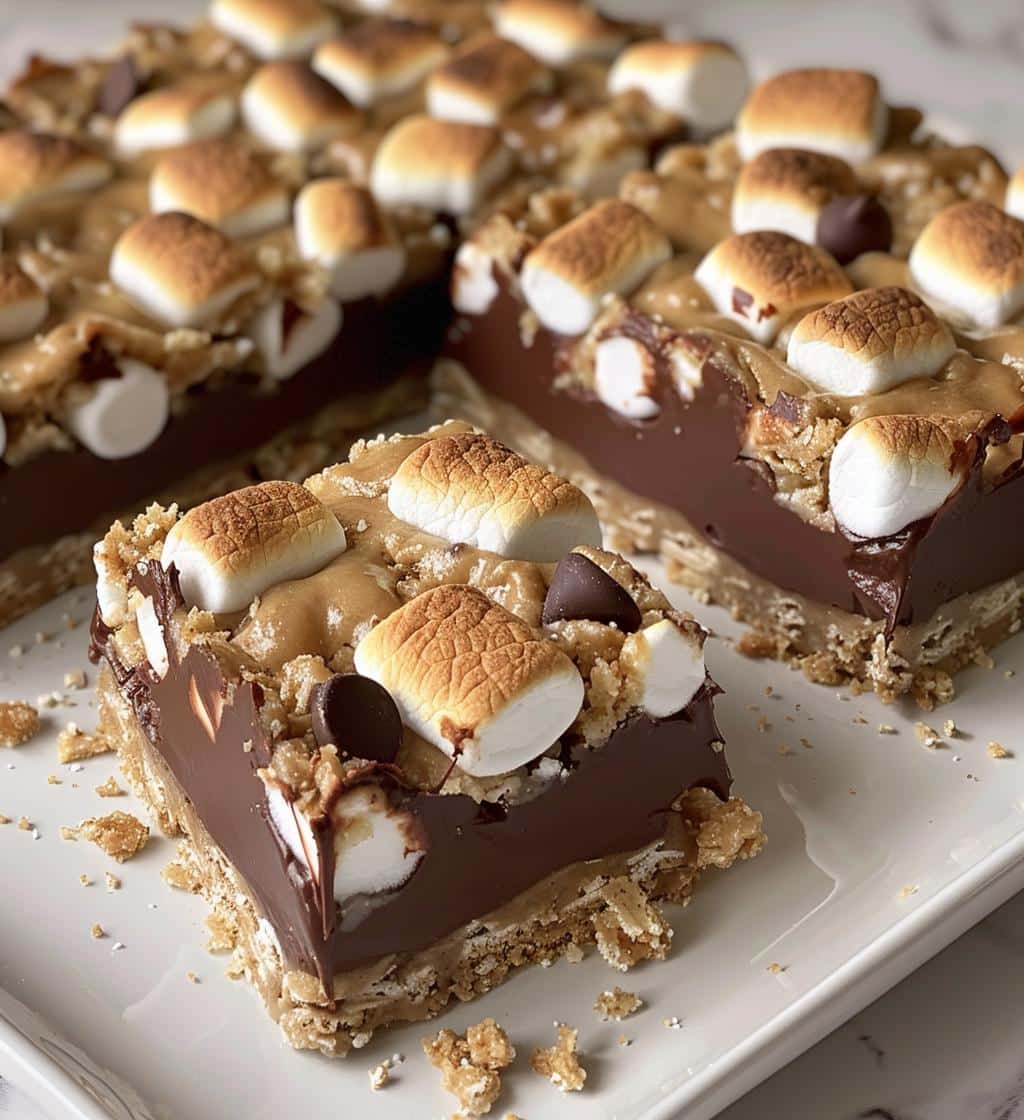
There’s just something magical about s’mores, isn’t there? The gooey marshmallows, melty chocolate, and crunchy graham crackers all meld together over a campfire, creating a nostalgic treat that takes us back to summer nights. But what if I told you that you can capture all those delightful flavors in an easy-to-make dessert at home? That’s where my *S’mores Bars* come in! They’re not only a breeze to whip up in just 25 minutes, but they also deliver that classic campfire experience without the need for a fire pit. Trust me, once you take that first bite, with the rich chocolate and toasted marshmallows, you’ll be hooked. Perfect for sharing, these bars bring all the joy of s’mores to your kitchen—no camping required!
Ingredients List
- 1 cup graham cracker crumbs: These provide the crunchy, sweet base for our bars. You can crush whole graham crackers in a zip-top bag or use a food processor for a finer texture.
- 1/2 cup unsalted butter, melted: This will bind the crumbs together and add richness. Make sure it’s completely melted for even mixing!
- 1/4 cup packed brown sugar: This adds a delightful caramel flavor that complements the chocolate and marshmallows beautifully. Don’t skip packing it down in the measuring cup!
- 1 cup chocolate chips: Choose your favorite type—milk chocolate for classic sweetness, or dark chocolate for a richer taste. They’ll melt and create that luscious layer in the bars.
- 1 cup mini marshmallows: These are the stars of the show! They’ll get all gooey and toasty on top, giving you that perfect s’mores vibe. Feel free to adjust the amount if you’re a marshmallow lover like me!
How to Prepare Instructions
Preheat the Oven
First things first, you need to preheat your oven to 350°F (175°C). This step is super important because it ensures that your *S’mores Bars* bake evenly and come out perfectly gooey and delicious. While the oven is heating up, you can get everything else ready, which is a big time-saver!
Prepare the Crust
In a mixing bowl, combine the graham cracker crumbs, melted unsalted butter, and packed brown sugar. I like to use a fork or a spatula to mix it all together until it’s well combined and looks like wet sand. This mixture is going to be the foundation of your bars, so make sure everything is evenly mixed. It should hold together when you squeeze it in your hand. Once mixed, it’s ready to go into the baking dish!
Assemble the Layers
Now, grab a baking dish (I usually use an 8×8-inch one) and press the crust mixture firmly into the bottom. You want it to be nice and compact so it holds together when you cut the bars later. Once that’s done, sprinkle the chocolate chips evenly over the crust—make sure you cover every inch! Then, it’s time to add the mini marshmallows on top of the chocolate. I like to pile them on because who doesn’t love a gooey marshmallow topping?
Baking Time
Pop your baking dish into the preheated oven and let it bake for about 15 minutes. Keep an eye on it; you’re looking for those marshmallows to puff up and turn a gorgeous golden brown. That’s when you’ll know they’re ready! The smell wafting through your kitchen will be irresistible—trust me!
Cooling and Cutting
Once they’re baked to perfection, take the dish out of the oven and let the bars cool for about 10-15 minutes. This is the hardest part, I know! But letting them cool slightly helps them set up a bit more, making it easier to cut. After they’ve cooled, use a sharp knife to cut them into squares. You’ll want to dig right in, but give them a few more moments to firm up for easier serving!
Nutritional Information Section
When you indulge in a delicious *S’mores Bar*, it’s good to know what you’re treating yourself to! Here are the typical nutritional values per serving (1 bar), but keep in mind these are just estimates:
- Calories: 150
- Fat: 7g
- Saturated Fat: 4g
- Unsaturated Fat: 2g
- Trans Fat: 0g
- Sodium: 100mg
- Carbohydrates: 20g
- Fiber: 1g
- Sugar: 10g
- Protein: 2g
- Cholesterol: 15mg
So, while these bars are a sweet treat, they also pack a bit of everything—just enough to enjoy without feeling too guilty. Perfect for sharing, or maybe just keeping all to yourself!
FAQ Section
Can I use different types of chocolate?
Absolutely! You can definitely swap out the chocolate chips for your favorite kind. Dark chocolate adds a rich, deeper flavor that complements the sweetness of the marshmallows beautifully. If you’re feeling adventurous, try using white chocolate for a fun twist or even a mix of different chocolates for a layered taste experience. Just remember to adjust the sweetness to your liking—sometimes dark chocolate can be a bit less sweet than milk chocolate!
How should I store leftovers?
If you happen to have any *S’mores Bars* left (which is rare in my house!), the best way to keep them fresh is to store them in an airtight container. They’ll stay good at room temperature for about 3-4 days. Just make sure they’re completely cooled before you seal them up! If you want to keep them for longer, you can pop them in the fridge. Just let them come back to room temperature before diving in, so they soften up a bit!
Can I make these bars ahead of time?
You bet you can! These *S’mores Bars* are perfect for making ahead of time. You can prepare them a day or two in advance and store them in an airtight container. Just make sure to let them cool completely before cutting and storing. They actually taste even better after a day in the fridge as the flavors meld together! Just remember to bring them back to room temperature before serving so that gooey marshmallow goodness is at its best.
Why You’ll Love This Recipe
- Quick to Prepare: With just 10 minutes of prep and 15 minutes of baking, you’ll have these *S’mores Bars* ready in no time!
- Easy Cleanup: One mixing bowl and a baking dish mean less mess and more time to enjoy your treats.
- Delicious Flavor: The perfect combination of crunchy, gooey, and chocolaty flavors will have everyone coming back for seconds.
- Great for Gatherings: These bars are a crowd-pleaser, making them ideal for parties, potlucks, or just a cozy night in.
- Flexibility with Ingredients: Feel free to mix things up with your favorite chocolates or add-ins like nuts or flavored marshmallows!
Tips for Success
To ensure your *S’mores Bars* turn out perfectly every time, I’ve got a few pro tips that will make all the difference!
- Don’t skip the preheating: This is crucial for even baking! If your oven isn’t preheated, the bars won’t set properly, and you might end up with a gooey mess instead of deliciously structured bars.
- Check for doneness: Keep an eye on those marshmallows as they bake. You want them to be a lovely golden brown, but not burnt. If they start to puff up and turn golden, you’re good to go!
- Adjust the sweetness: If you prefer a sweeter treat, you can add a bit more brown sugar to the crust or sprinkle some extra chocolate chips on top. Taste the mixture as you go—cooking should be an adventure!
- Let them cool completely: It’s tempting to dig in right away, but letting the bars cool for a while helps them firm up and makes cutting easier. Patience is key here!
- Use a sharp knife: When it’s time to cut the bars, use a sharp knife and make clean cuts. Wiping the knife with a damp cloth between cuts can help keep the edges neat and tidy.
Follow these tips, and I promise you’ll be enjoying perfect, gooey *S’mores Bars* in no time!
Variations
One of the best things about these *S’mores Bars* is how easy it is to customize them to fit your taste! Here are some fun variations that can take your bars to the next level:
- Nutty Delight: Add a handful of chopped nuts, like pecans or walnuts, to the crust for an added crunch. They’ll give a great texture contrast and a flavor boost!
- Flavored Marshmallows: Swap out regular mini marshmallows for flavored ones, like chocolate or strawberry. It’s a simple way to infuse a new taste into your bars without changing much else.
- Peanut Butter Swirl: Drizzle some melted peanut butter over the chocolate layer before adding the marshmallows. It adds a delicious nutty richness that pairs beautifully with the chocolate!
- Caramel Drizzle: After baking, drizzle some warm caramel sauce over the top of the bars for an extra layer of sweetness and a chewy texture. It’s like a s’more meets a caramel candy!
- Cookie Dough Base: Instead of the graham cracker crust, try using cookie dough as the base. Just press it into the baking dish and bake for a delicious twist on your bars!
- Minty Fresh: Add a few drops of peppermint extract to the chocolate layer for a refreshing minty flavor. It’s perfect for those who love a mint chocolate combination!
Feel free to mix and match these ideas or even come up with your own unique twist. The possibilities are endless, and whatever you choose, I’m sure it’ll be delicious!
Serving Suggestions
Now that you’ve got your delicious *S’mores Bars* ready to go, let’s talk about how to elevate your dessert experience! While these bars are scrumptious on their own, pairing them with some delightful accompaniments can take your treat from great to unforgettable.
- Vanilla Ice Cream: A scoop of creamy vanilla ice cream is the perfect match for the warm, gooey *S’mores Bars*. The cold ice cream contrasts beautifully with the warmth of the bars, creating a delightful melty mix in every bite.
- Fresh Berries: Serve your bars alongside some fresh strawberries, raspberries, or blueberries. The tartness of the berries complements the sweetness of the bars, adding a refreshing burst of flavor that balances everything out.
- Chocolate Sauce: Drizzle some warm chocolate sauce over the top of your *S’mores Bars* before serving. It’s a chocolate lover’s dream and adds an extra layer of indulgence!
- Whipped Cream: A dollop of freshly whipped cream on top can enhance the richness of the bars and make for a more luxurious dessert experience. Plus, it looks oh-so-pretty!
- Nutty Trail Mix: For a crunchy contrast, serve some nutty trail mix on the side. The nuts will add a satisfying crunch and complement the flavors of the bars nicely.
- Caramel Sauce: Drizzling some caramel sauce over the bars gives a sweet and sticky finish that adds another layer of flavor—perfect for those who love that sweet and salty combo!
So go ahead, set up a lovely dessert platter with these delightful accompaniments, and enjoy every last crumb of your *S’mores Bars*! Each bite will be a delicious reminder of summer campfires and sweet memories, no matter the season.
Print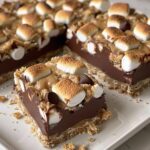
Smores Bars: 5 Irresistibly Gooey Ways to Indulge
- Total Time: 25 minutes
- Yield: 12 bars 1x
- Diet: Vegetarian
Description
Delicious s’mores bars made with graham crackers, chocolate, and marshmallows.
Ingredients
- 1 cup graham cracker crumbs
- 1/2 cup unsalted butter, melted
- 1/4 cup brown sugar
- 1 cup chocolate chips
- 1 cup mini marshmallows
Instructions
- Preheat the oven to 350°F (175°C).
- Mix graham cracker crumbs, melted butter, and brown sugar in a bowl.
- Press the mixture into the bottom of a baking dish.
- Sprinkle chocolate chips evenly over the crust.
- Add mini marshmallows on top of the chocolate chips.
- Bake for 15 minutes or until marshmallows are golden brown.
- Let cool before cutting into bars.
Notes
- Store leftovers in an airtight container.
- Can substitute dark chocolate chips if preferred.
- Adjust marshmallow quantity based on preference.
- Prep Time: 10 minutes
- Cook Time: 15 minutes
- Category: Dessert
- Method: Baking
- Cuisine: American
Nutrition
- Serving Size: 1 bar
- Calories: 150
- Sugar: 10g
- Sodium: 100mg
- Fat: 7g
- Saturated Fat: 4g
- Unsaturated Fat: 2g
- Trans Fat: 0g
- Carbohydrates: 20g
- Fiber: 1g
- Protein: 2g
- Cholesterol: 15mg
Keywords: S'mores Bars, dessert, easy recipe, chocolate, marshmallow