
Oh my goodness, let me tell you about my absolute favorite chicken dish: *Apple Cider Chicken*! Cooking with apple cider is such a joy, and it adds this incredible sweet and tangy flavor that just elevates everything. I remember the first time I made this dish—it was a chilly fall evening, and the house filled with the warm, inviting aroma of simmering cider and herbs. I was experimenting in the kitchen, trying to use up some apple cider I had left from a recent apple-picking adventure, and boy, did I hit the jackpot! The chicken turned out so juicy and flavorful that it became an instant family favorite.
I’ve been cooking chicken dishes for years, and I can confidently say that this one is a standout. The way the apple cider melds with the savory chicken creates a dish that’s not just delicious but also comforting. Plus, it’s incredibly simple to whip up, making it perfect for both weeknight dinners and special occasions. Trust me, once you try this recipe, you’ll be hooked! It’s all about those little touches that make the flavors pop, and I’m here to guide you through every step. Ready to dive in?
Ingredients List
Gathering the right ingredients is key to making the most amazing *Apple Cider Chicken*. Here’s what you’ll need:
- 4 chicken breasts
- 1 cup apple cider
- 2 tablespoons olive oil
- 1 onion, chopped
- 2 cloves garlic, minced
- 1 teaspoon thyme
- Salt to taste
- Pepper to taste
Make sure to chop the onion nicely so it softens up beautifully while sautéing, and don’t forget to mince the garlic for that intense flavor punch! The apple cider is what really brings everything together, so don’t skimp on that. I promise, it’s worth it! Let’s get everything ready, and we’ll be on our way to a delicious meal!
How to Prepare *Apple Cider Chicken*
Now that we’ve got our ingredients ready, let’s jump into the magic of making *Apple Cider Chicken*! This process is straightforward, and I promise you’ll feel like a pro in no time. Just follow these steps, and you’ll have a delicious meal that your family will rave about!
Step 1: Heat the Olive Oil
First things first, heat up 2 tablespoons of olive oil in a large pan over medium heat. This is key—medium heat gives the oil just the right temperature to sauté without burning. You want it hot enough that a drop of water sizzles when it hits the pan but not so hot that the oil starts smoking. Let it warm up for about a minute or so before we add the veggies.
Step 2: Sauté the Vegetables
Once the oil is shimmering, toss in your chopped onion and minced garlic. Ah, the smell is heavenly! Sauté them for about 3-5 minutes until the onion becomes soft and translucent. This step is super important because it builds a lovely flavor base for your chicken. Don’t rush it; give those flavors a moment to develop!
Step 3: Prepare the Chicken
While your onions and garlic are sautéing, let’s season the chicken. Take those 4 chicken breasts and sprinkle salt and pepper generously on both sides. This is where you can really customize it to your taste! Don’t be shy—seasoning is what makes the chicken burst with flavor.
Step 4: Brown the Chicken
Now, it’s time to add the seasoned chicken to the pan! Place them carefully in the pan so you don’t splatter any oil on yourself. Brown each side for about 5 minutes. You want them to get a nice golden color; this adds depth to the dish. Once both sides are browned, you’re ready for the next step!
Step 5: Add the Apple Cider
Here comes the fun part—pour that glorious 1 cup of apple cider over the chicken! Be careful as you pour; you don’t want to create a splatter zone! The cider will start bubbling right away, and that’s a good sign. It’s going to infuse the chicken with that sweet-tangy goodness we love.
Step 6: Simmer the Chicken
After adding the cider, sprinkle in 1 teaspoon of thyme for that aromatic touch, then cover the pan with a lid. This helps trap in the moisture and flavors. Let it simmer for about 20-25 minutes. You’ll know it’s done when the chicken is cooked through and no longer pink in the center. If you have a meat thermometer, aim for 165°F (75°C) for perfectly cooked chicken!
Step 7: Let the Chicken Rest
Finally, once your chicken is cooked, remove it from the pan and let it rest for a few minutes before serving. Resting is crucial because it allows the juices to redistribute throughout the meat, keeping it juicy and tender. Trust me, you’ll want every bite to be as flavorful as possible!
And there you have it! A delicious, mouthwatering *Apple Cider Chicken* that’s sure to impress. Can you smell it yet? You’re going to love this dish! Let’s move on to why you’ll love it even more!
Why You’ll Love This Recipe
- Quick Preparation: You can whip up this delicious dish in just about 35 minutes, making it perfect for busy weeknights!
- Easy Cooking Method: With simple steps and minimal ingredients, even beginner cooks will feel confident tackling this recipe.
- Flavorful Dish: The combination of apple cider and savory chicken creates a delightful sweet and tangy flavor that will leave everyone wanting more.
- Gluten-Free: This recipe is naturally gluten-free, so it’s a fantastic option for those with dietary restrictions!
Tips for Success
Alright, let’s make sure your *Apple Cider Chicken* turns out absolutely perfect! Here are some of my top tips to help you achieve the best results:
- Check the Internal Temperature: Always use a meat thermometer to check for doneness. Chicken should reach an internal temperature of 165°F (75°C). This ensures it’s safe to eat and perfectly cooked—no one likes dry chicken!
- Enhance the Cider Flavor: If you want to kick it up a notch, consider adding a splash of apple cider vinegar or a sprinkle of brown sugar to the cider. This extra layer of flavor can really make the dish pop!
- Let the Cider Reduce: If you have extra time, after you remove the chicken, you can let the cider sauce simmer uncovered for a few minutes to reduce and thicken. It’ll create a luscious glaze that’s amazing drizzled over the chicken.
- Experiment with Herbs: Feel free to switch up the herbs! Rosemary or sage could be delightful alternatives to thyme, adding a different aromatic twist to the dish.
- Don’t Rush the Sauté: Give your onions and garlic enough time to soften and develop their flavors. This step is crucial for building that deep, savory base that complements the sweetness of the cider.
- Pair with the Right Sides: This dish goes beautifully with roasted vegetables, mashed potatoes, or even a simple green salad. Think about balancing the flavors on your plate!
With these tips in your back pocket, you’re all set to create an unforgettable *Apple Cider Chicken* that’ll have everyone coming back for seconds. Happy cooking!
Variations
If you’re feeling adventurous or just want to mix things up a bit, there are so many fun variations you can try with your *Apple Cider Chicken*! Here are a few ideas that I absolutely love:
- Herb Swaps: Instead of thyme, try using rosemary or sage for a completely different aromatic profile. Each herb brings its own unique flavor that pairs beautifully with the cider!
- Vegetable Additions: Want to make it a one-pan wonder? Toss in some diced carrots, sweet potatoes, or even Brussels sprouts along with the chicken. They’ll soak up all that delicious cider goodness and add some lovely color to your dish!
- Spicy Kick: If you enjoy a little heat, sprinkle in some red pepper flakes or add a dash of cayenne pepper to the seasoning. It’s a fantastic way to elevate the dish and give it an exciting twist!
- Fruit Infusion: For a fruity twist, add sliced apples or pears to the pan when you pour in the cider. They’ll soften and caramelize, adding a delightful sweetness that complements the chicken perfectly.
- Cider Reduction Sauce: After simmering the chicken, remove it and let the cider sauce reduce a bit longer on the stove. You can add a splash of cream for a rich, velvety sauce that’s perfect for drizzling over the chicken.
- Mustard Glaze: Mix in a tablespoon of Dijon mustard into the cider before simmering. It adds a wonderful tang and complexity that’ll keep everyone guessing about your secret ingredient!
Feel free to get creative with these variations! The beauty of *Apple Cider Chicken* is that it’s adaptable and can easily be tailored to your taste. I can’t wait to hear how you put your spin on it!
Nutritional Information
Now, let’s talk about the nutritional details of our delicious *Apple Cider Chicken*! While the exact values can vary based on the specific ingredients you use, here’s a general idea of what you can expect per serving (that’s one chicken breast):
- Calories: 250
- Fat: 10g
- Saturated Fat: 2g
- Unsaturated Fat: 7g
- Trans Fat: 0g
- Cholesterol: 80mg
- Sodium: 300mg
- Carbohydrates: 10g
- Sugar: 10g
- Fiber: 0g
- Protein: 30g
These values give you a pretty good snapshot of the dish. With a good amount of protein and a balanced flavor profile, *Apple Cider Chicken* is a satisfying option that won’t weigh you down. Plus, it’s gluten-free! Just remember, these numbers are estimates, so if you’re tracking your intake closely, it’s a good idea to measure your ingredients accurately. Enjoy your cooking adventure, and know you’re treating yourself to a wholesome meal!
Storage & Reheating Instructions
So, you’ve made this delicious *Apple Cider Chicken*, and now you might be wondering what to do with any leftovers. Don’t worry; I’ve got you covered! Proper storage and reheating are key to keeping that amazing flavor and juiciness intact.
First off, let the chicken cool down to room temperature before you store it. This is important to prevent any condensation from forming in your storage container, which can make the chicken soggy. Once it’s cooled, transfer the chicken to an airtight container. It can be stored in the refrigerator for up to 3 days. Just be sure to label it with the date so you know when you made it!
If you want to keep it longer, you can also freeze the chicken! Wrap each piece tightly in plastic wrap and then place them in a freezer-safe bag or container. It’ll last in the freezer for up to 2 months. When you’re ready to enjoy it again, simply thaw it overnight in the refrigerator before reheating.
Now, for reheating, I recommend using the oven or stovetop to maintain its fantastic flavor and texture. If you’re using the oven, preheat it to 350°F (175°C) and place the chicken in a baking dish. Cover it with foil to keep it moist and heat for about 15-20 minutes, or until warmed through. If you’re in a bit more of a hurry, you can reheat it on the stovetop in a pan over low heat, adding a splash of apple cider or broth to keep things juicy. Just make sure to heat it gently so it doesn’t dry out—nobody wants rubbery chicken!
With these storage and reheating tips, you’ll savor every last bite of your *Apple Cider Chicken*! Enjoy your delicious leftovers, and feel free to get creative with them in salads, wraps, or even on a cozy grain bowl. Happy cooking!
Share Your Experience
I’d absolutely love to hear about your adventures making *Apple Cider Chicken*! Did you try any fun variations or maybe add a special twist of your own? Please, share your success stories, tips, or even any hiccups you encountered along the way. We all learn from each other, and your insights could inspire someone else to dive into this delicious dish!
Feel free to leave a comment below to let me know how it turned out for you. Did your family love it? Was it a hit at dinner? I can’t wait to see your thoughts and hear about your experiences. And if you enjoyed this recipe, a rating would mean the world to me! Thank you for joining me in this cooking journey, and happy eating!
Print
Apple Cider Chicken: 7 Secrets to Unforgettable Flavor
- Total Time: 35 minutes
- Yield: 4 servings 1x
- Diet: Gluten Free
Description
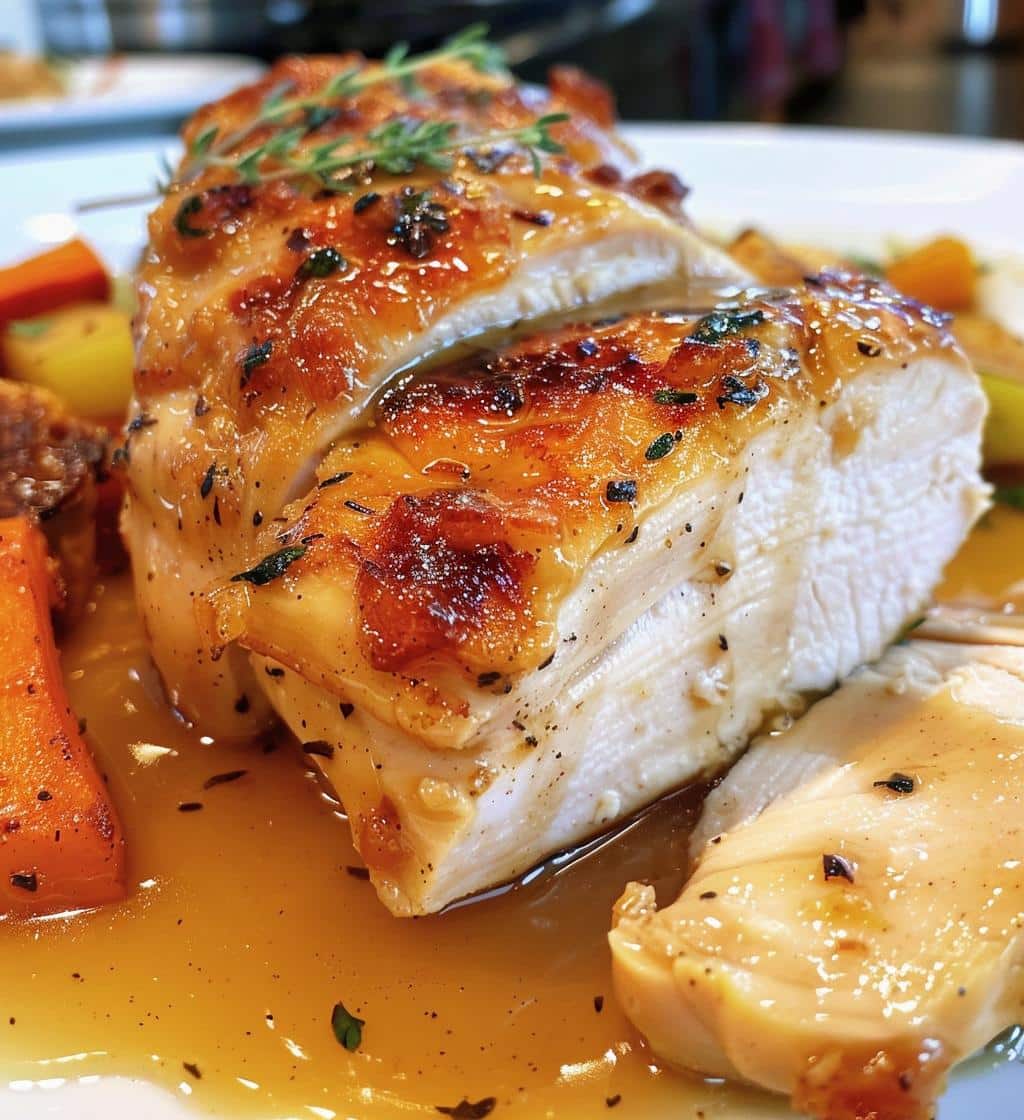
A flavorful chicken dish cooked with apple cider for a sweet and tangy taste.
Ingredients
- 4 chicken breasts
- 1 cup apple cider
- 2 tablespoons olive oil
- 1 onion, chopped
- 2 cloves garlic, minced
- 1 teaspoon thyme
- Salt to taste
- Pepper to taste
Instructions
- Heat olive oil in a pan over medium heat.
- Add chopped onion and garlic, sauté until soft.
- Season chicken breasts with salt and pepper.
- Add chicken to the pan, browning both sides.
- Pour apple cider over the chicken.
- Add thyme and cover the pan.
- Simmer for 20-25 minutes until chicken is cooked through.
- Remove chicken and let it rest for a few minutes before serving.
Notes
- Serve with vegetables or rice.
- Adjust seasoning as per taste.
- Leftovers can be stored in the fridge for up to 3 days.
- Prep Time: 10 minutes
- Cook Time: 25 minutes
- Category: Main Dish
- Method: Stovetop
- Cuisine: American
Nutrition
- Serving Size: 1 chicken breast
- Calories: 250
- Sugar: 10g
- Sodium: 300mg
- Fat: 10g
- Saturated Fat: 2g
- Unsaturated Fat: 7g
- Trans Fat: 0g
- Carbohydrates: 10g
- Fiber: 0g
- Protein: 30g
- Cholesterol: 80mg
Keywords: Apple Cider Chicken, Chicken Recipe, Easy Chicken Dish