
Oh my goodness, let me tell you about the joy of baking! There’s just something magical about the scent of fresh pastries wafting through the kitchen, and when strawberries are involved, it’s even more enchanting. I can still remember the first time I made a Strawberry Danish — it was like a sweet symphony of flavors, with the creamy filling playing perfectly against the tartness of the strawberry jam. Trust me, once you get the hang of it, making these delightful pastries is a breeze!
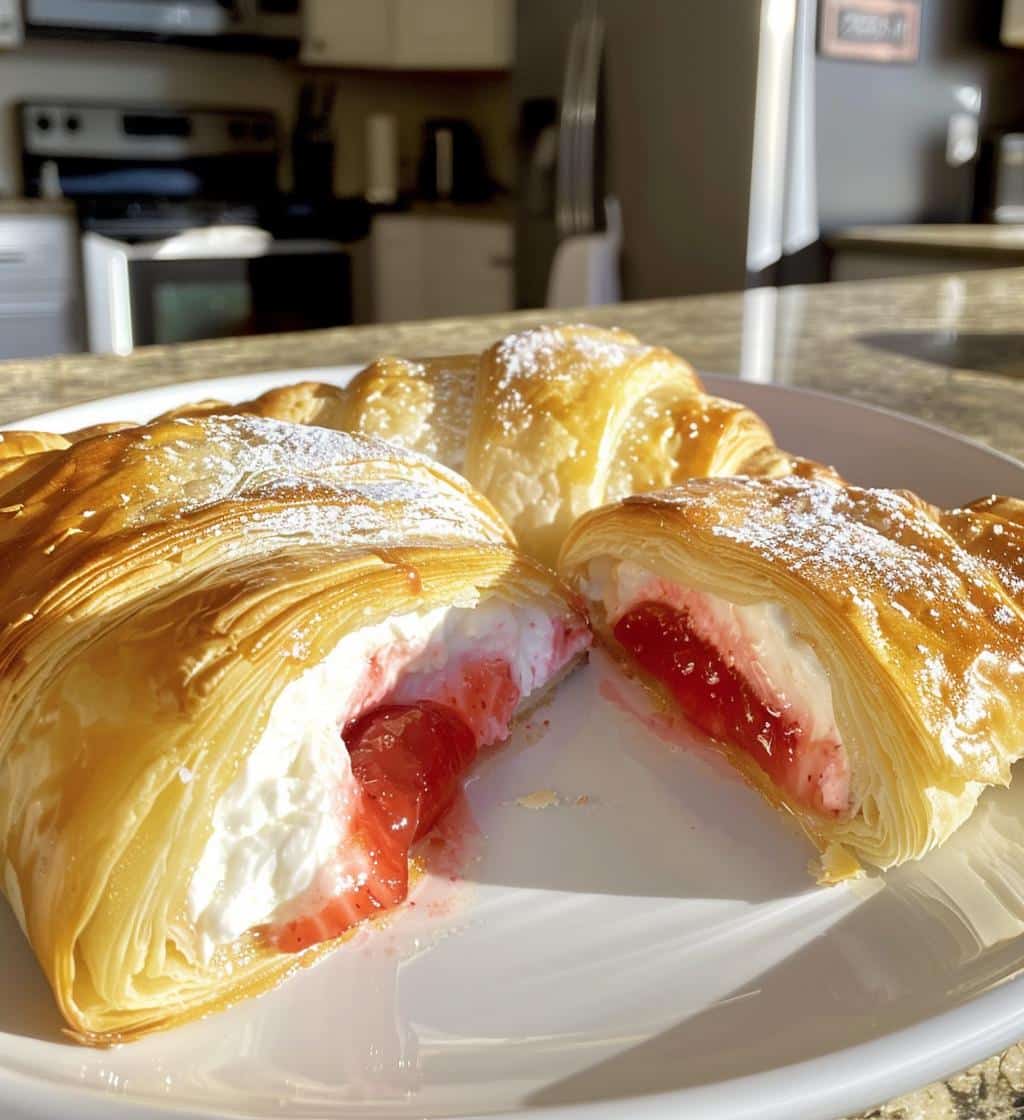
Picture this: golden, flaky puff pastry enveloping a luscious cream cheese filling, all kissed by the vibrant sweetness of strawberries. Each bite feels like a little piece of heaven! And the best part? You don’t need to be a pro baker to whip these up. Seriously, it’s simple, fun, and oh-so-rewarding. So, roll up your sleeves and let’s dive into making the *best* Strawberry Danish you’ll ever taste!
Ingredients List
Now let’s gather everything we need to make these scrumptious Strawberry Danish pastries! I promise you’ll find these ingredients easy to work with, and they come together beautifully. Here’s what you’ll need:
- 1 package of puff pastry: This is the magic behind our flaky pastry. Make sure to thaw it ahead of time so it’s pliable when you’re ready to roll!
- 1 cup of strawberry jam: Go for your favorite brand or even homemade if you’re feeling adventurous! This will add that delicious fruity sweetness.
- 8 oz cream cheese: Make sure it’s softened — it’ll mix much easier and give that creamy texture we crave.
- 1/2 cup powdered sugar: This sweetener will balance perfectly with the tang of the cream cheese and give us a lovely filling.
- 1 egg (for egg wash): This is what gives our pastries that beautiful golden color when baked. Just whisk it up a bit before brushing!
- 1 tsp vanilla extract: This is optional, but I always add it for a lovely depth of flavor that complements the strawberries so well.
That’s it! Simple and straightforward, right? You’ll be amazed at how these ingredients come together to create something so delightful. Now, let’s get to the fun part — making our Strawberry Danish!
How to Prepare Strawberry Danish
Alright, let’s get our hands a little messy and create some magic! I can’t wait to see how these Strawberry Danish pastries turn out. Just follow these steps, and you’ll have a delightful treat in no time!
Preheat and Prepare
First things first — let’s preheat that oven to 400°F (200°C). This is crucial because we want our pastries to bake perfectly! While that’s heating up, clear a nice space on your counter for rolling out the puff pastry. It’s always good to have a floured surface ready so the dough doesn’t stick. Trust me, a smooth rolling experience makes all the difference!
Roll and Cut the Pastry
Now, take your thawed puff pastry and roll it out gently on that floured surface. You want it to be about 1/8 inch thick — not too thin, or it might tear! Once you’ve rolled it out, grab a sharp knife or a pizza cutter and cut the pastry into squares. I usually go for about 4×4 inches, but feel free to adjust based on how big you want your Danish to be. Just make sure they’re all about the same size so they bake evenly!
Make the Filling
Let’s whip up that creamy filling! In a bowl, combine the softened cream cheese, powdered sugar, and vanilla extract. Use a hand mixer or a whisk to blend it until it’s super smooth and creamy. You want it to be luscious, so take your time here! If it’s too lumpy, it won’t spread easily, and we definitely don’t want that!
Assemble the Pastries
Now comes the fun part — assembling our pastries! Take a square of puff pastry and place a spoonful of the cream cheese mixture right in the center. Then, add a dollop of strawberry jam on top of that. Don’t overfill them, or they might burst open while baking! Once you’ve got your filling in place, fold the corners of the pastry over the top to form a little pocket and seal them tight. You can use a fork to crimp the edges for an extra touch of cuteness!
Bake the Pastries
Time to get these beauties in the oven! Brush the top of each pastry with the egg wash for that gorgeous golden brown finish. Pop them in the preheated oven and let them bake for about 20-25 minutes. Keep an eye on them, though! You want them to be golden and puffed — that’s when you know they’re ready to shine!
Cool and Serve
Once they’re out of the oven, resist the urge to dive in right away! Let them cool on a wire rack for a few minutes. This helps the filling set a bit and makes them easier to handle. Trust me, the flavor is worth the wait! Serve them warm for the best experience, and watch as smiles spread across everyone’s faces. Enjoy your delicious Strawberry Danish!
Nutritional Information
Alright, let’s chat about the nutritional side of our delightful Strawberry Danish! While these pastries are undeniably tasty, it’s also good to know what we’re enjoying. Here’s a general idea of what’s in each pastry, based on estimated values:
- Serving Size: 1 pastry
- Calories: 250
- Fat: 15g
- Saturated Fat: 8g
- Unsaturated Fat: 5g
- Trans Fat: 0g
- Sodium: 150mg
- Carbohydrates: 30g
- Fiber: 1g
- Sugar: 10g
- Protein: 3g
- Cholesterol: 30mg
These figures can vary a bit based on your specific ingredients and portion size, but this should give you a solid idea of what to expect. Enjoying a Strawberry Danish is all about balance — and I’d say a little indulgence now and then is totally worth it! Happy baking!
Tips for Success
Let’s make sure your Strawberry Danish turns out perfectly every time! I’ve gathered some of my favorite tips and tricks to help you avoid common pitfalls and elevate your baking game. Trust me, these little nuggets of wisdom can make all the difference!
- Thaw the Puff Pastry: Always remember to thaw your puff pastry in the fridge overnight or at room temperature for about 30 minutes. If it’s too cold, it won’t roll out smoothly, and we definitely want that lovely flaky texture!
- Don’t Overfill: It can be tempting to pile on the filling, but trust me, a spoonful of cream cheese and a dollop of jam is just right! Overfilling can lead to messy pastries that burst open. Keep it simple, and you’ll be golden!
- Watch the Baking Time: Ovens can vary, so keep an eye on your pastries as they bake. You want that perfect golden brown color. If they start to brown too quickly, you can cover them loosely with foil to prevent burning.
- Egg Wash Matters: Brushing the pastries with egg wash not only gives them that gorgeous sheen but also helps them crisp up beautifully. Don’t skip this step — it’s worth it!
- Let Them Cool: I know it’s hard to resist diving in immediately, but letting your Danish cool for a few minutes really helps set the filling. Plus, it makes them easier to handle and enjoy!
- Experiment with Flavors: Feel free to play around with different jams or even add a sprinkle of nuts for some crunch! Strawberry is fantastic, but raspberry, blueberry, or even a mixed berry jam can give you a whole new experience!
With these tips in your back pocket, you’re all set to create some incredible Strawberry Danish pastries! Enjoy the process, and don’t forget to savor every delicious bite!
Variations
Now, let’s have some fun with our Strawberry Danish! One of the things I love most about this recipe is how easily it can be customized. Here are some delicious variations to consider that’ll keep your baking exciting:
- Berry Medley: Swap out the strawberry jam for a mix of your favorite berries! Whether it’s raspberry, blueberry, or blackberry, the combination is sure to delight your taste buds.
- Nutty Delight: Add a sprinkle of chopped nuts like almonds or walnuts into the cream cheese filling for a delightful crunch. It adds a lovely texture contrast that I can’t get enough of!
- Citrus Zing: Mix in a teaspoon of lemon or orange zest into your cream cheese filling for a refreshing citrus twist. It brightens up the flavor and complements the sweetness beautifully!
- Chocolate Hazelnut: Spread a layer of chocolate hazelnut spread on the pastry before adding the cream cheese and jam. This decadent version is a real treat for chocolate lovers!
- Peach or Apricot: Try using peach or apricot jam instead of strawberry for a different fruity flavor. The sweet and slightly tart notes of these jams are just divine!
- Spiced Up: Add a sprinkle of cinnamon or nutmeg to your cream cheese mixture for a warm, cozy flavor. This is especially lovely during the fall months!
These variations are just the tip of the iceberg! Feel free to get creative and make this Strawberry Danish your own. Each twist brings its own delightful experience, and I can’t wait for you to try them!
Storage & Reheating Instructions
So, you’ve made a batch of these delightful Strawberry Danish pastries, and now you’re wondering how to keep them fresh for later. Don’t worry, I’ve got you covered! Storing and reheating these treats is super simple, and I’ll share my best tips to ensure they stay delicious.
First off, if you have any leftovers (which is rare, I know!), let them cool completely before storing. This helps prevent any moisture buildup that can make the pastry soggy. Once they’re cool, place the Danish in an airtight container. You can also layer them between pieces of parchment paper to keep them from sticking together. They’ll stay fresh in the fridge for about 3-4 days.
If you want to keep them longer, you can freeze the pastries! Just wrap each one tightly in plastic wrap, then place them in a freezer bag or container. They’ll last for up to 2 months in the freezer. When you’re ready to enjoy them, simply thaw them overnight in the refrigerator or pop them in the microwave for a quick warm-up.
Now, let’s talk reheating! For the best results, I recommend reheating them in the oven. Preheat your oven to 350°F (175°C) and place the Danish on a baking sheet. Heat them for about 10-15 minutes until they’re warmed through and the pastry feels nice and flaky again. If you’re in a hurry, you can microwave them for about 15-20 seconds, but keep in mind the texture won’t be quite as perfect.
That’s it! With these storage and reheating tips, you can savor your Strawberry Danish pastries whenever the craving strikes. Enjoy every delicious bite, whether fresh out of the oven or reheated to perfection!
Why You’ll Love This Recipe
- Quick and Easy: With just a handful of ingredients and simple steps, you’ll have these delicious pastries ready in no time!
- Flaky and Buttery: The puff pastry creates a light, flaky texture that’s simply irresistible. Each bite melts in your mouth!
- Sweet and Creamy Filling: The combination of cream cheese and strawberry jam brings a delightful balance of flavors that will have everyone coming back for more.
- Perfect for Any Occasion: Whether it’s a brunch, a party, or just a cozy night in, these Strawberry Danish pastries are a hit every time!
- Customizable: With so many variations to try, you can mix and match ingredients to create your own unique twist on this classic treat.
- Impressive Presentation: They look so fancy and delicious, yet they’re surprisingly simple to make. You’ll impress your friends and family every time!
- Leftover-Friendly: They store well, so you can enjoy them fresh or reheated — perfect for satisfying those late-night cravings!
FAQ Section
Can I use different fruit jams?
Absolutely! While strawberry jam is a classic choice, feel free to experiment with other fruit jams like raspberry, blueberry, or even peach. Each one will give your Strawberry Danish a unique flavor twist!
Can I make the filling ahead of time?
Yes, you can prepare the cream cheese filling in advance! Just keep it in the fridge until you’re ready to use it. This can save you some time when you’re ready to assemble your pastries!
What should I do if my puff pastry is too cold?
If your puff pastry is too cold, it can be tough to roll out. Just give it a little extra time at room temperature. I usually let it sit for about 15-30 minutes, and it should be perfect for rolling!
How do I know when my pastries are done baking?
Look for that beautiful golden brown color! They should puff up nicely and have a lovely sheen from the egg wash. If they’re golden and flaky, you’re in business!
Can I freeze the Strawberry Danish?
Definitely! You can freeze the pastries before or after baking. Just make sure to wrap them tightly in plastic wrap and store them in an airtight container. They’ll keep for about 2 months in the freezer. Just thaw and reheat when you’re ready to indulge!

Strawberry Danish: 7 Irresistible Tips for Perfect Pastry
- Total Time: 40 minutes
- Yield: 12 pastries 1x
- Diet: Vegetarian
Description
A delicious pastry filled with strawberry jam and cream cheese.
Ingredients
- 1 package of puff pastry
- 1 cup of strawberry jam
- 8 oz cream cheese
- 1/2 cup powdered sugar
- 1 egg (for egg wash)
- 1 tsp vanilla extract
Instructions
- Preheat your oven to 400°F (200°C).
- Roll out the puff pastry on a floured surface.
- Cut the pastry into squares.
- In a bowl, mix cream cheese, powdered sugar, and vanilla extract.
- Place a spoonful of cream cheese mixture and a spoonful of strawberry jam in the center of each square.
- Fold the corners of the pastry over the filling and seal.
- Brush with egg wash.
- Bake for 20-25 minutes or until golden brown.
- Let cool before serving.
Notes
- Use fresh strawberries for a fresher taste.
- Store leftovers in an airtight container.
- Serve warm for best flavor.
- Prep Time: 15 minutes
- Cook Time: 25 minutes
- Category: Dessert
- Method: Baking
- Cuisine: American
Nutrition
- Serving Size: 1 pastry
- Calories: 250
- Sugar: 10g
- Sodium: 150mg
- Fat: 15g
- Saturated Fat: 8g
- Unsaturated Fat: 5g
- Trans Fat: 0g
- Carbohydrates: 30g
- Fiber: 1g
- Protein: 3g
- Cholesterol: 30mg
Keywords: Strawberry Danish, pastry, dessert, cream cheese